A report on building a shipping container habitat
Tomás K. Ryan
support@transitionalcontinuum@gmail.com
October 2016
Creative Common (CC)2016
You are free to:
Share
— copy and redistribute the material in any medium or format
Adapt
— remix, transform, and build upon the material
If you are curious about building your own shipping container house, this might be of
interest to you. This report describes how I proceeded and what I have learned. I am sure there are better ways to do
this, but this document simply explains how I did it.
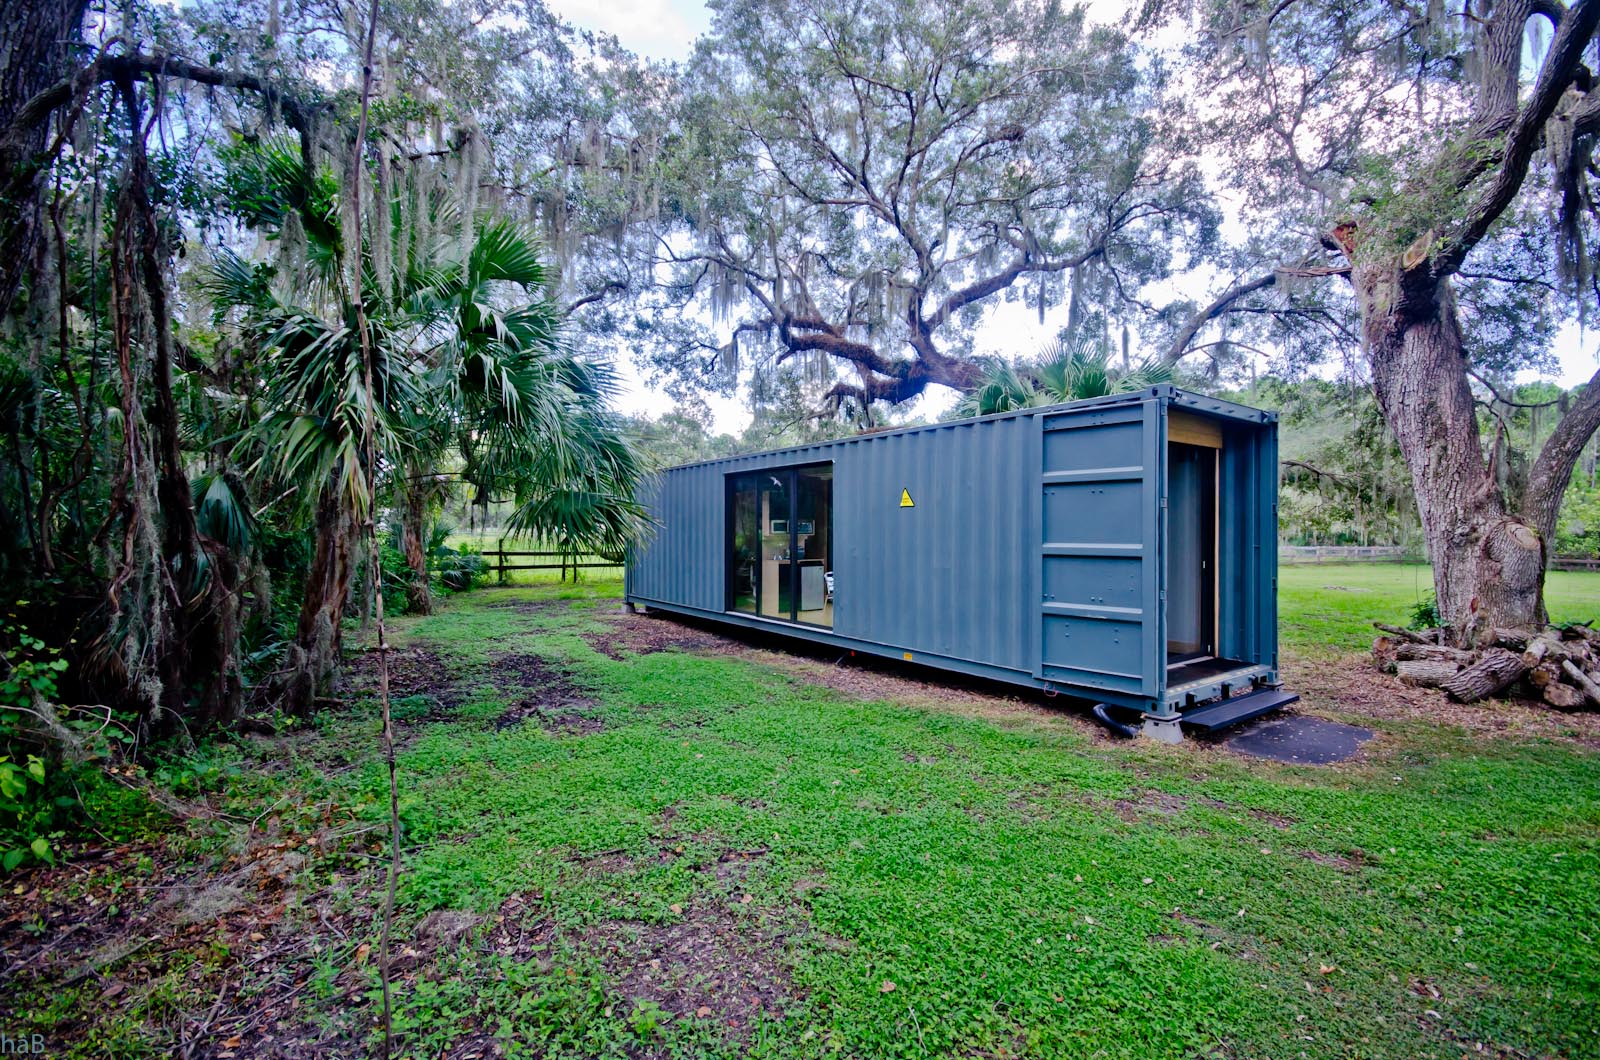
I wanted to build a small house on my brother’s property in Florida. After looking at many plans and
juggling with ideas with the wifie, I settled on recycling a shipping container into a small habitat. A container is an all steel structure made
for ocean shipping and can carry up to 70,000 pounds of pretty much anything. The rationale is if my brother sells his property or simply wants
to get rid of me, then I can leave with
my
mini-house. I could have decided on an RV,
but I wanted something that feels more like a home and would provide a great space to perform occasional software engineering development.
When I told the family about my plans to put a large steel structure on my brother’s property, my mother
was not convinced this was a great idea, Dad thought it was super cool, and brother seemed totally fine with the prospect of getting more
permanent on-site support to help raise his three kids.
The US
imports more stuff than
it
exports, or rather, we export a lot of software and not that much manufacturing products
. The consequence is
a surplus of shipping containers across the country.
I
f you are ready to shop around, you can find good deals
on containers.
I went on craigslist and found Rick Illch and his son Joel. They specialize in buying and making custom
modifications of shipping containers. I asked them if they could get me a used container and transform it according to my specifications.
After smooth negotiation with some good comments on what I had in mind, we agreed on the task.
Shipping containers come in two heights, 9.5 feet (high-cube) and 8 feet (standard). They also normally come
in two lengths, 20 feet (half) and 40 feet (full). Following Rick and Joel’s advice, I went for the high-cube and I do not regret this
decision. I am now convinced a standard container at 8 feet high would have been too low since you need space for a few inches of insulation.
The additional height also procures a better feeling when inside the container.
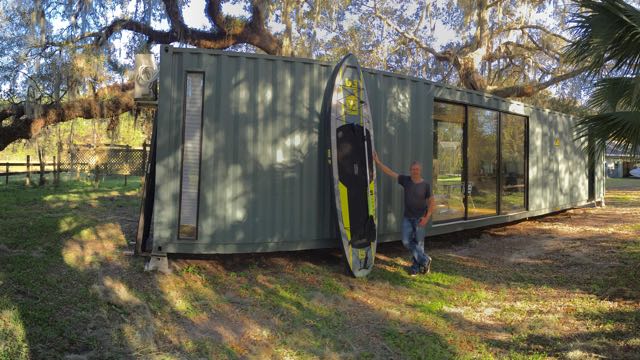
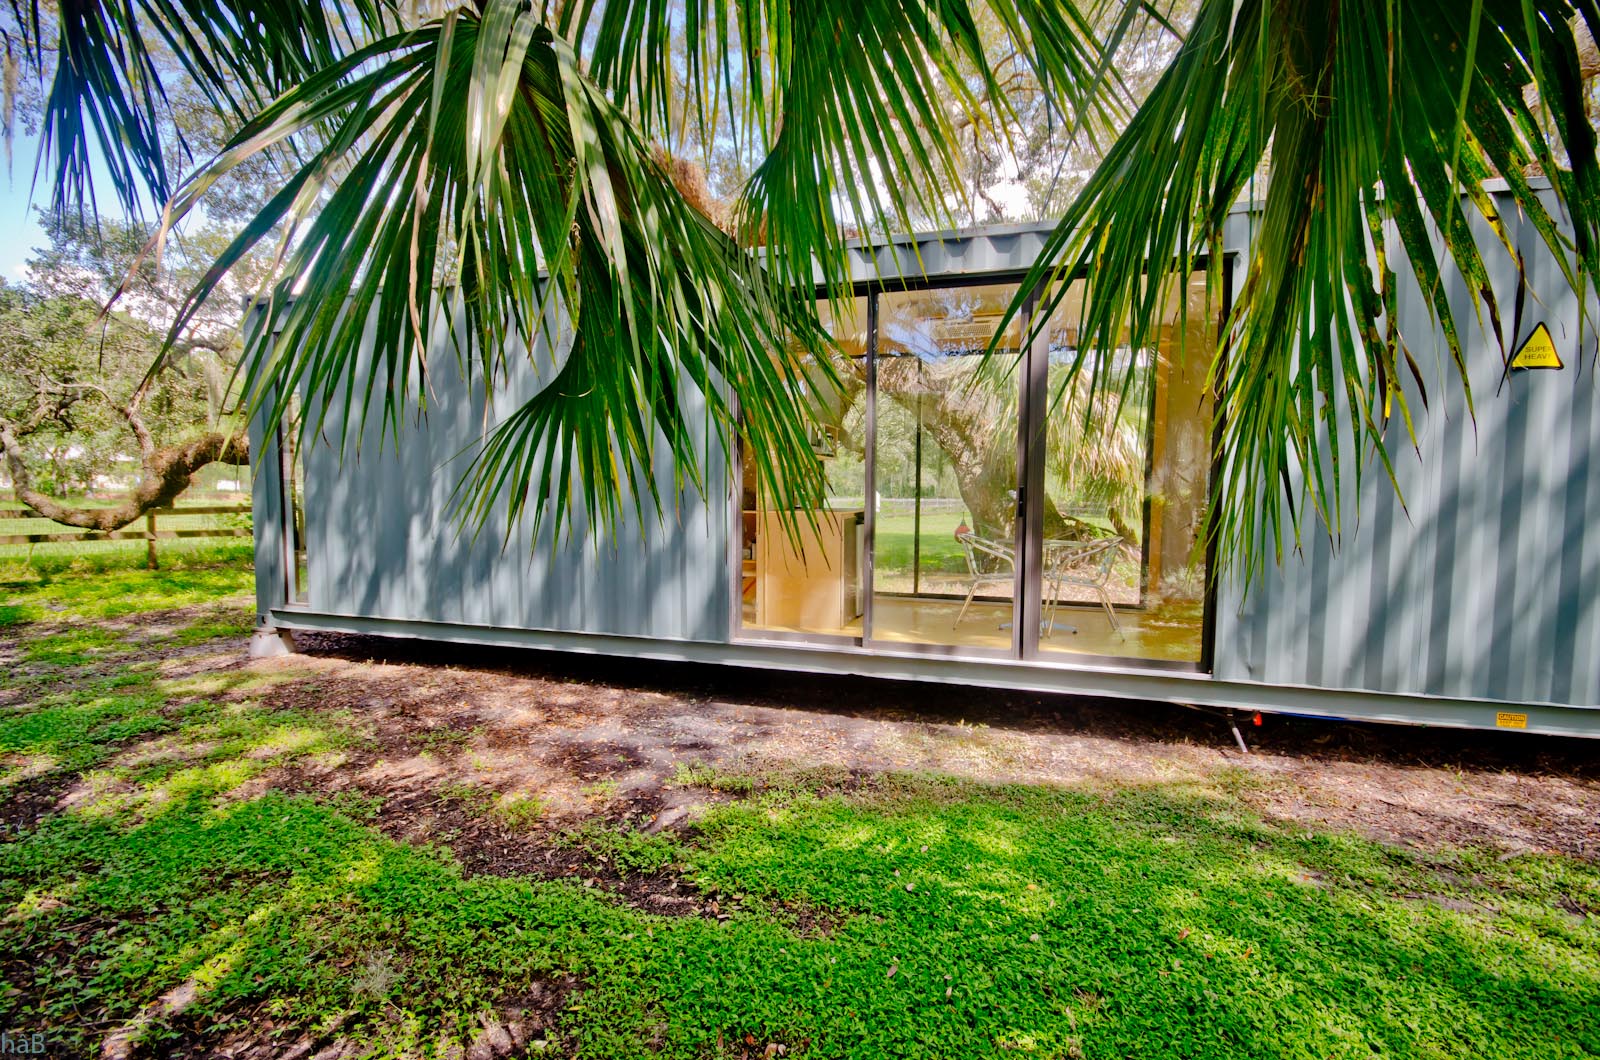
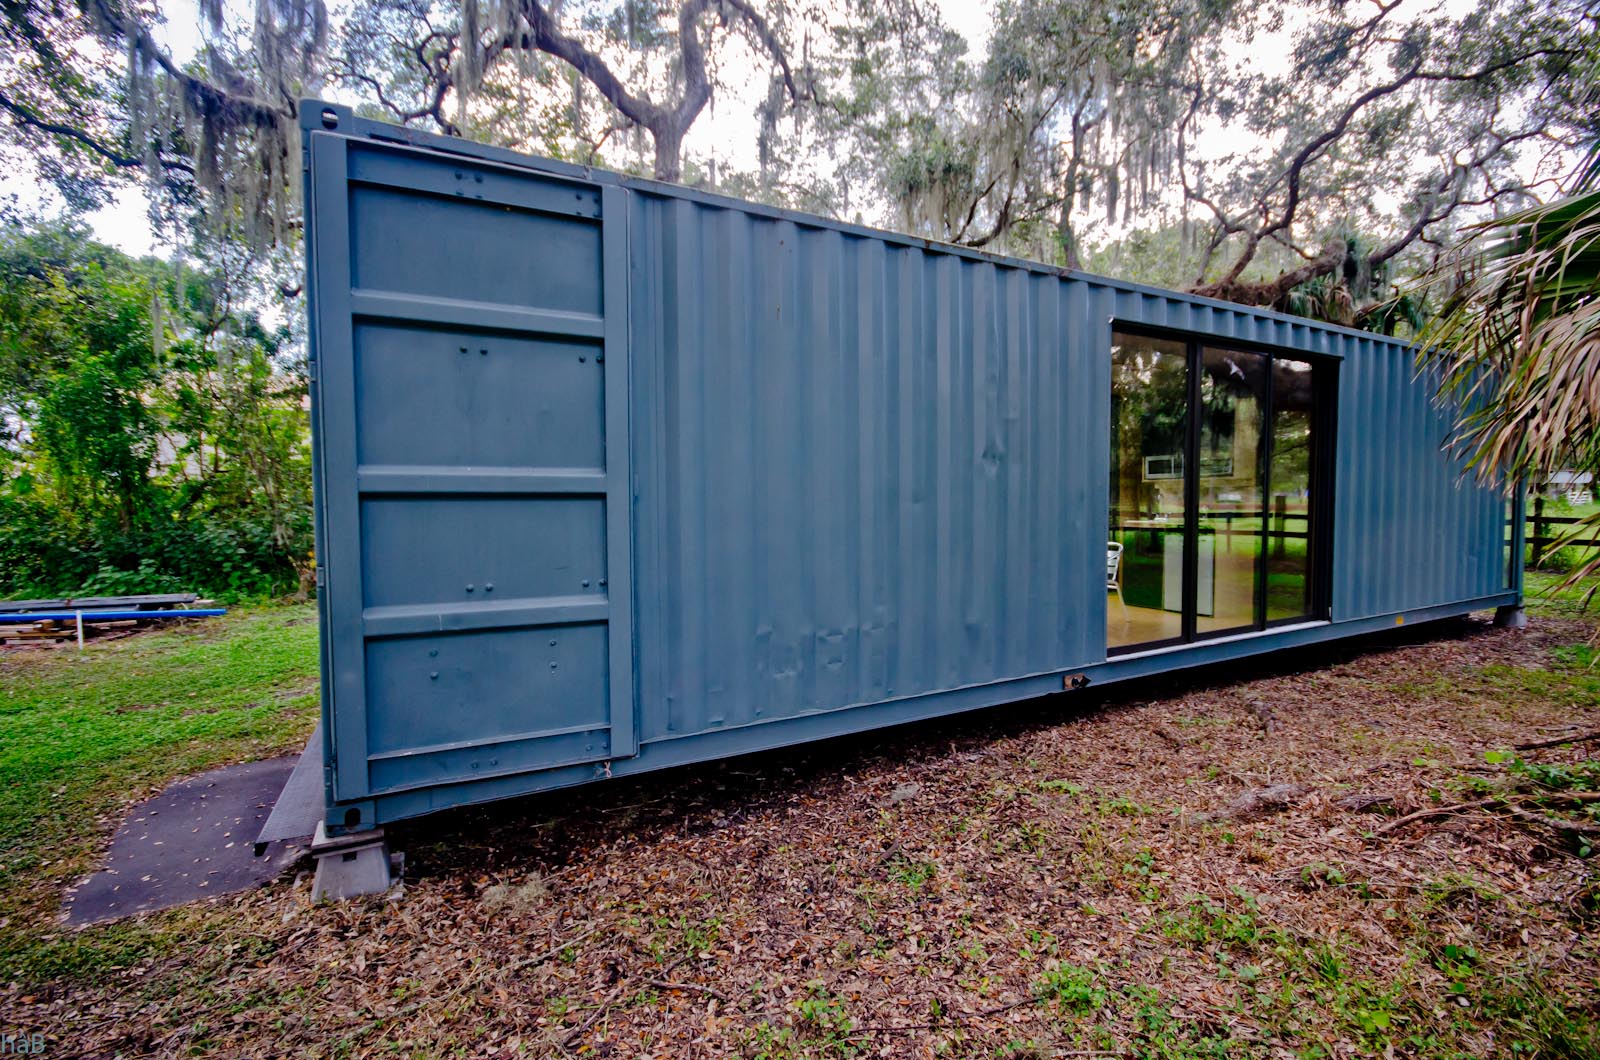
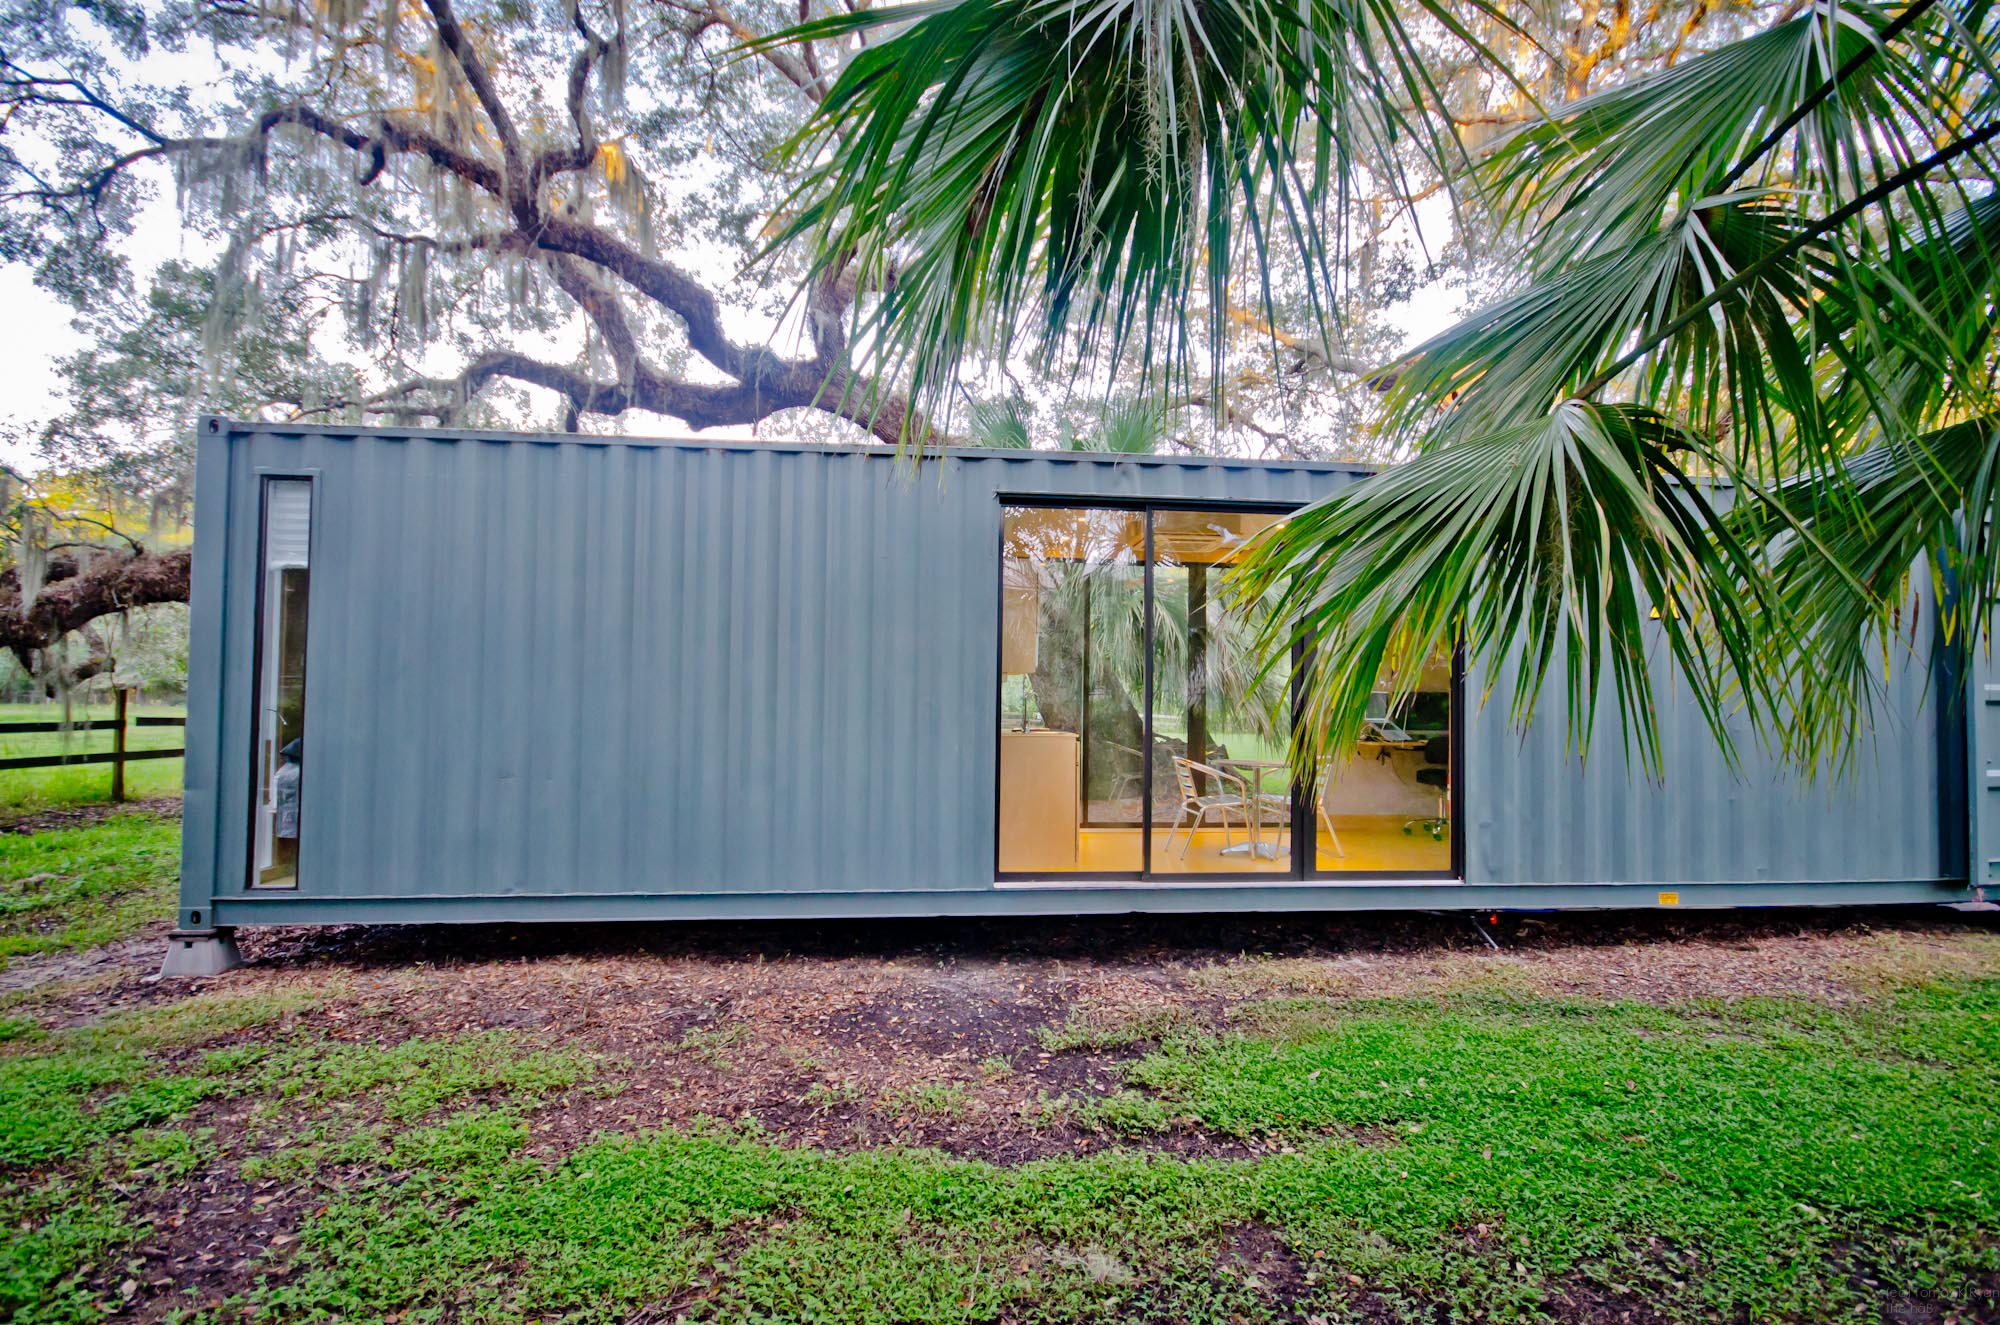
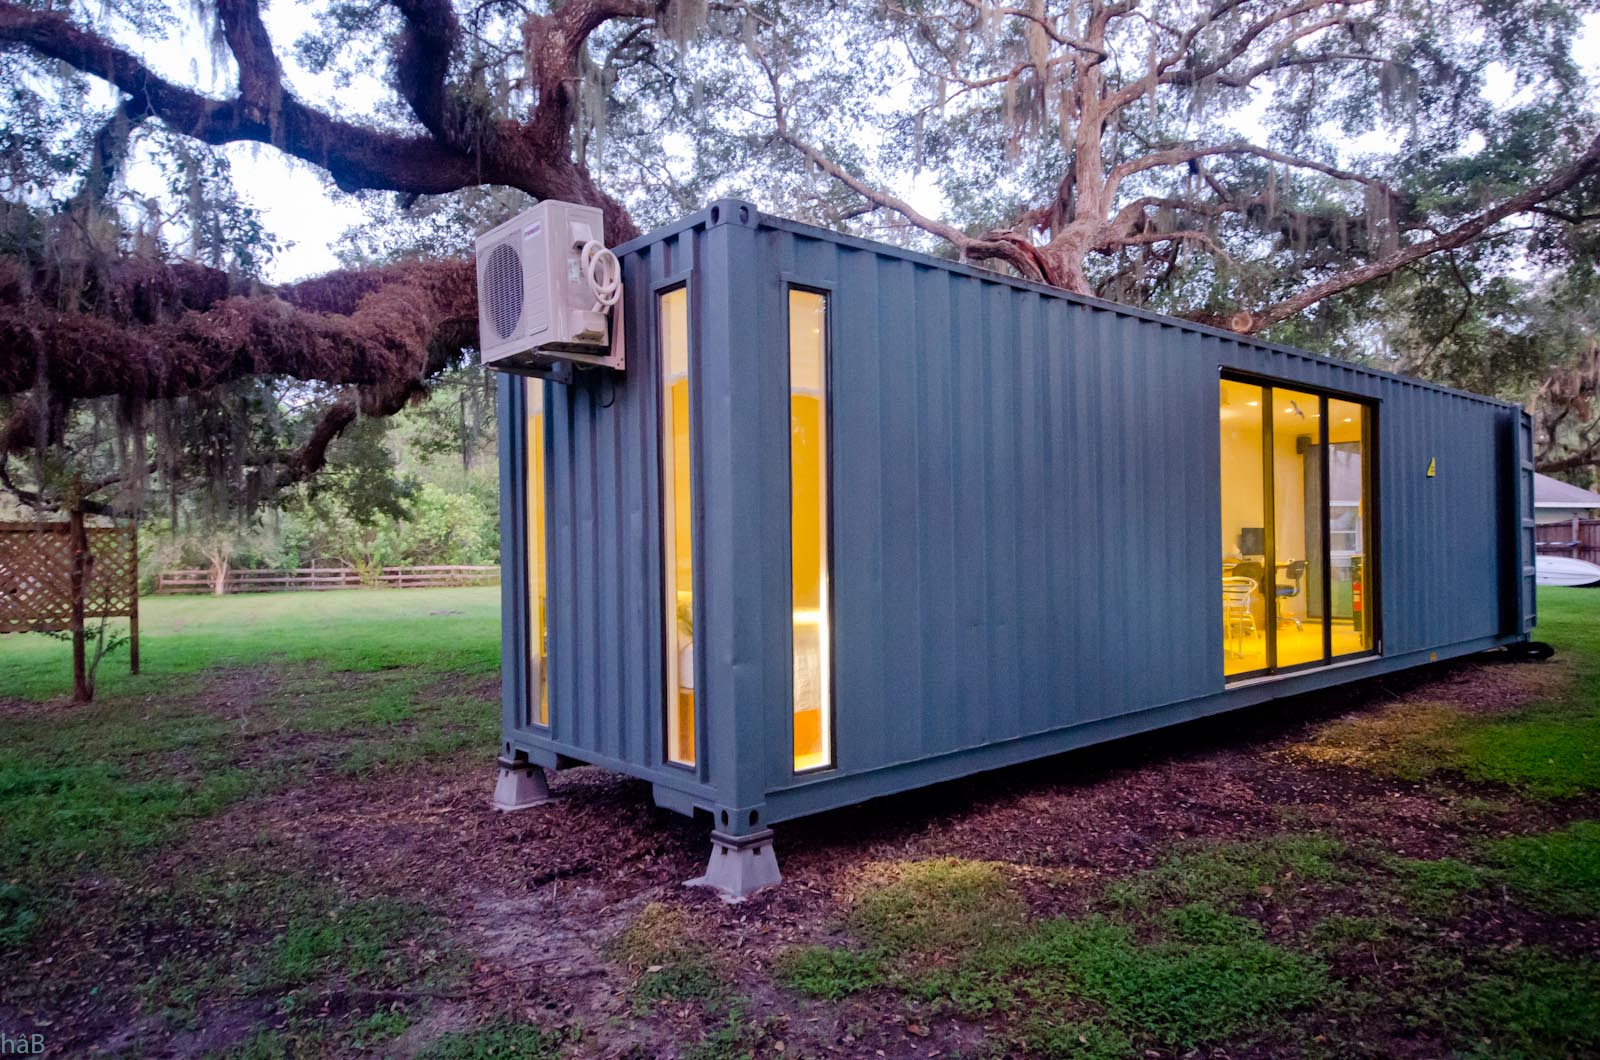
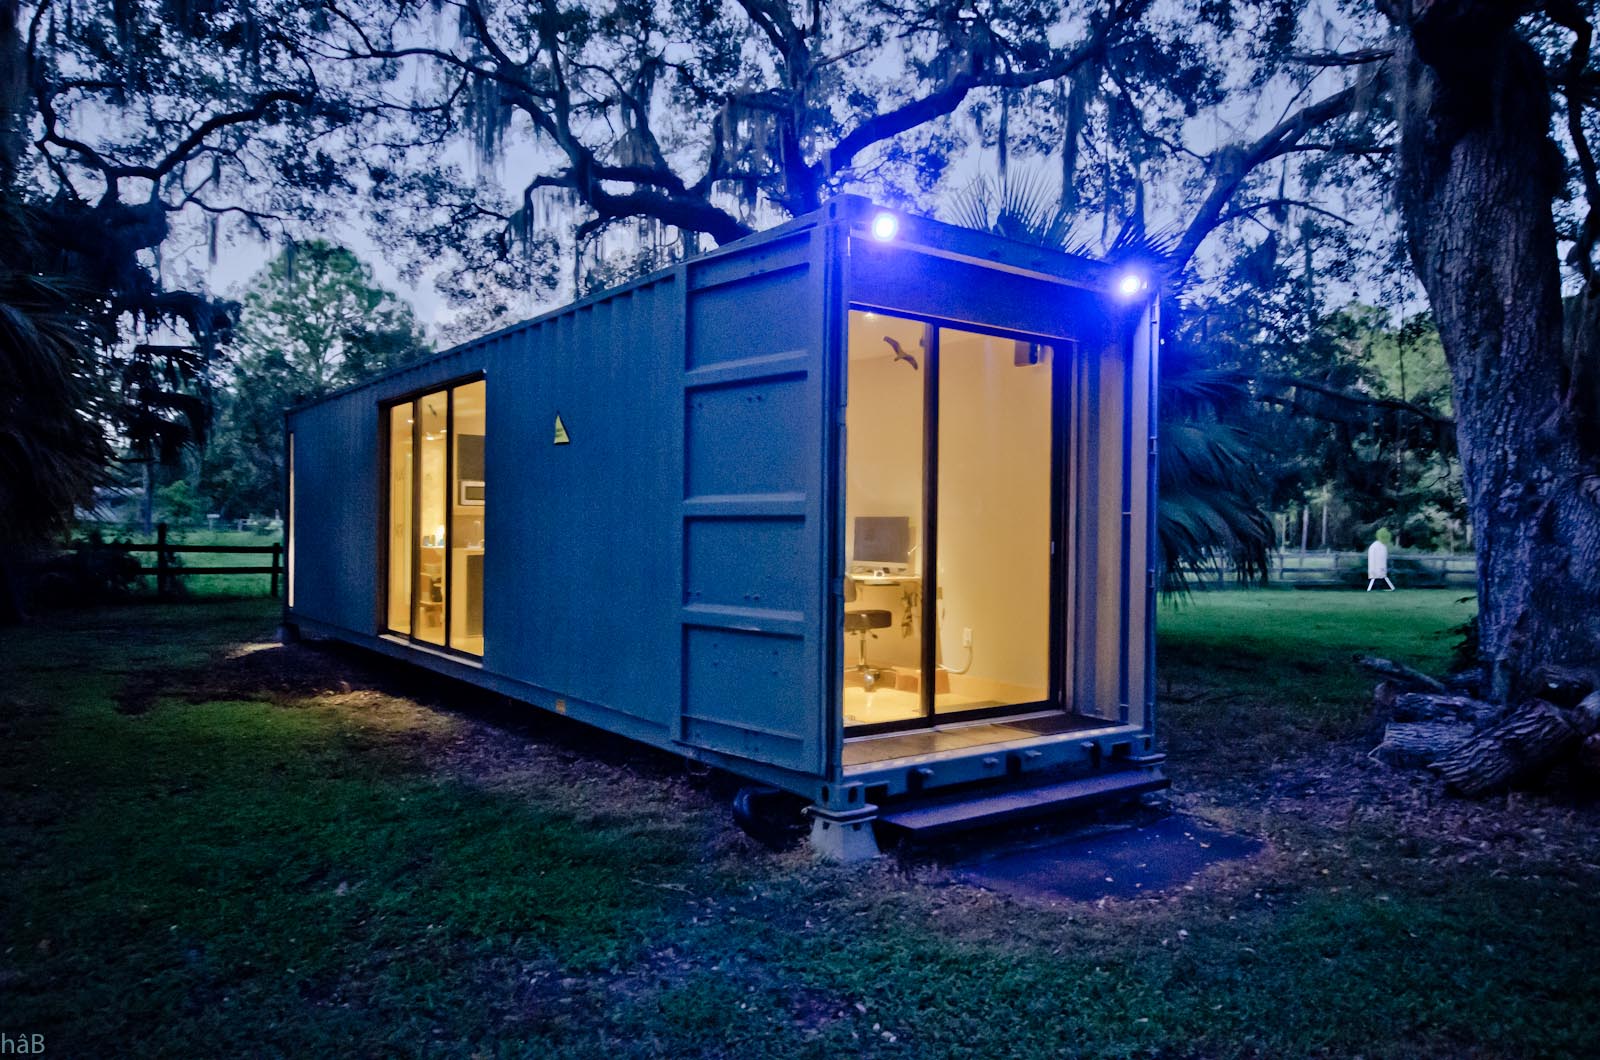
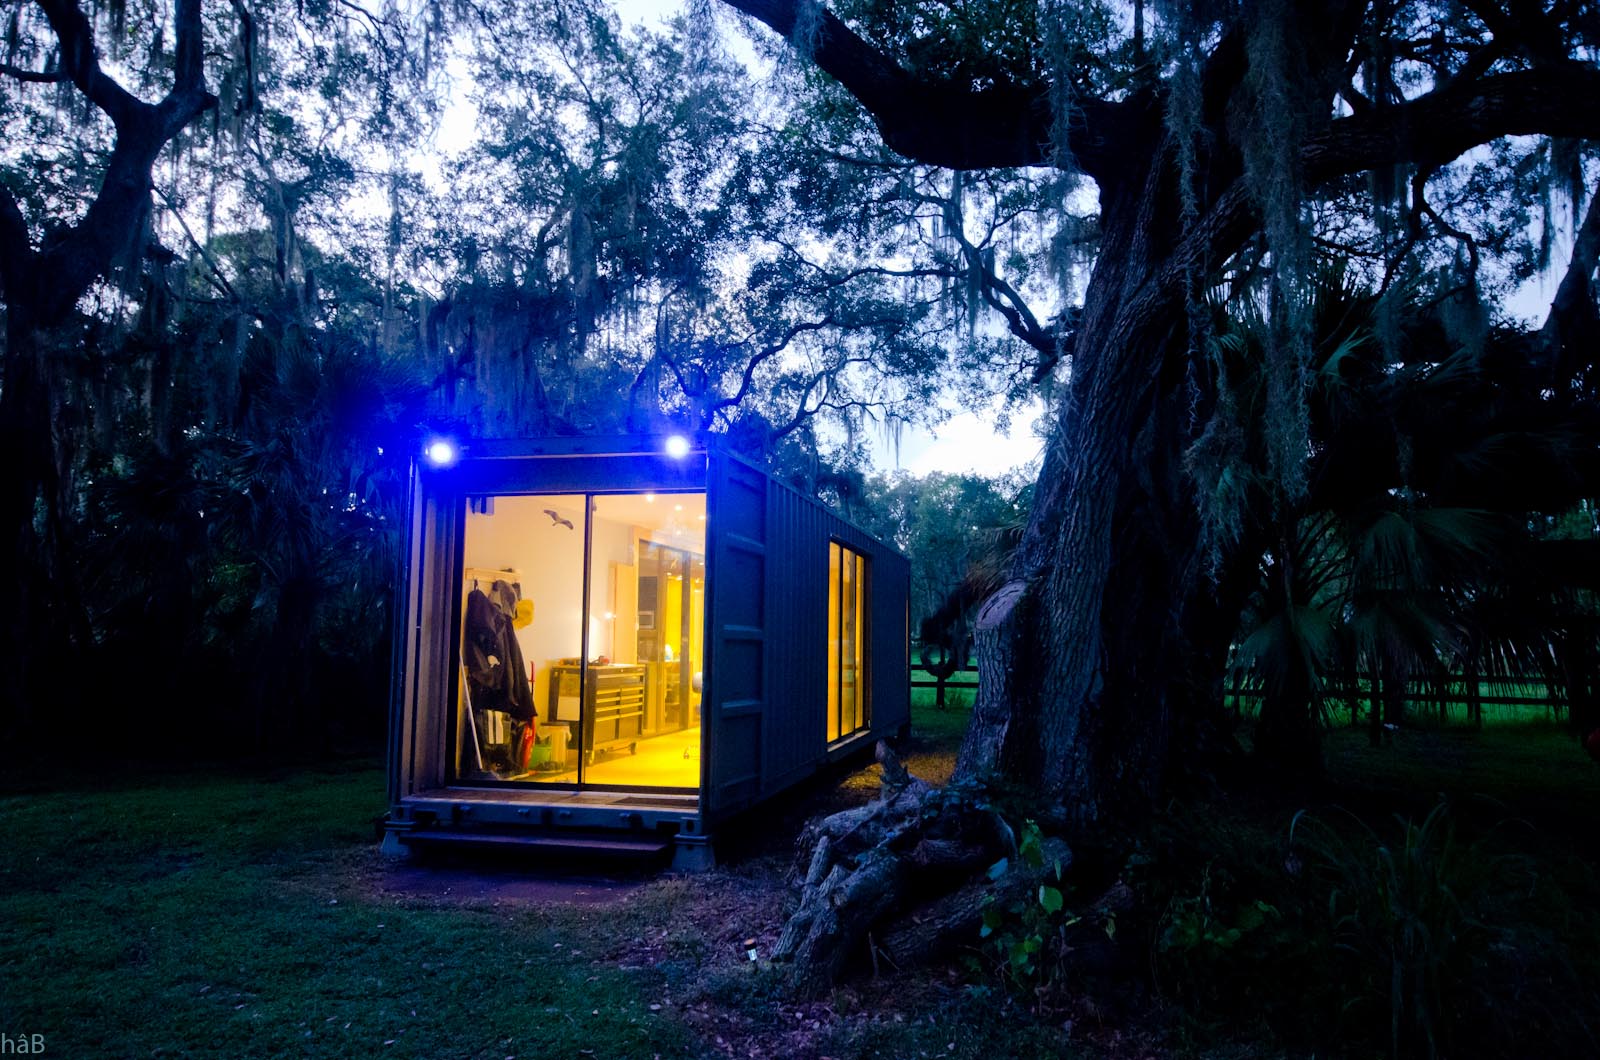
I wanted this to be a habitat that was heavy duty strong, with an industrial look and low on maintenance.
For this reason,
I left the exterior appearance pretty much intact as I like the shipping container look.
I did not want to disguise a shipping container into something that appears like a house. It remains a sea shipping container. This taste in
beauty was probably hammered down on me from over twenty years of engineering work.
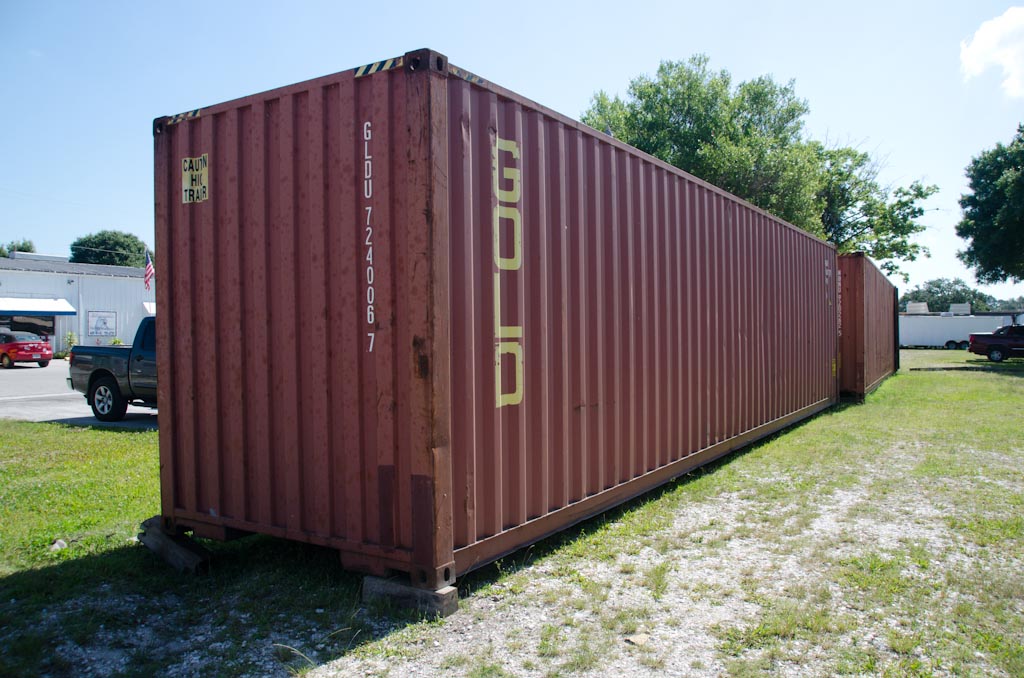
The container I bought is over ten years old and shows scuffs and dings from battling the oceans. This is
something that I enjoy knowing. It is after all a recycled structure.
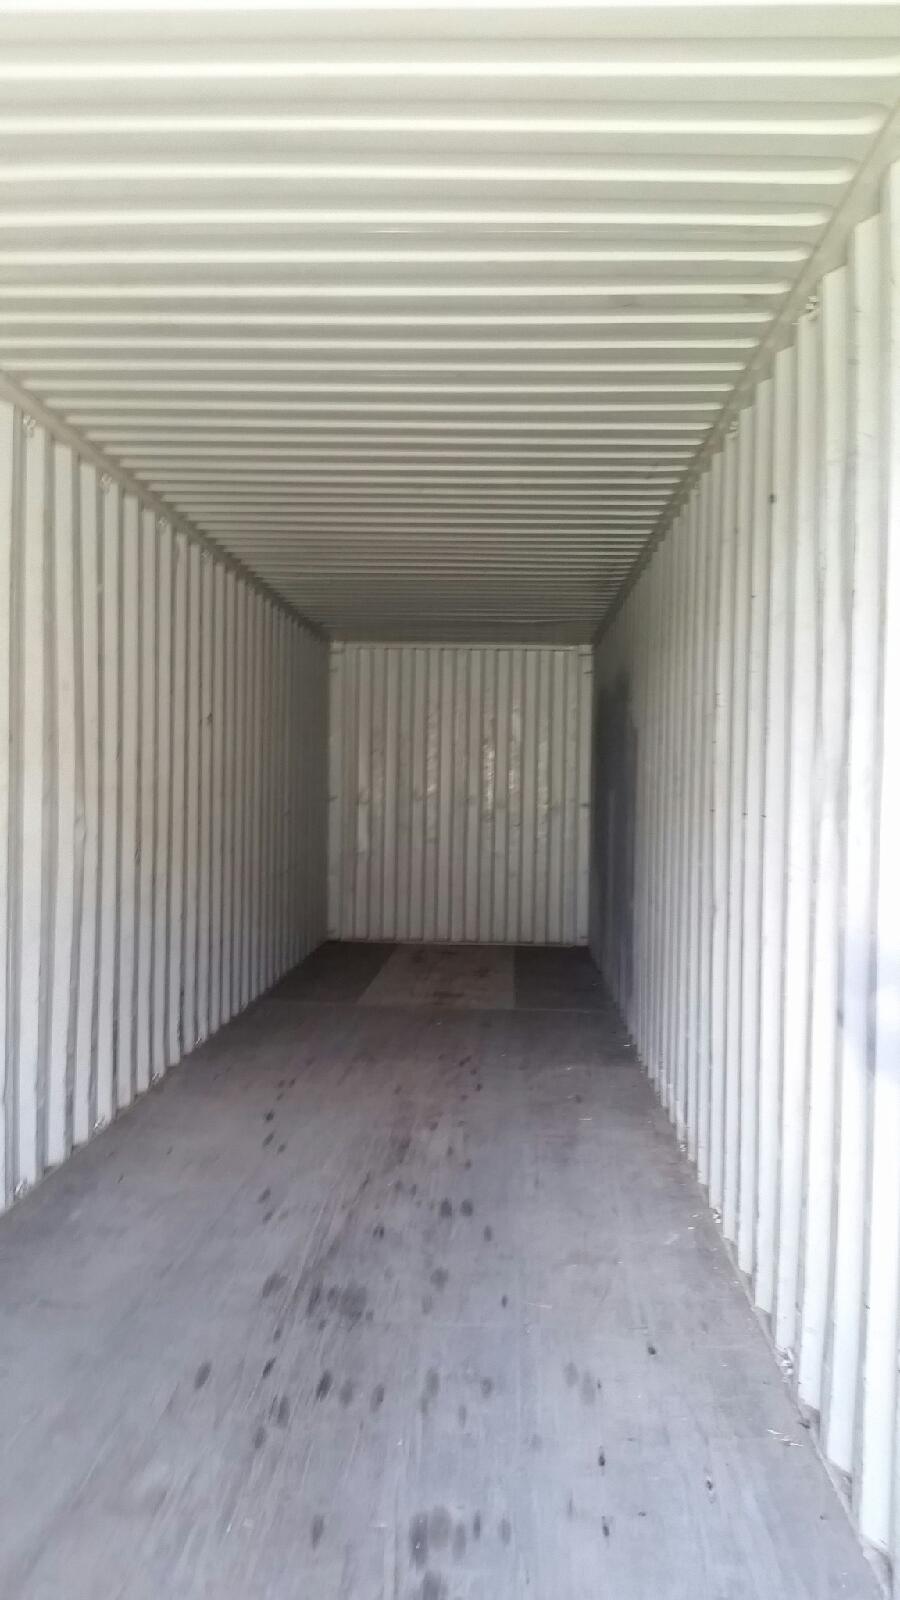
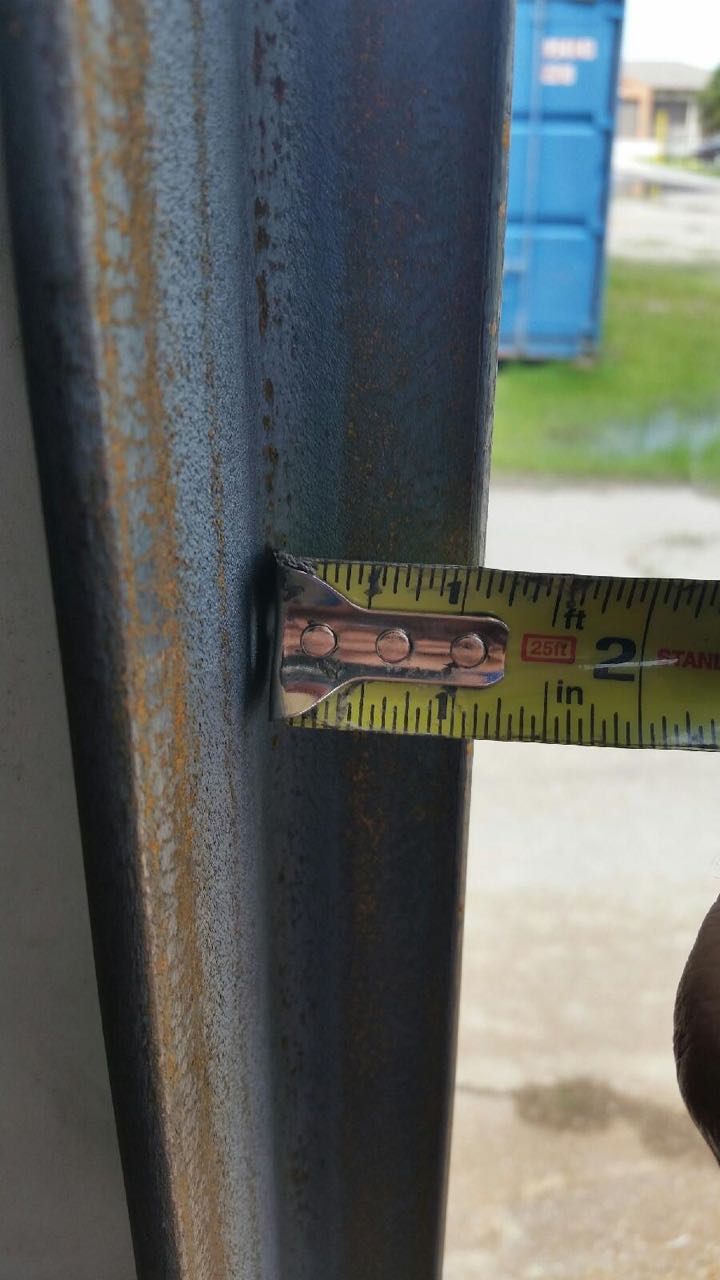
The container
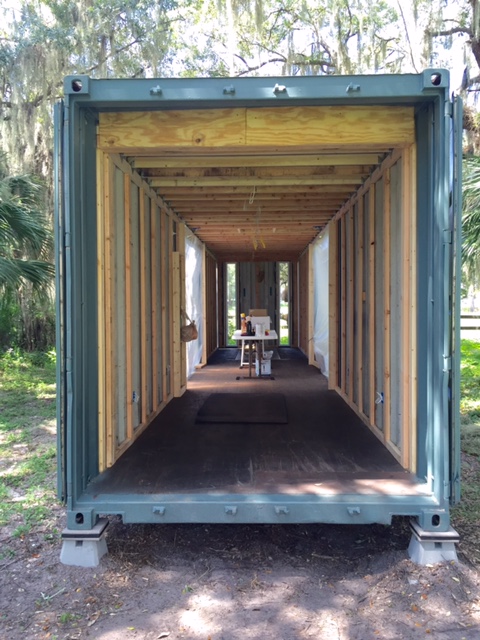
I ordered a 40ft high-cube shipping container. The external dimensions are 40 feet long, 9.5 feet high by 8 feet wide.
Rick drove to Miami, found the one, and texted me the pictures.
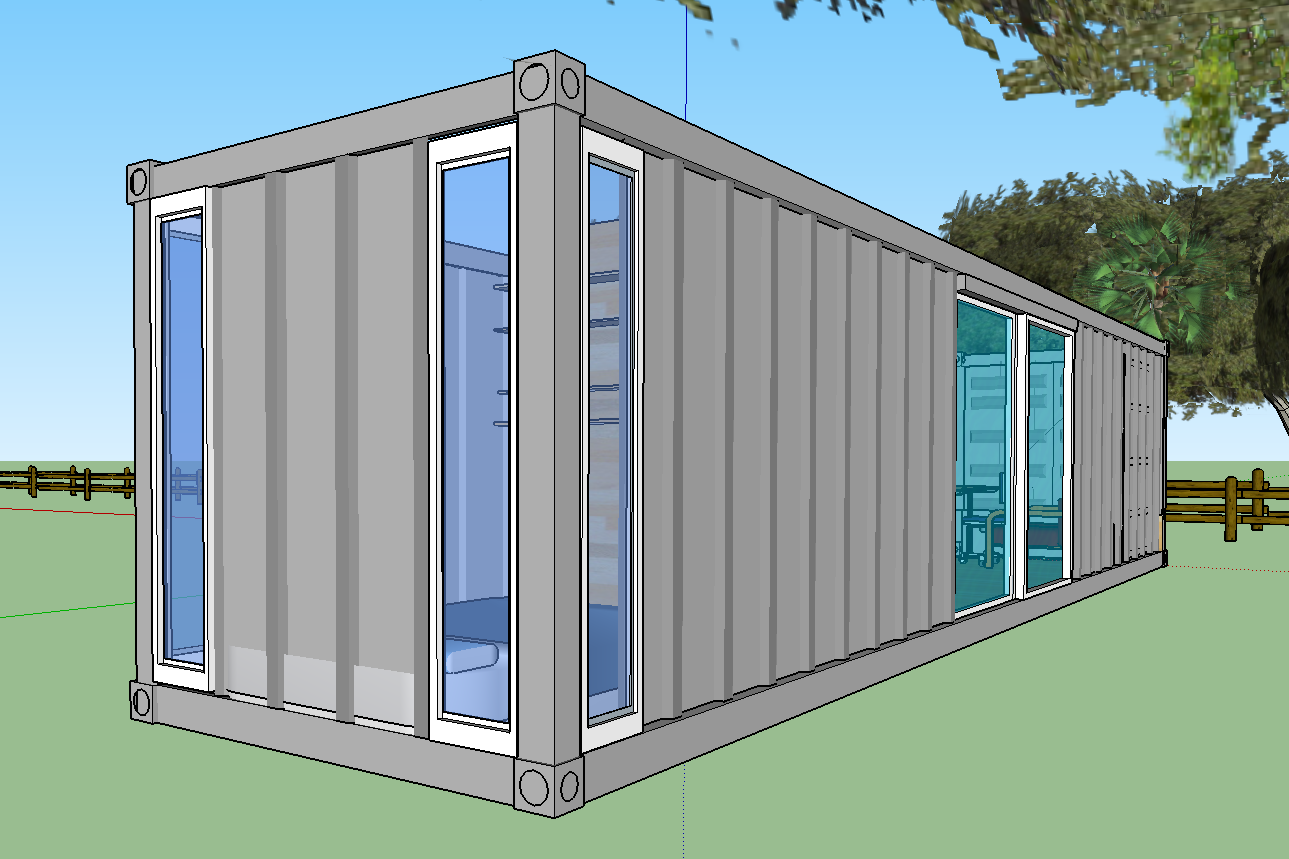
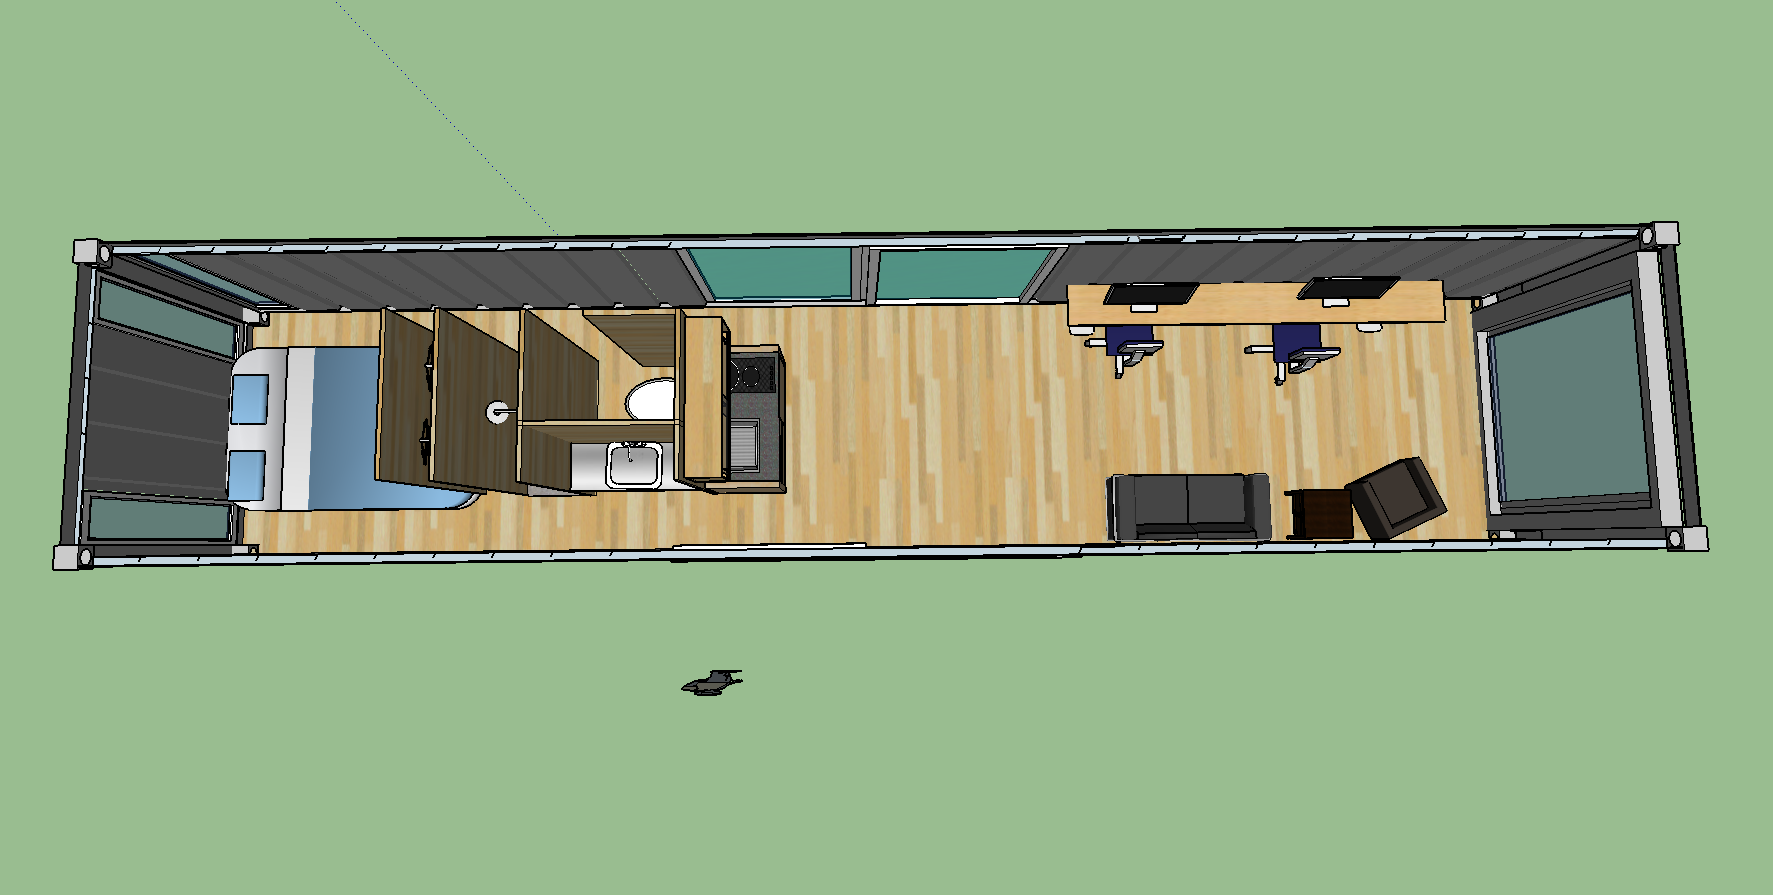
I created some schematics using Google Sketchup and presented it to Rick and Joel along with a Google Document with
all my specifications and measurements. To my delight, Rick edited the file straight online via the Google Drive cloud space, and made some
necessary adjustments.
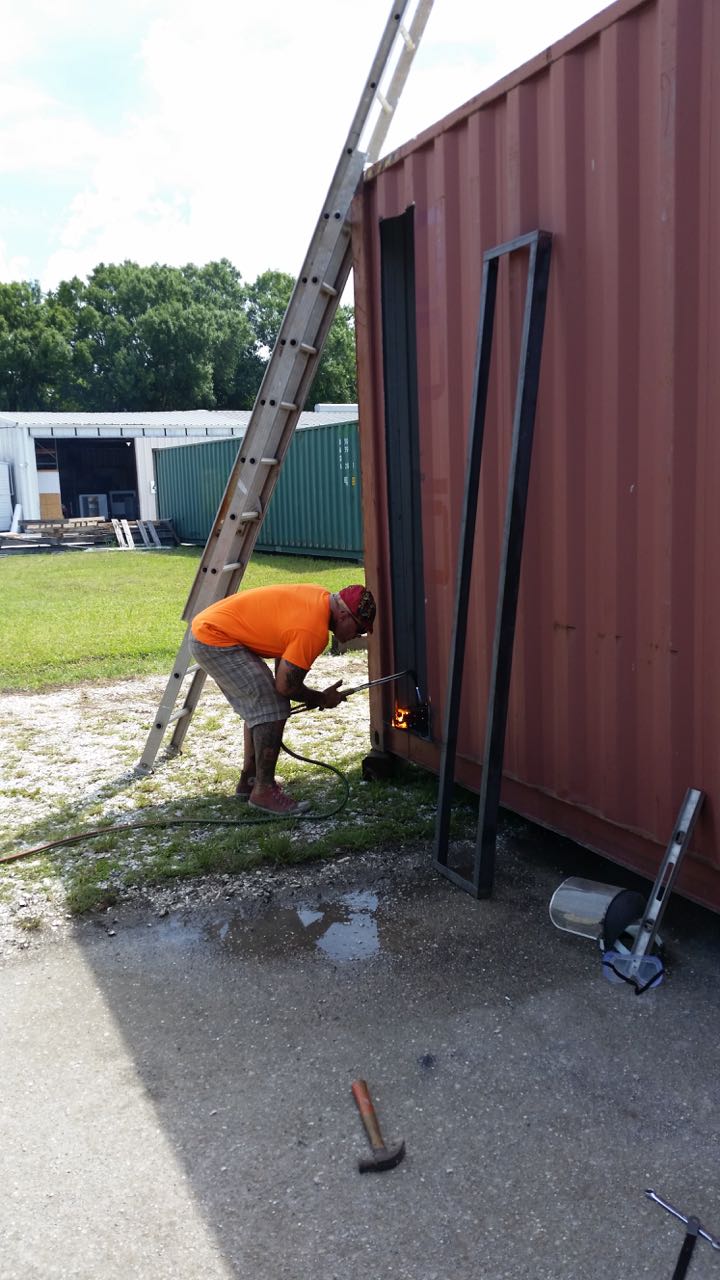
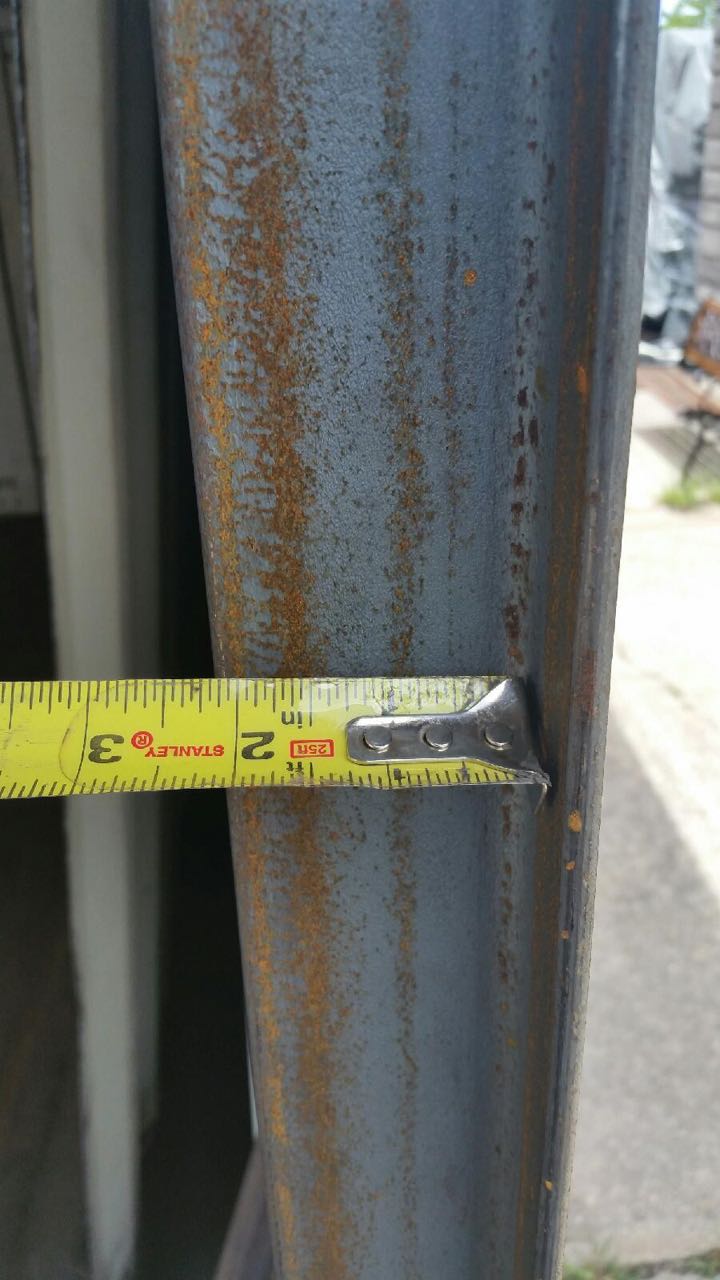
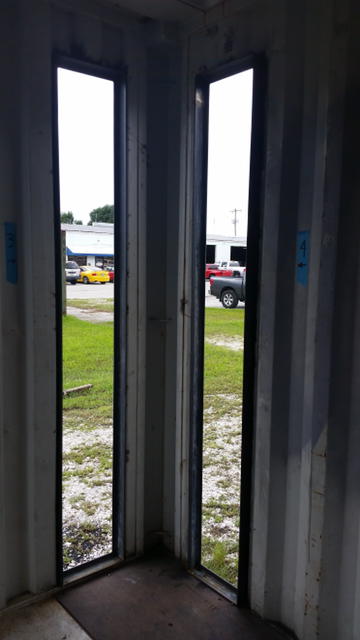
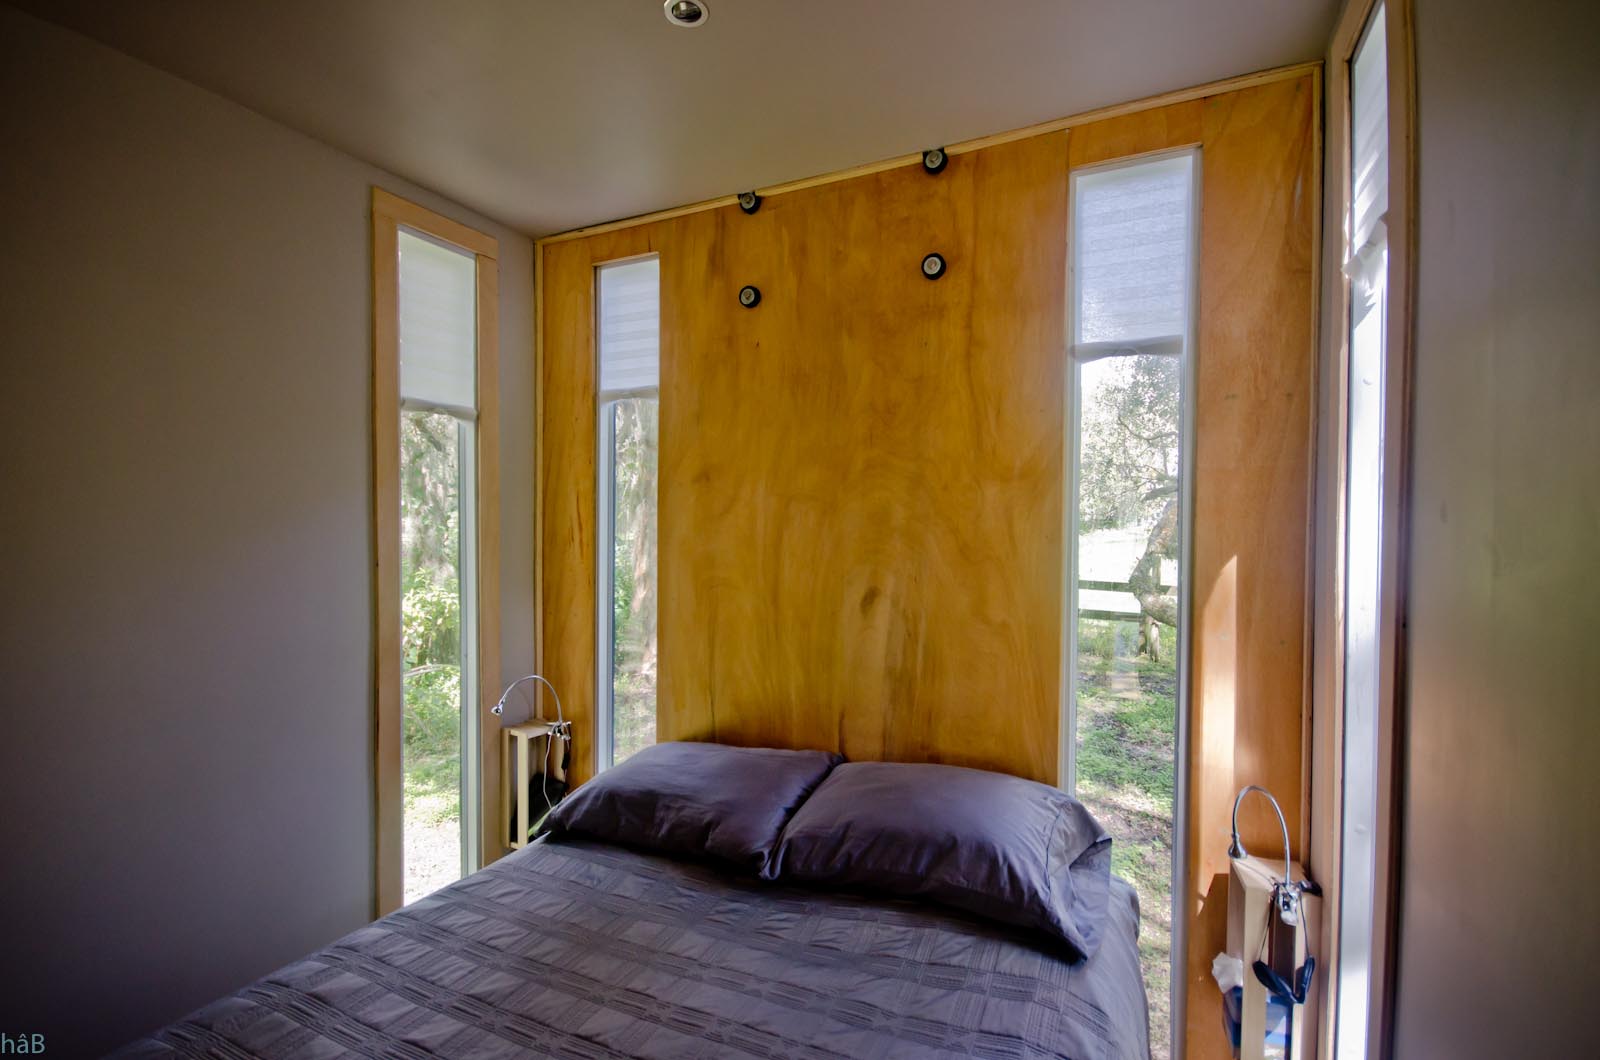
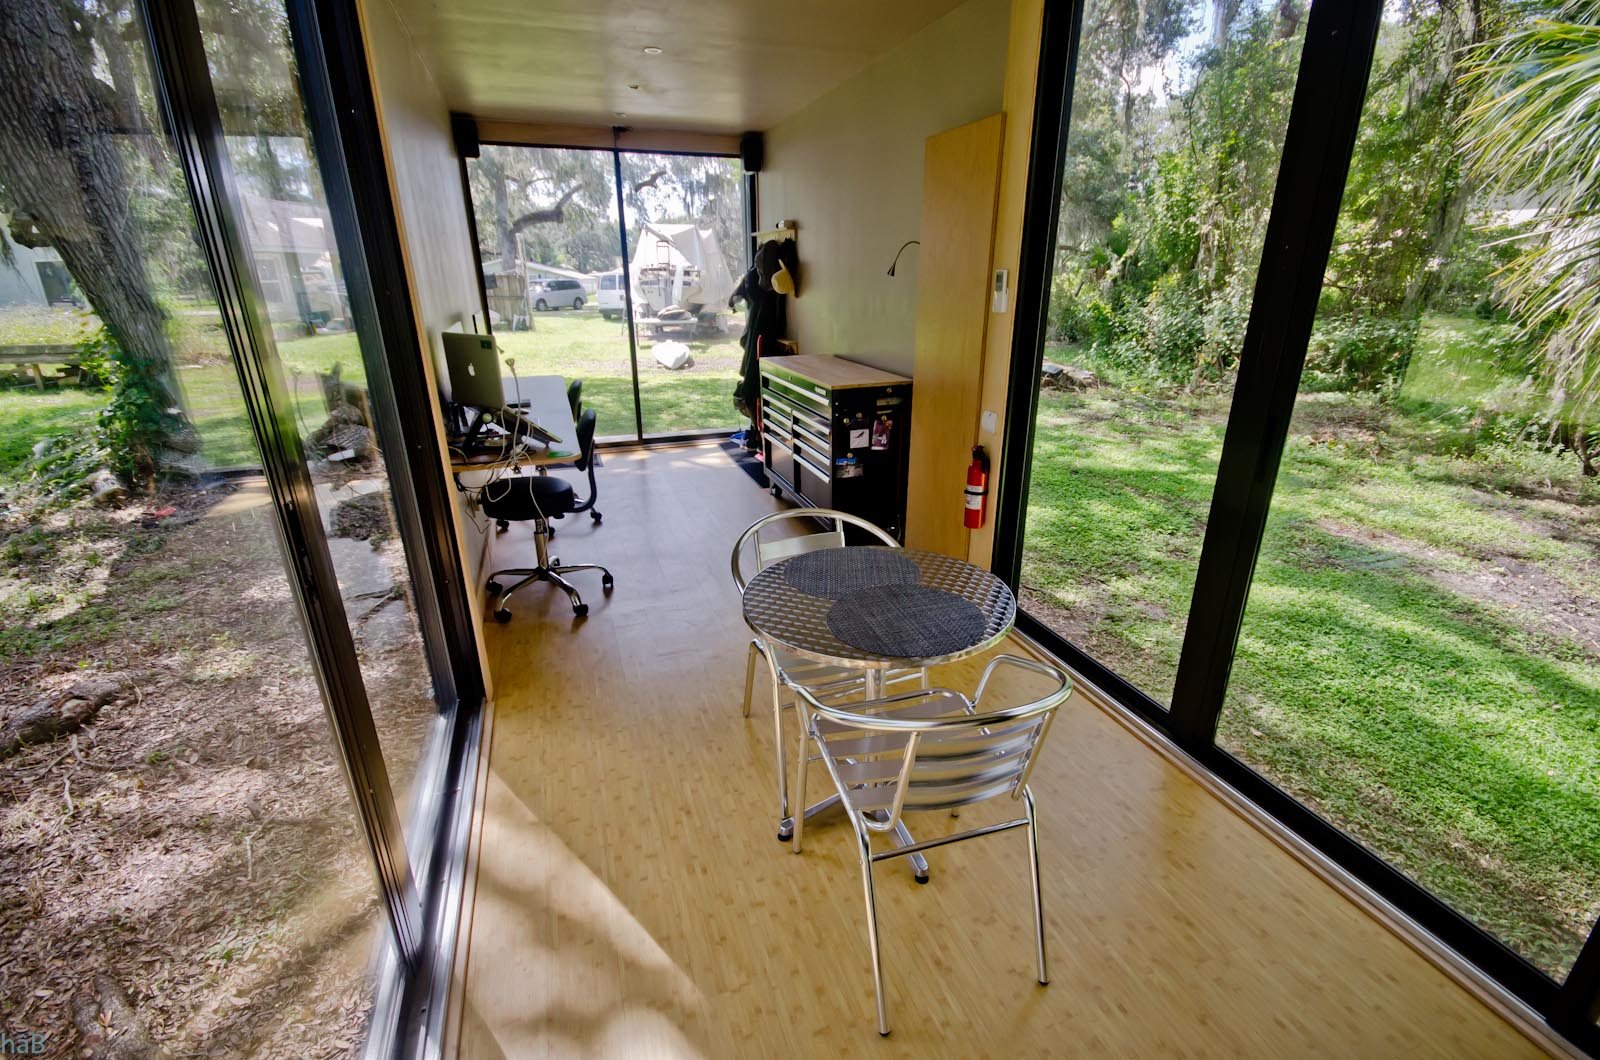
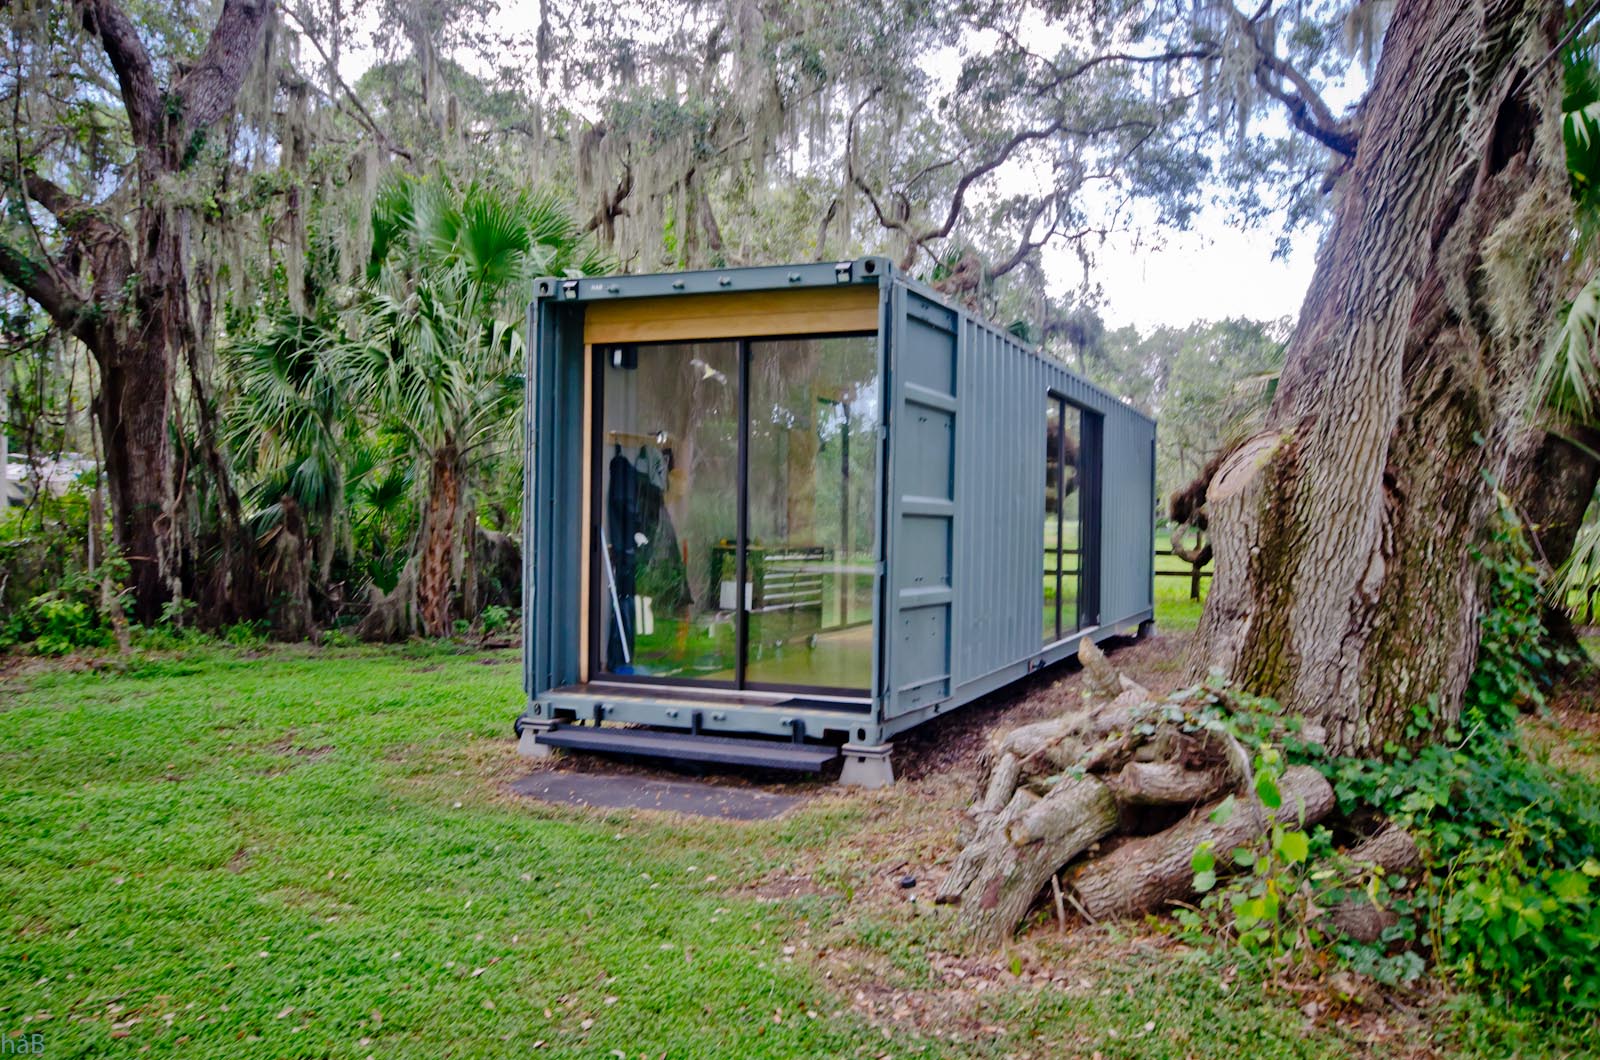
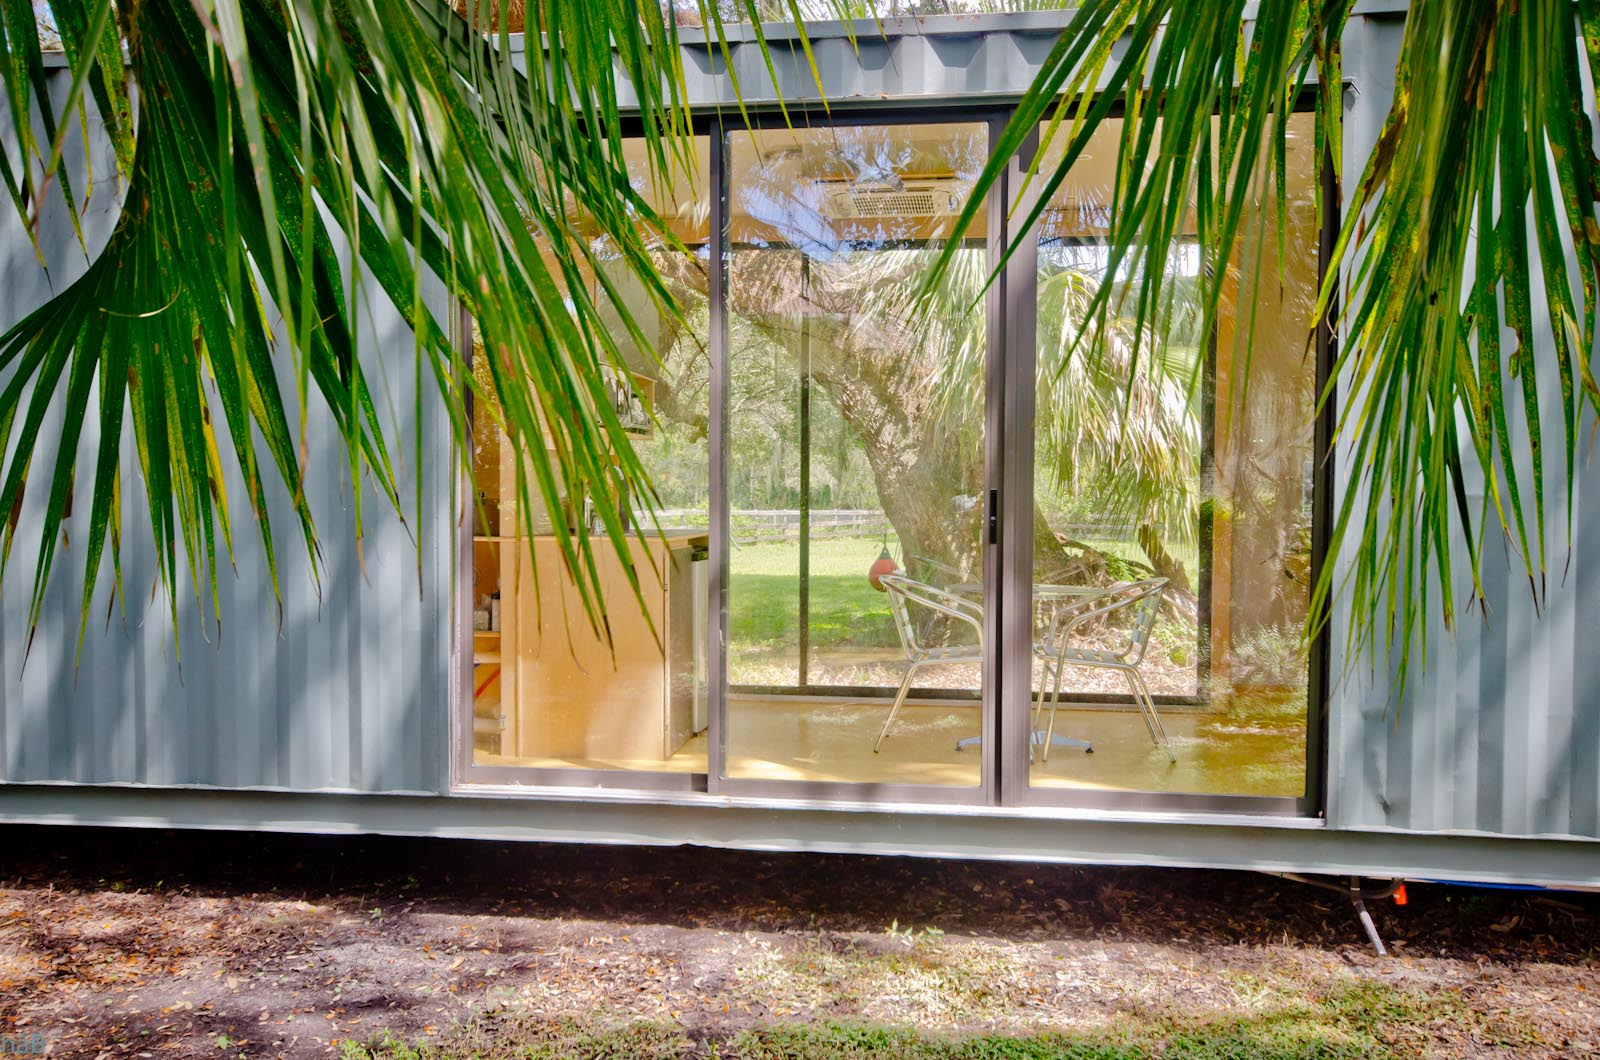
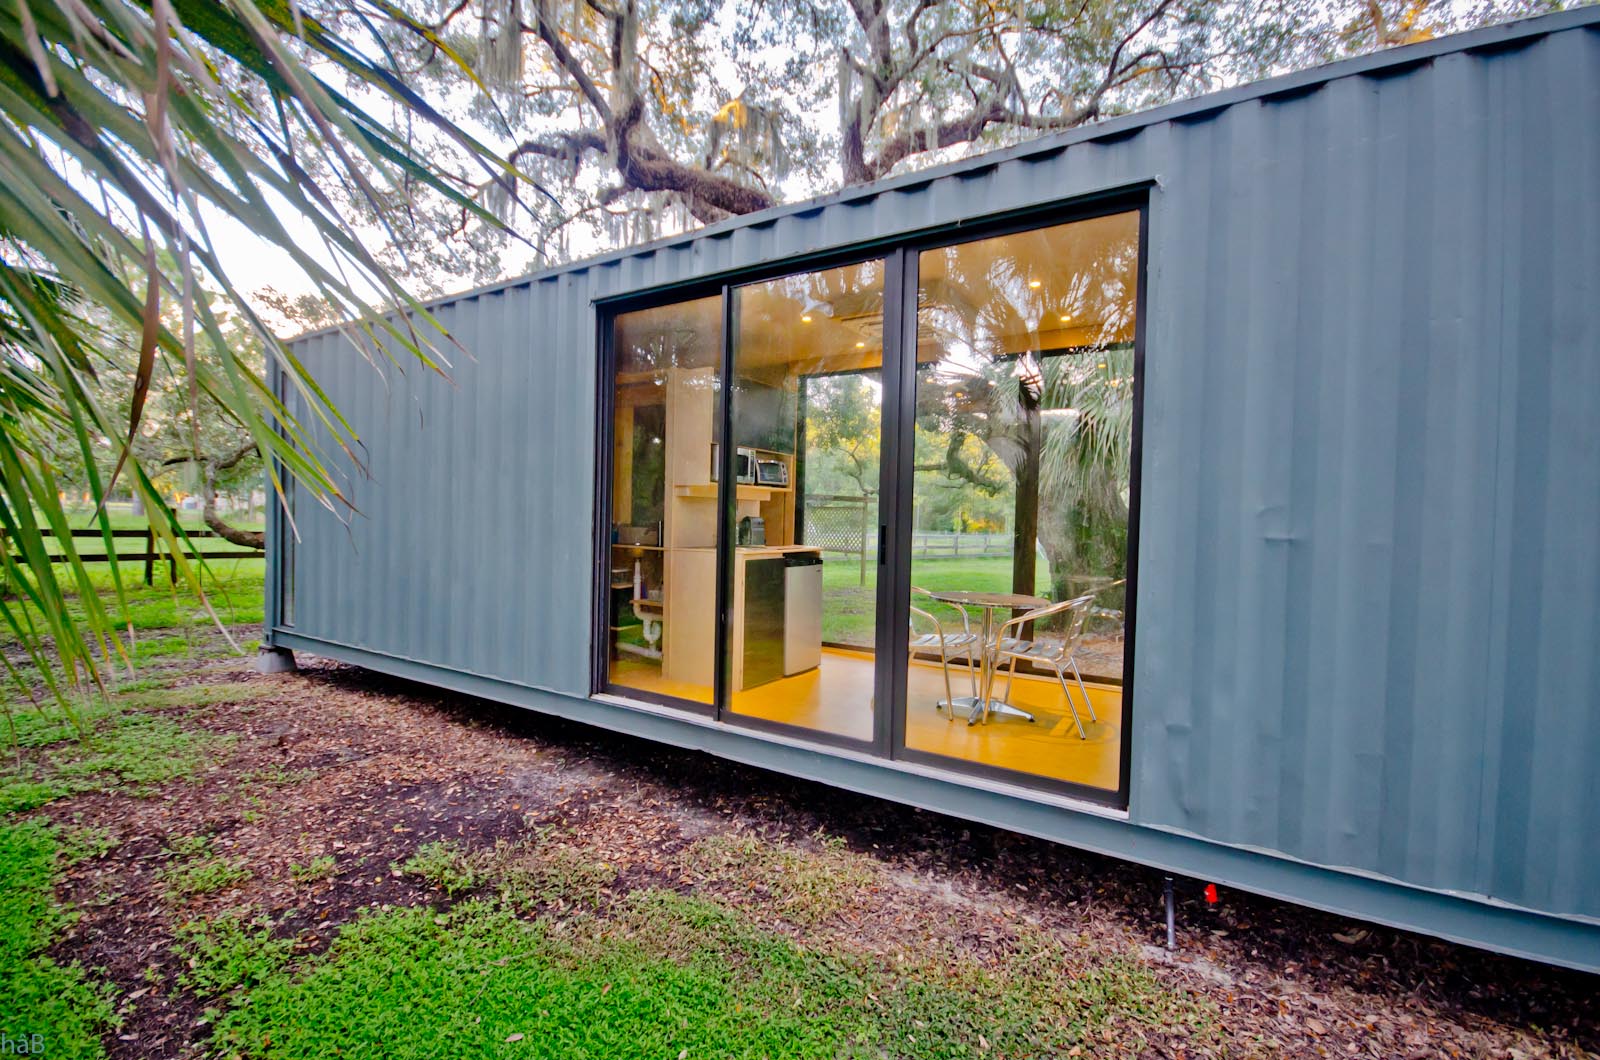
I wanted two large sliding glass doors in the middle of the container and four small narrow windows at the back
end of it, where the bedroom would be. Those window openings would have to be cut out from the steel walls, and a solid steel frame would need
to be welded all around the windows openings. Everything was executed as planned and I am totally pleased with the quality of the work and the
final result.
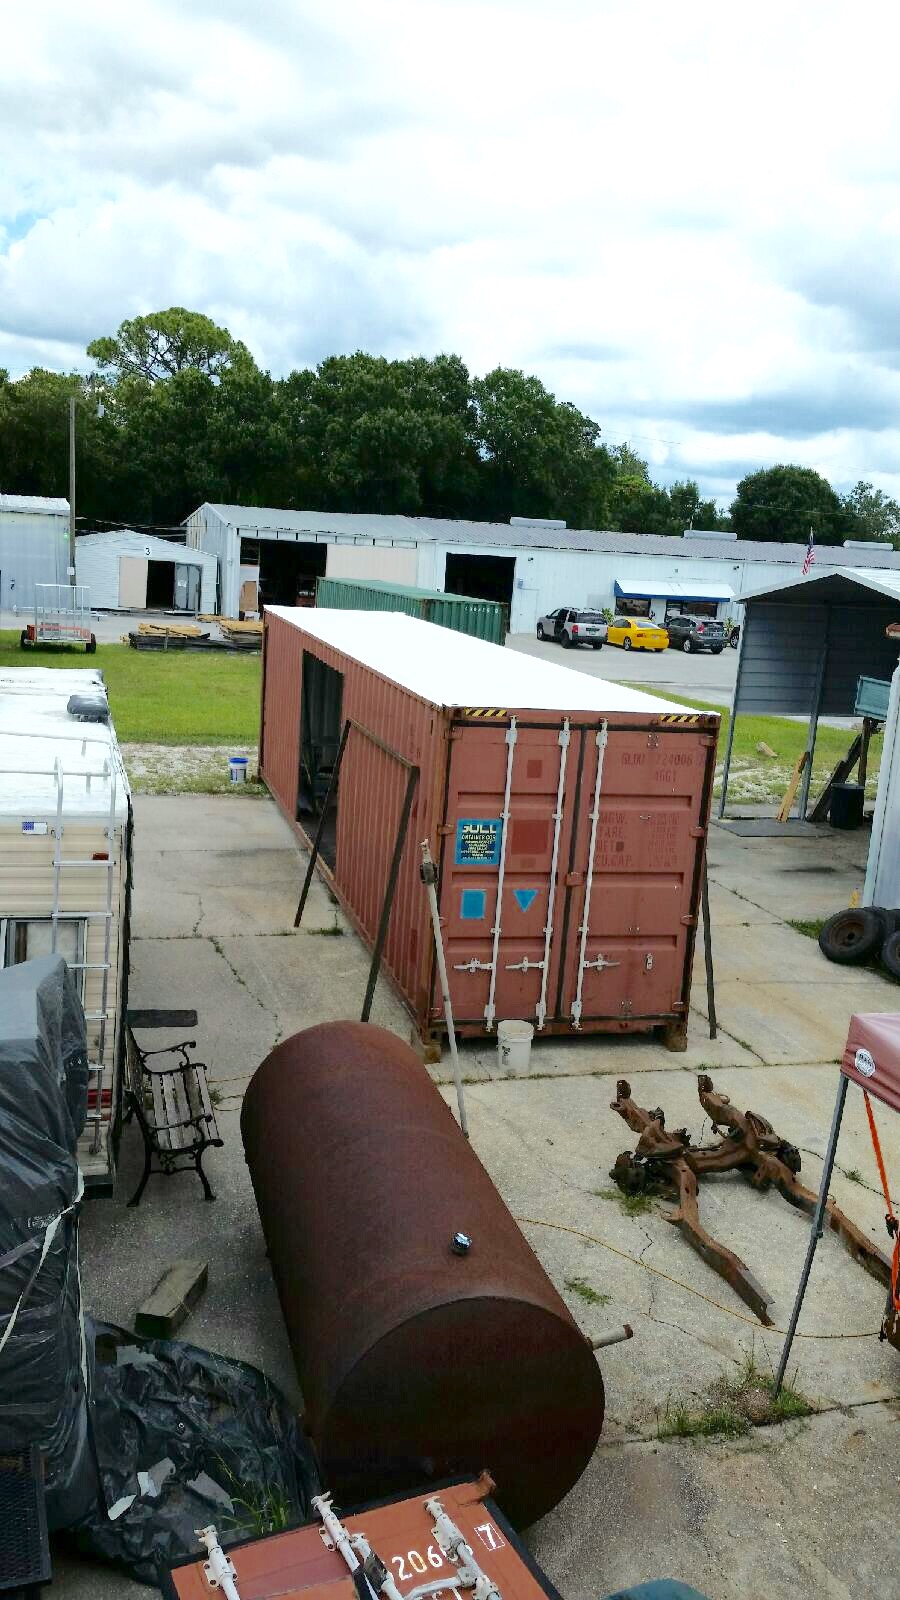
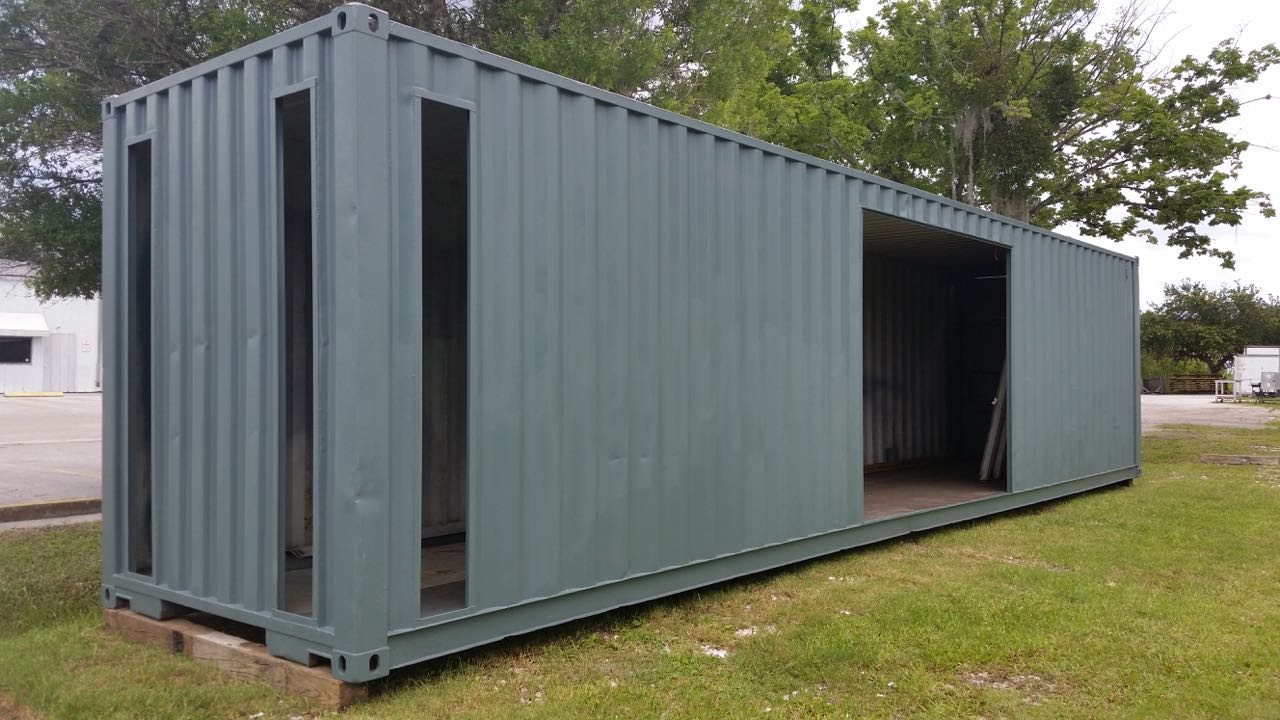
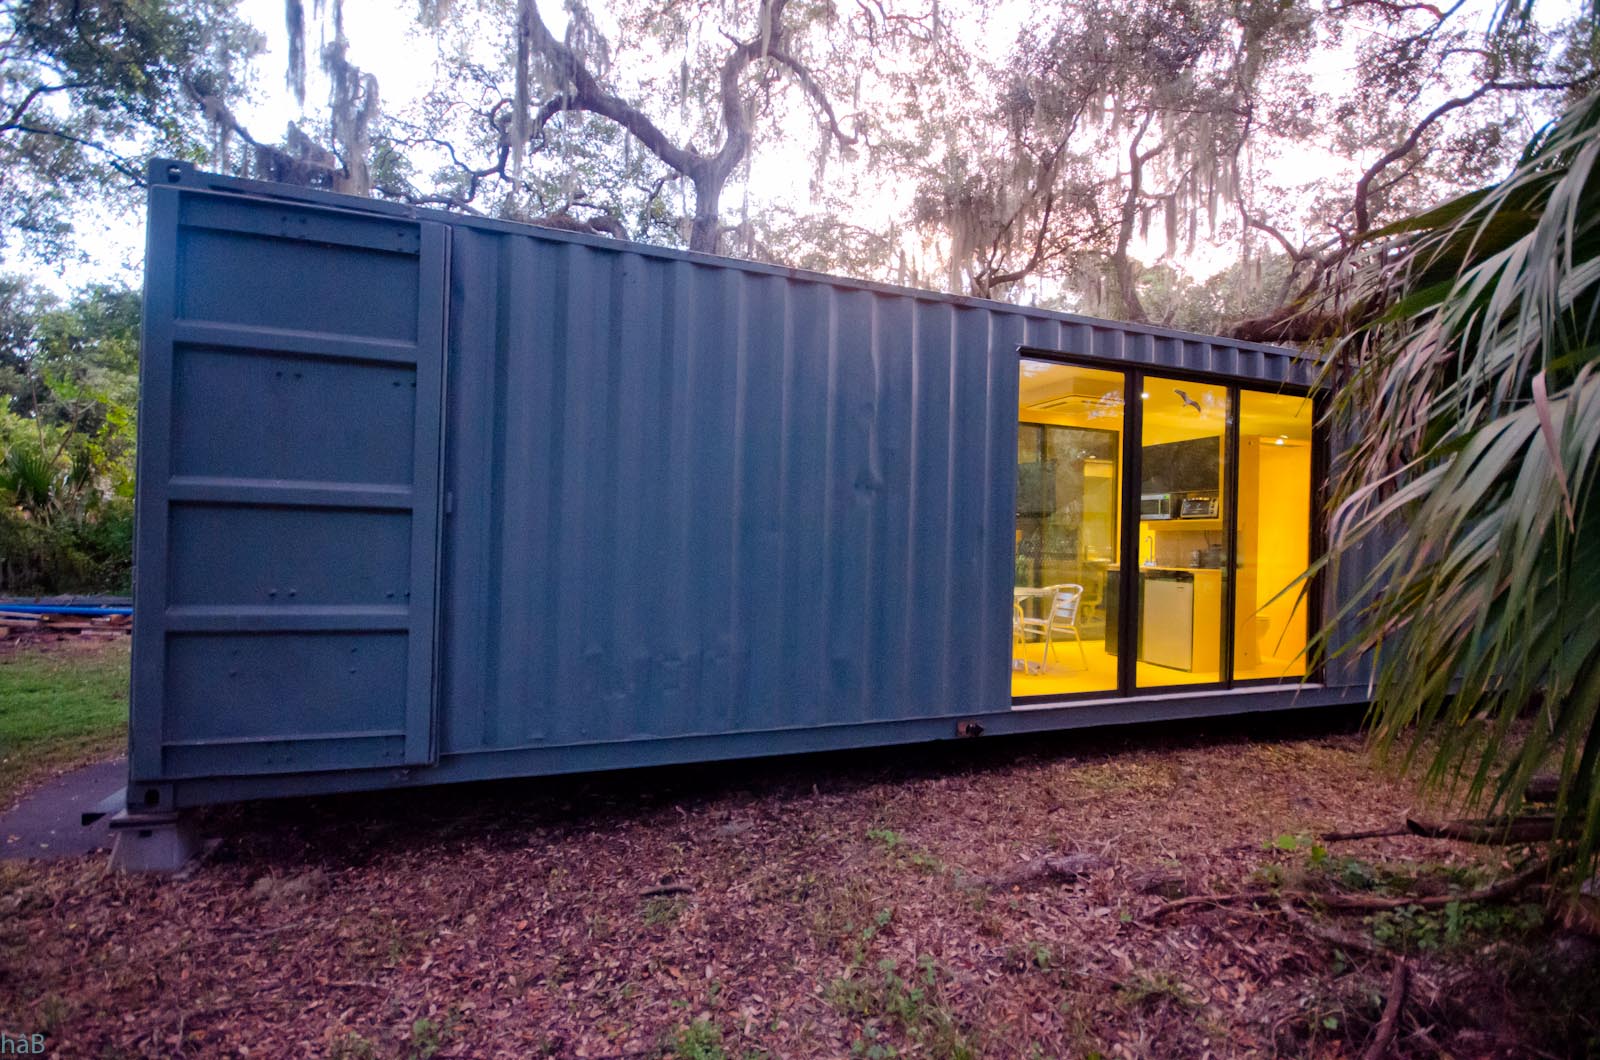
Joel and Rick soon started the hard work: buffing, cutting and welding. They also painted the entire structure
and applied a thick elastomeric reflective paint on the roof.
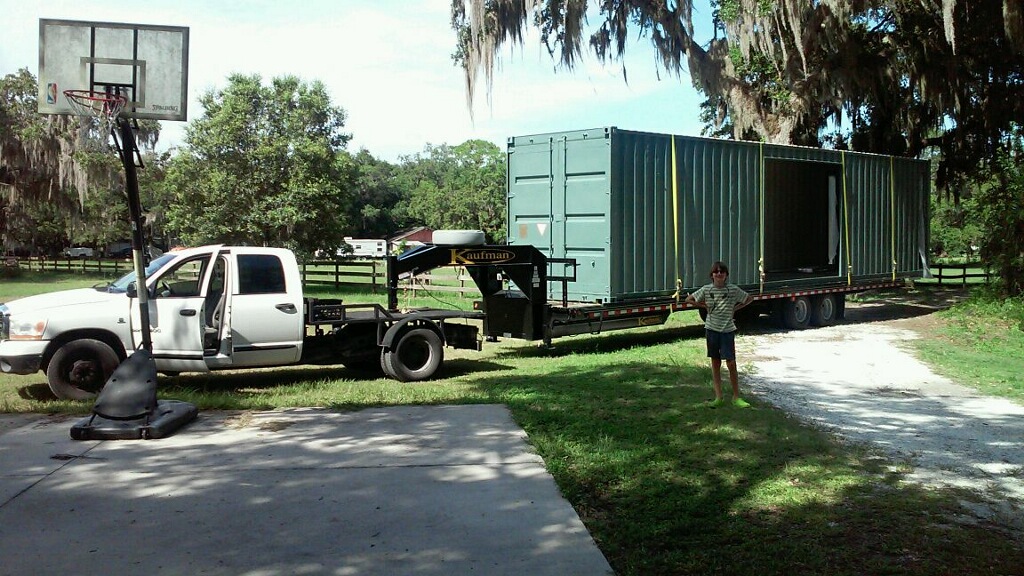
They delivered the freshly painted container on a trailer pulled by a pickup truck. An empty shipping container
weighs about 8,000 pounds and they easily glided it off into its more permanent place.
I am extremely happy with the work that Rick and Joel did. That is certainly the one thing
I c
ould
have never done myself.
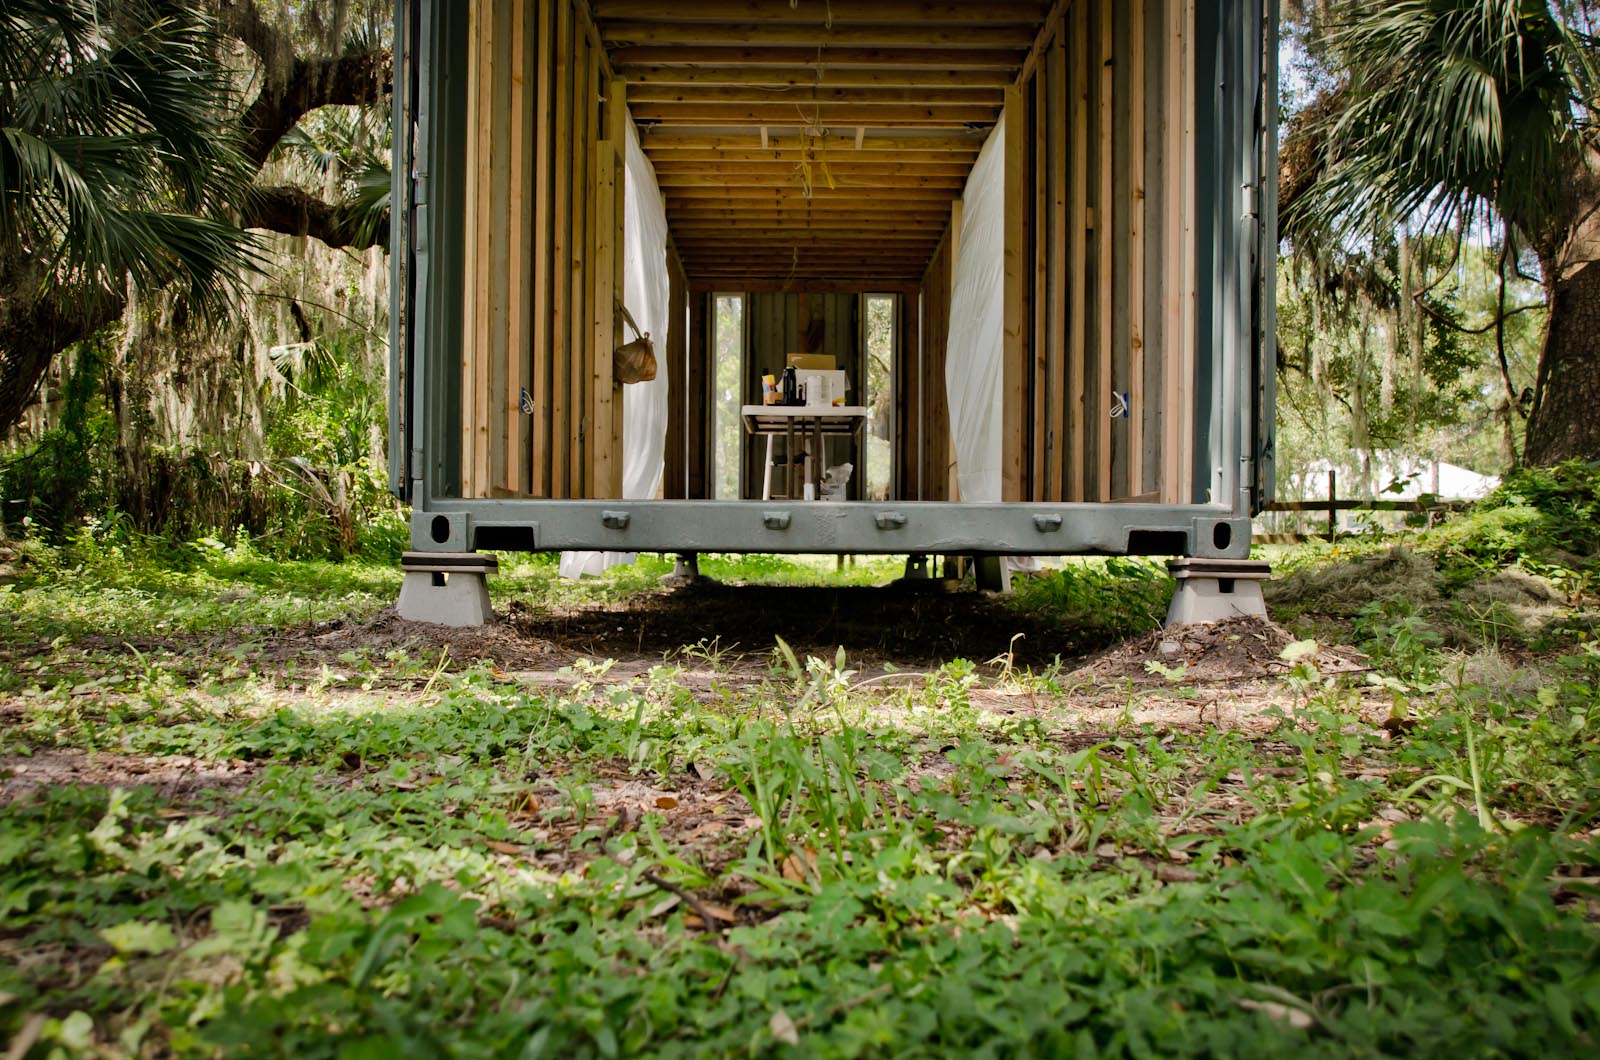
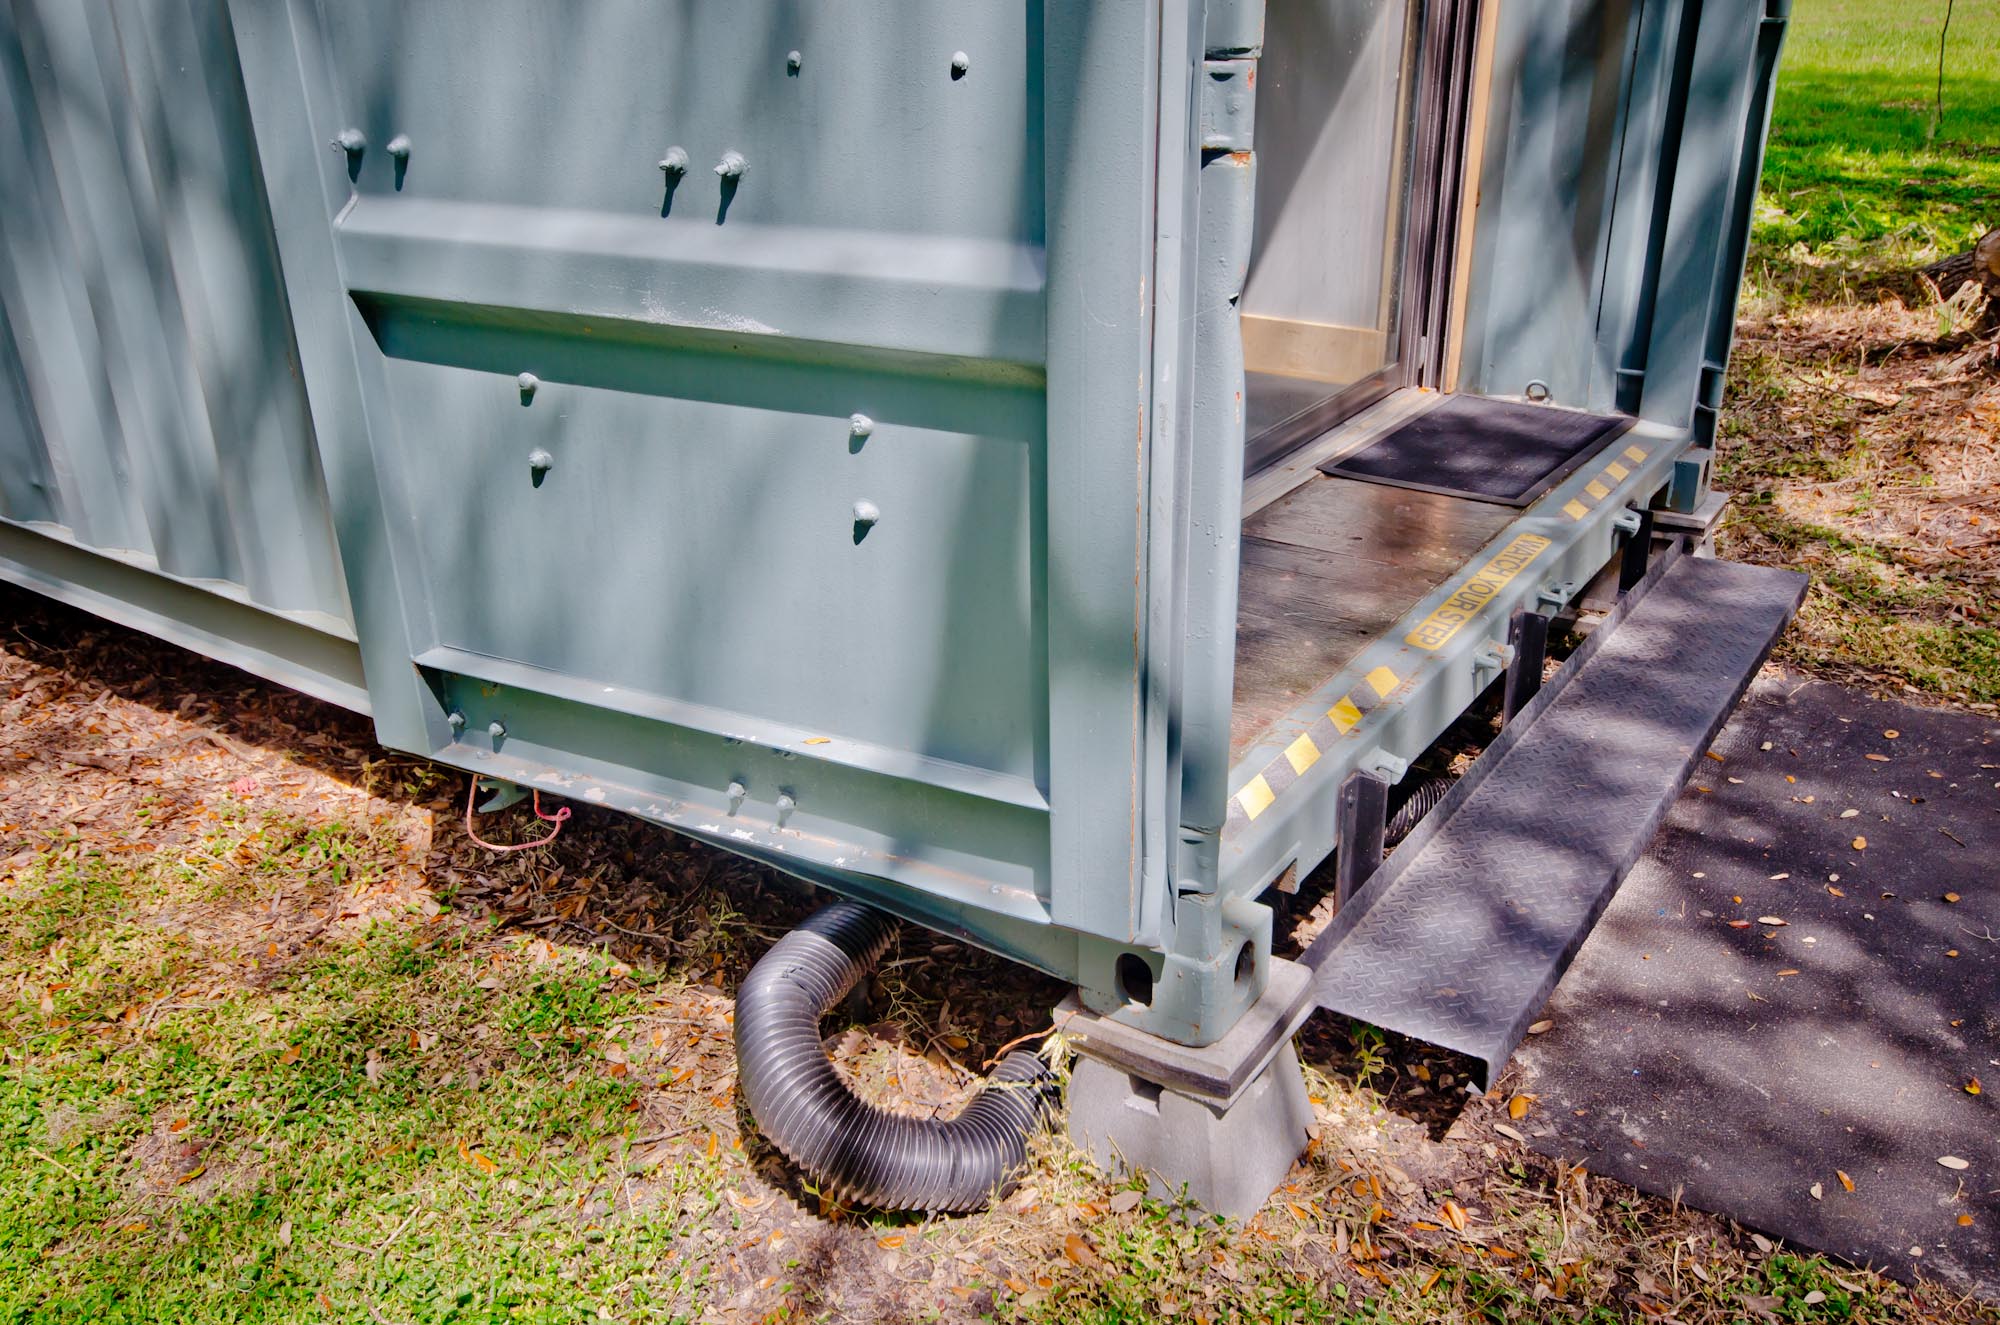
Ground installation
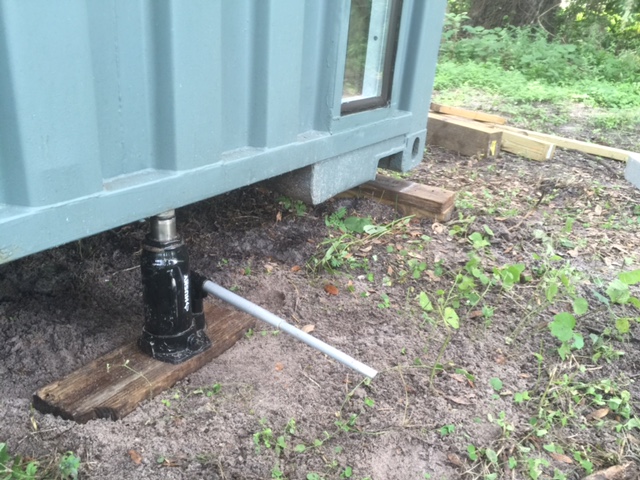
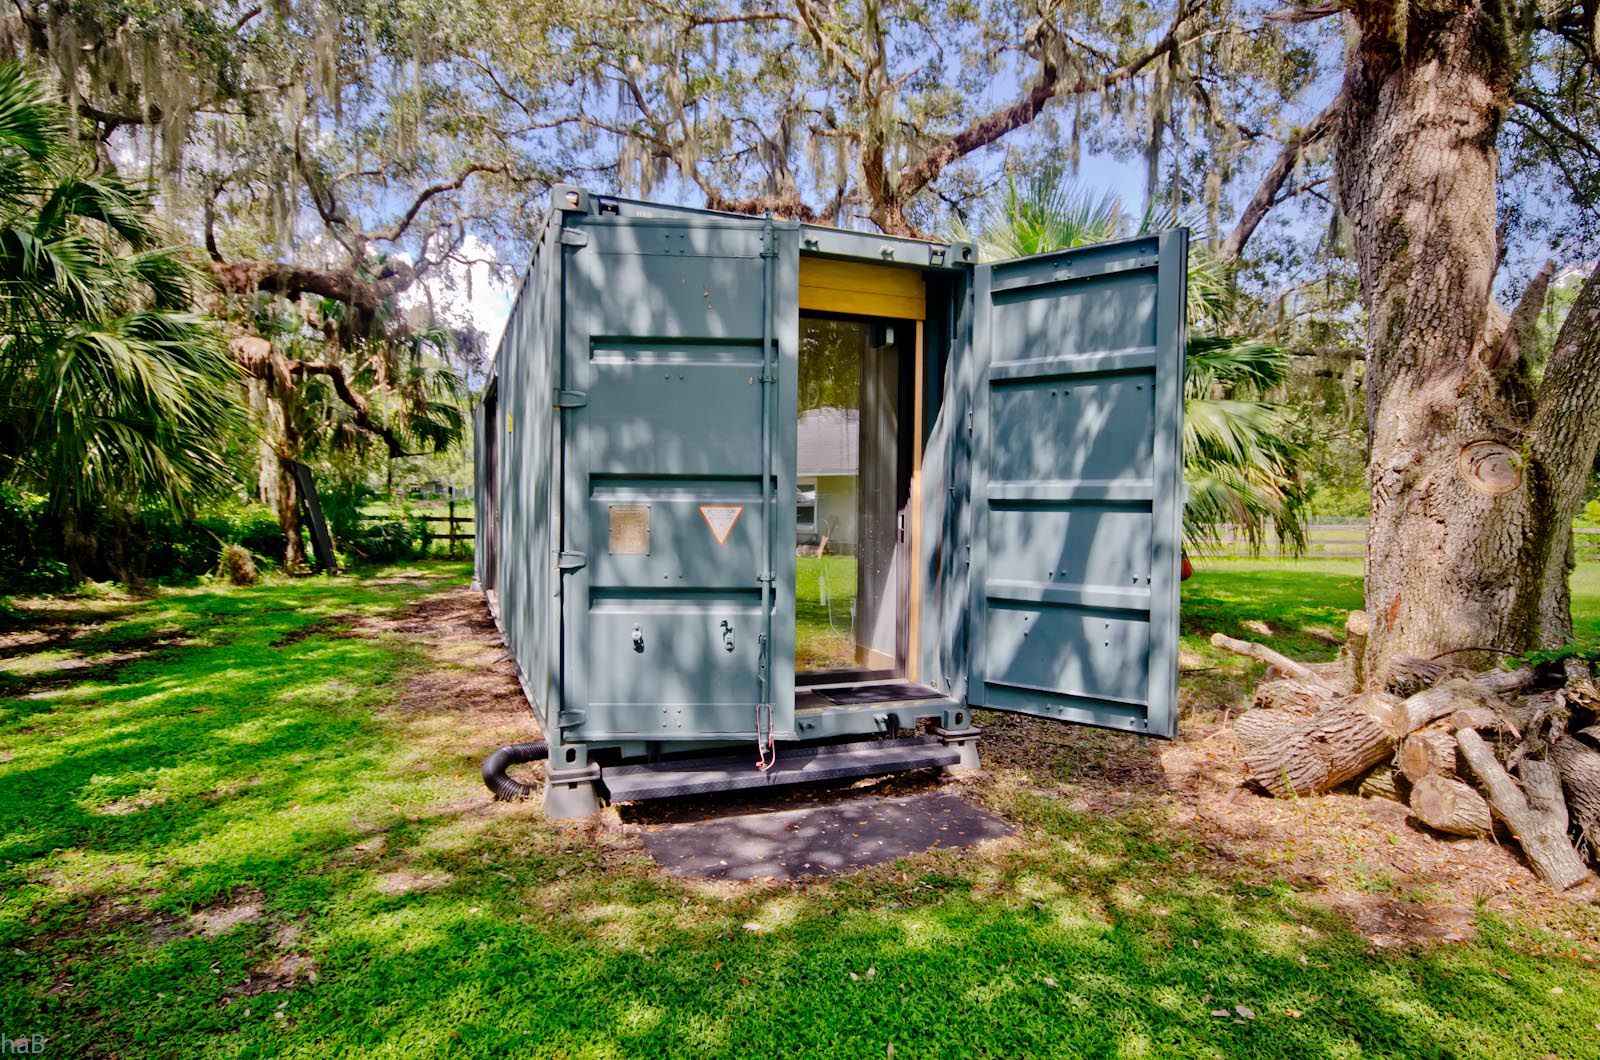
The first step was to set up the shipping container away from the ground. I thought of many things;
concrete slab, gravel, membrane, sonotubes, etc. I finally decided on the simplest approach. Since this structure is extremely rigid,
I choose to install the container 14 inches above ground and simply resting on its four corners. I like the look and it seems to be
quite stable, even if this thing stands on the Florida sandy ground.
To raise the container, I used a regular bottle jack (25 ton) and my brother’s help. The
tricky part was to put the jack under the container since it was resting straight on the ground. We had to dig down to make room
for the bottle jack. I thought it would take a few hours to do all this, but in total it took
about two
days
.
One thing you have to be very careful of, is to place the jack in the middle of the end wall. I
initially thought I could raise one corner at a time just like a car, but since the structure is
extremely
rigid, both corners lift at the same time. So it is much better to place the jack in the middle. If you ever
do this, watch closely for the container side movement. Since lifting is done at the end of the entire 40 feet length, it has a tendency
to move sideways and swing down to one side. If that happens, don’t even think about retaining it, and be ready to jump away.
We also used pieces of 4”x6” wood beams carefully placed under. This was to make sure a jack failure would result in no
more than a
n
inch of displacement.
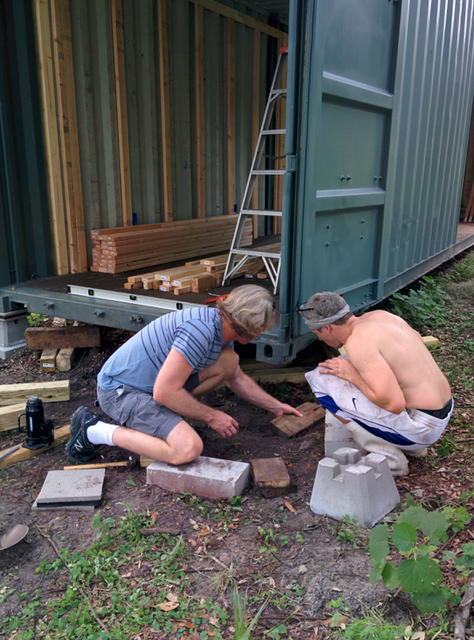
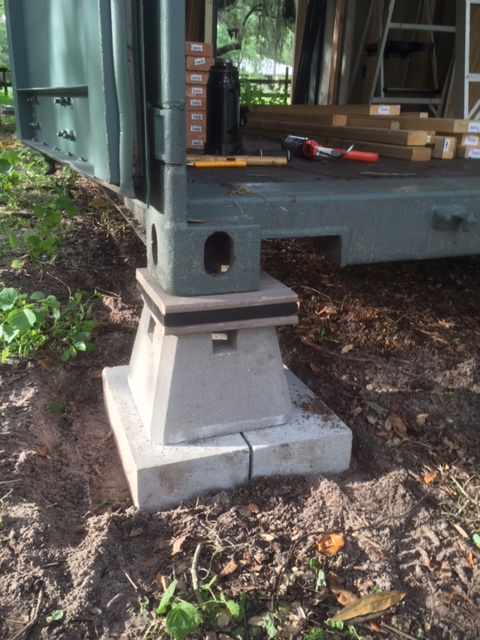
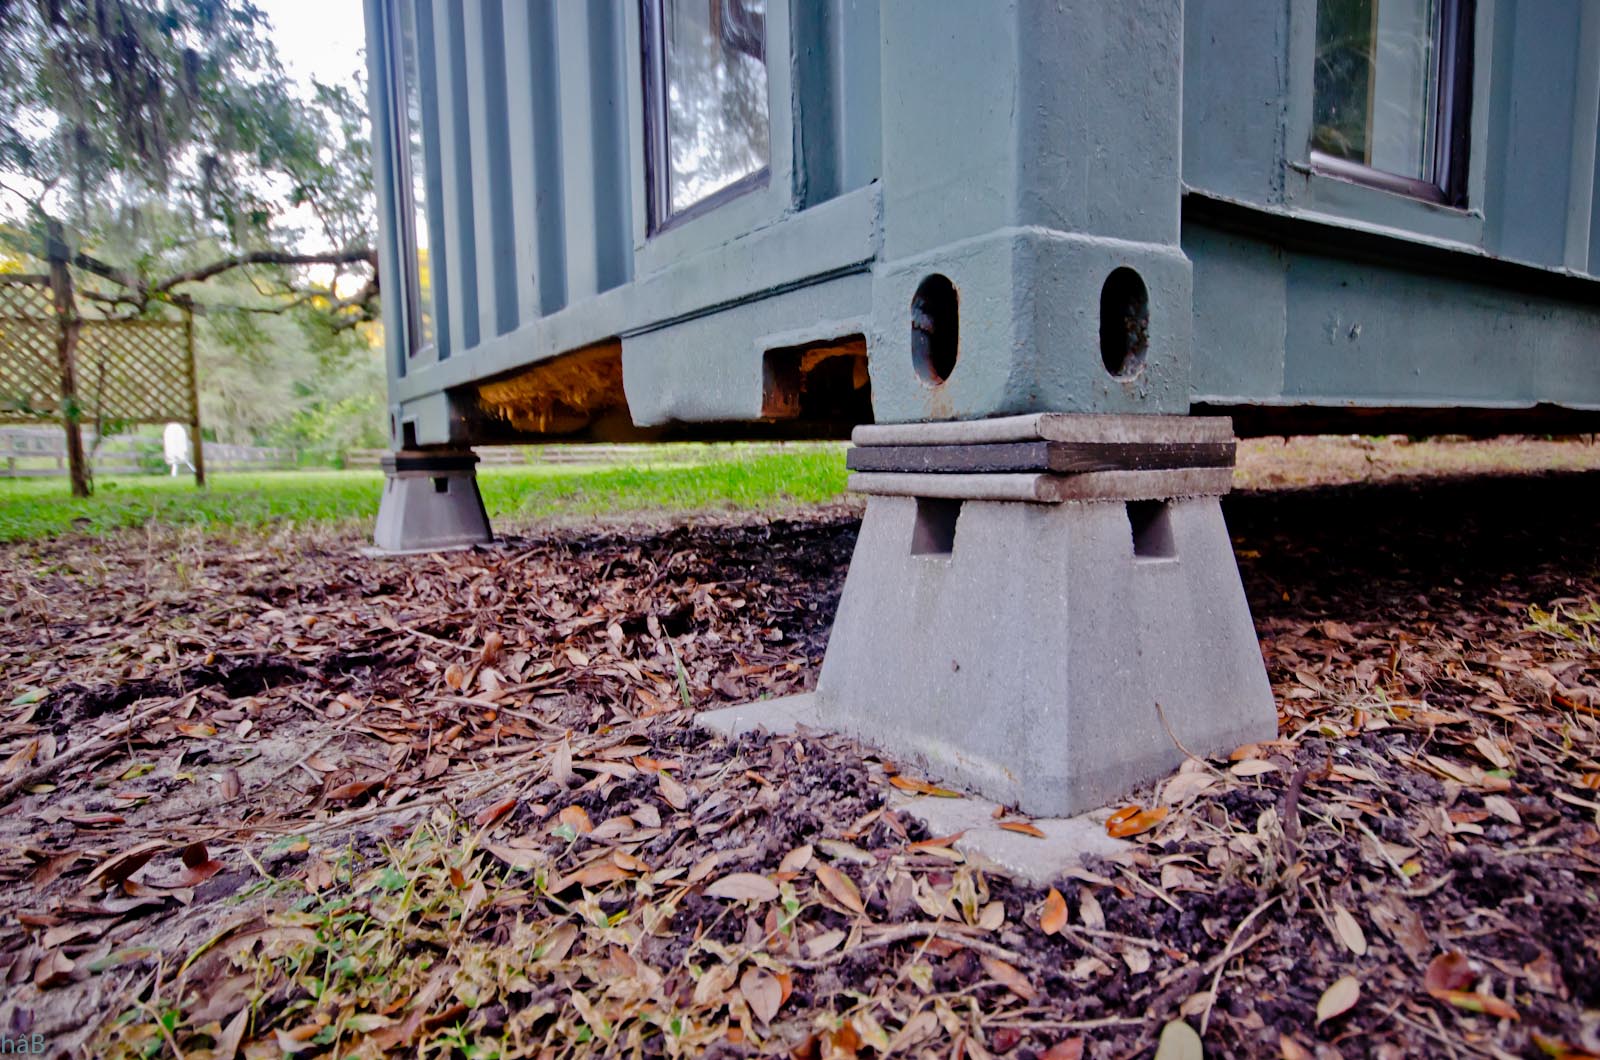
Each of the four corners stands consist of two big concrete blocks of 4 inches thick, placed side-to-side,
with a concrete deck block sitting on top. The shipping container is isolated from the concrete blocks with a layer of 0.5 inch heavy
duty rubber pad sandwiched between two pieces of Trex material. The result is a “floating” shipping container which makes
it pleasant when walking inside. Because the container is now isolated from the ground, and also due to some rather convincing arguments
from my uncle Bernard, I made sure the container was electrically connected to ground with a cable to a steel rod hammered deep into
the soil. I also added a surge protector for the entire electrical system (also upon uncle’s recommendation). However, I did this only
after a capacitor of the AC system blew during a lightning storm.
I regularly monitor the leveling of the container and often inspect the bottom of the structure
for deterioration. After one year, it still looks great. I also think the spray foam insulation on the bottom helps to preserve the
structure (
against
humidity and
rust).
So far, no exotic critters have established their home under there.
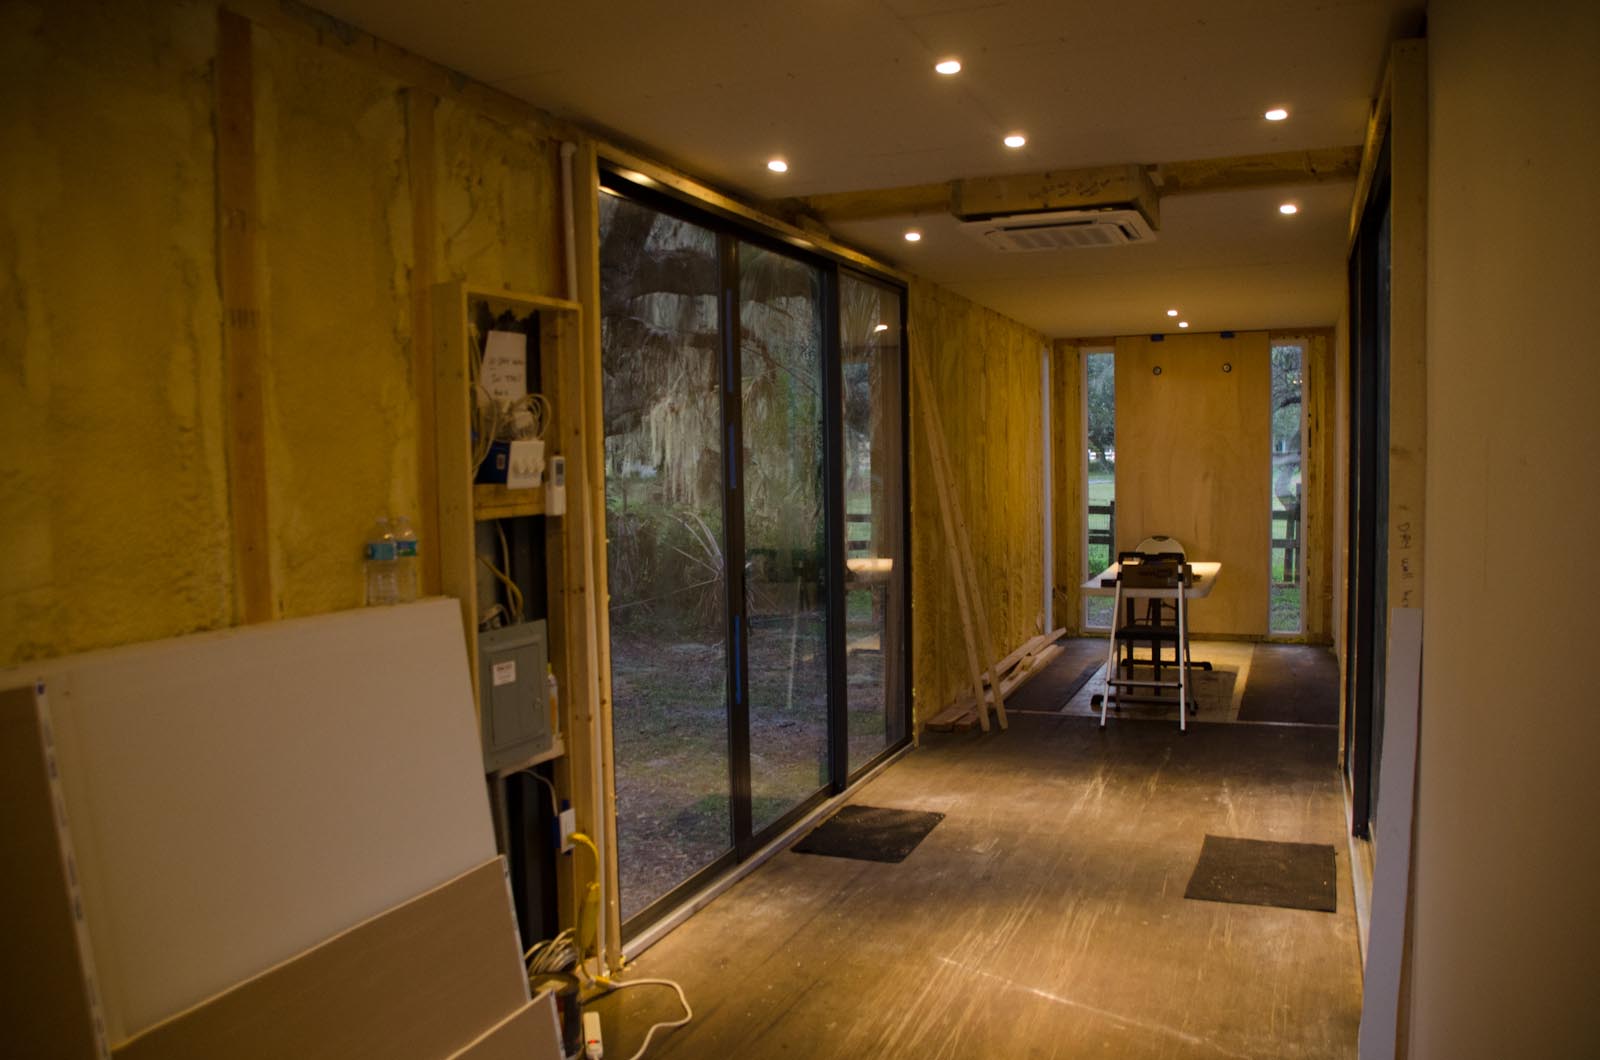
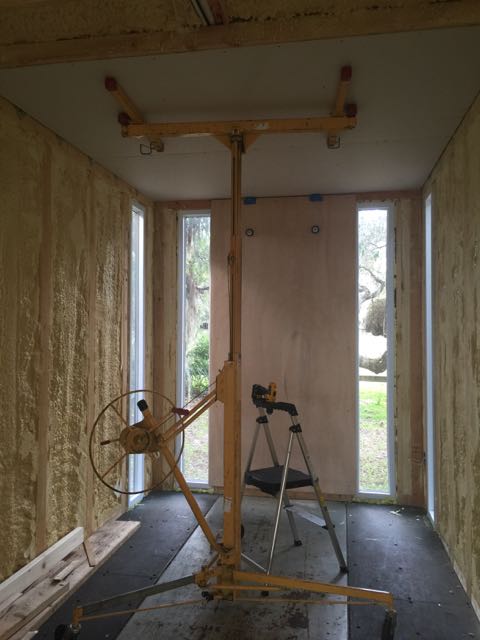
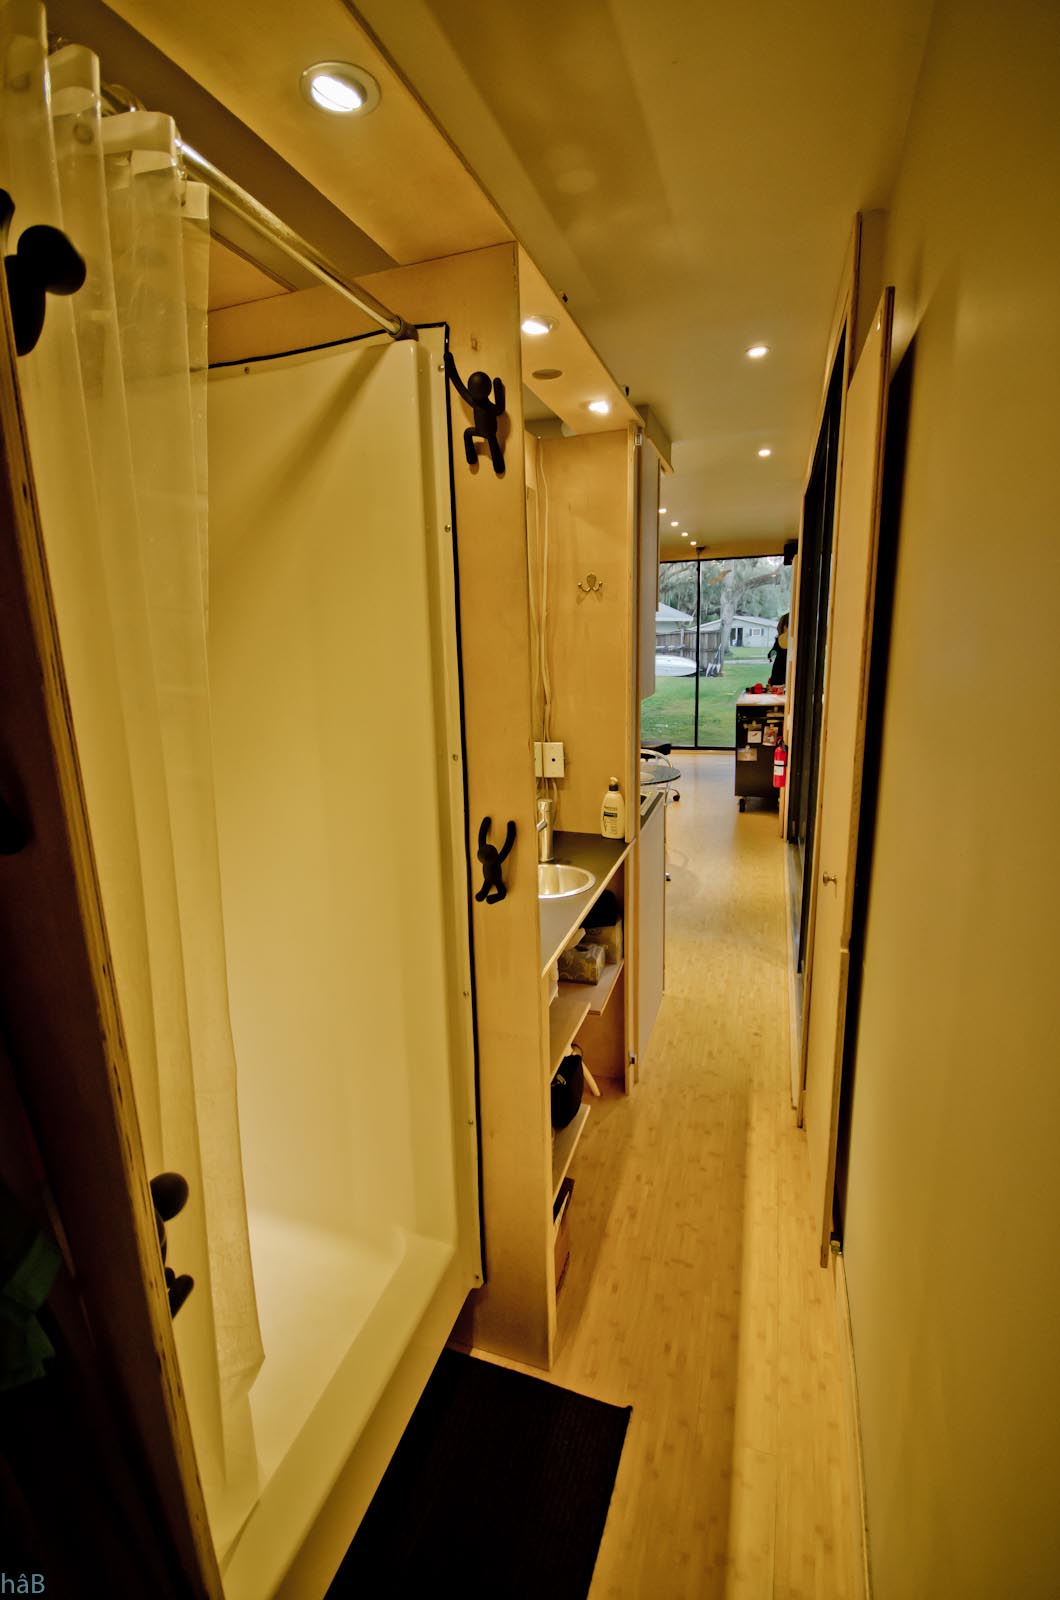
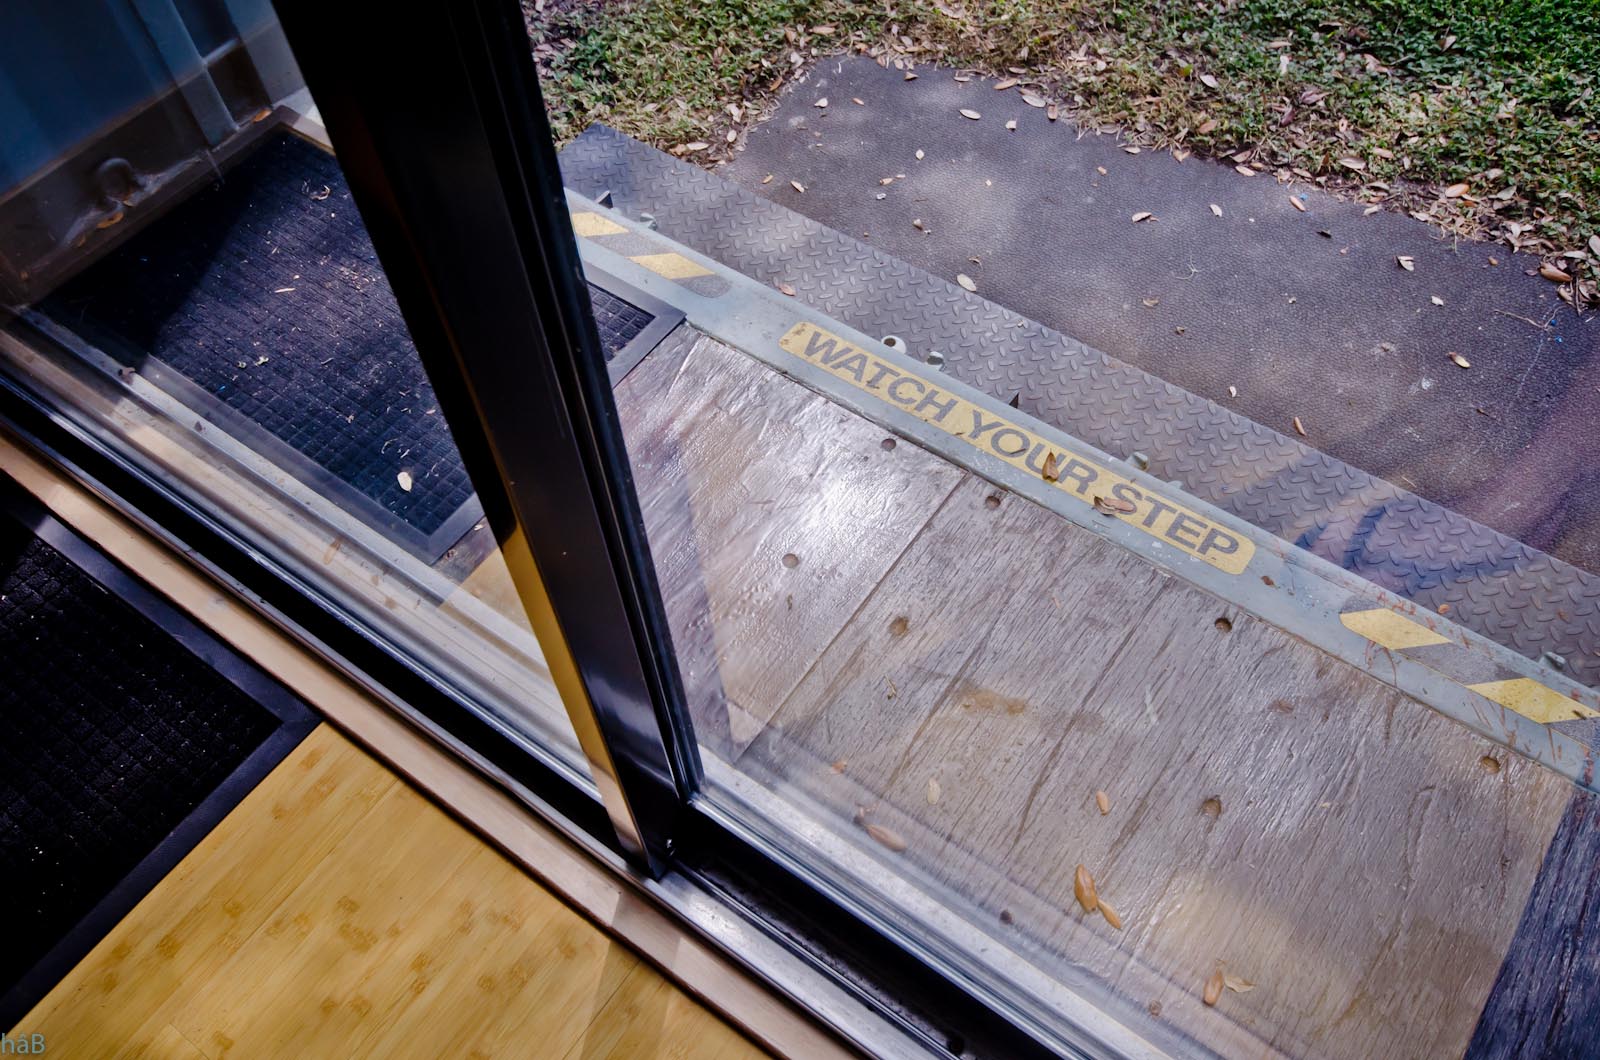
Windows and sliding doors
The window frames consist in 2 inches by 1 inch steel 90-degree angles welded
on
the container walls. The windows would be installed from the
inside and simply pushed
against
the frame and glued in place with
black silicone. A wood frame would then be built on the inside and the windows screwed to that wood frame. This turned out
to work pretty well. The interface between the windows and steel frame remains flexible and consist of a thick layer of
silicone. If someday I have to move the container, I am confident the windows would not
crack
due to this somewhat flexible interface.
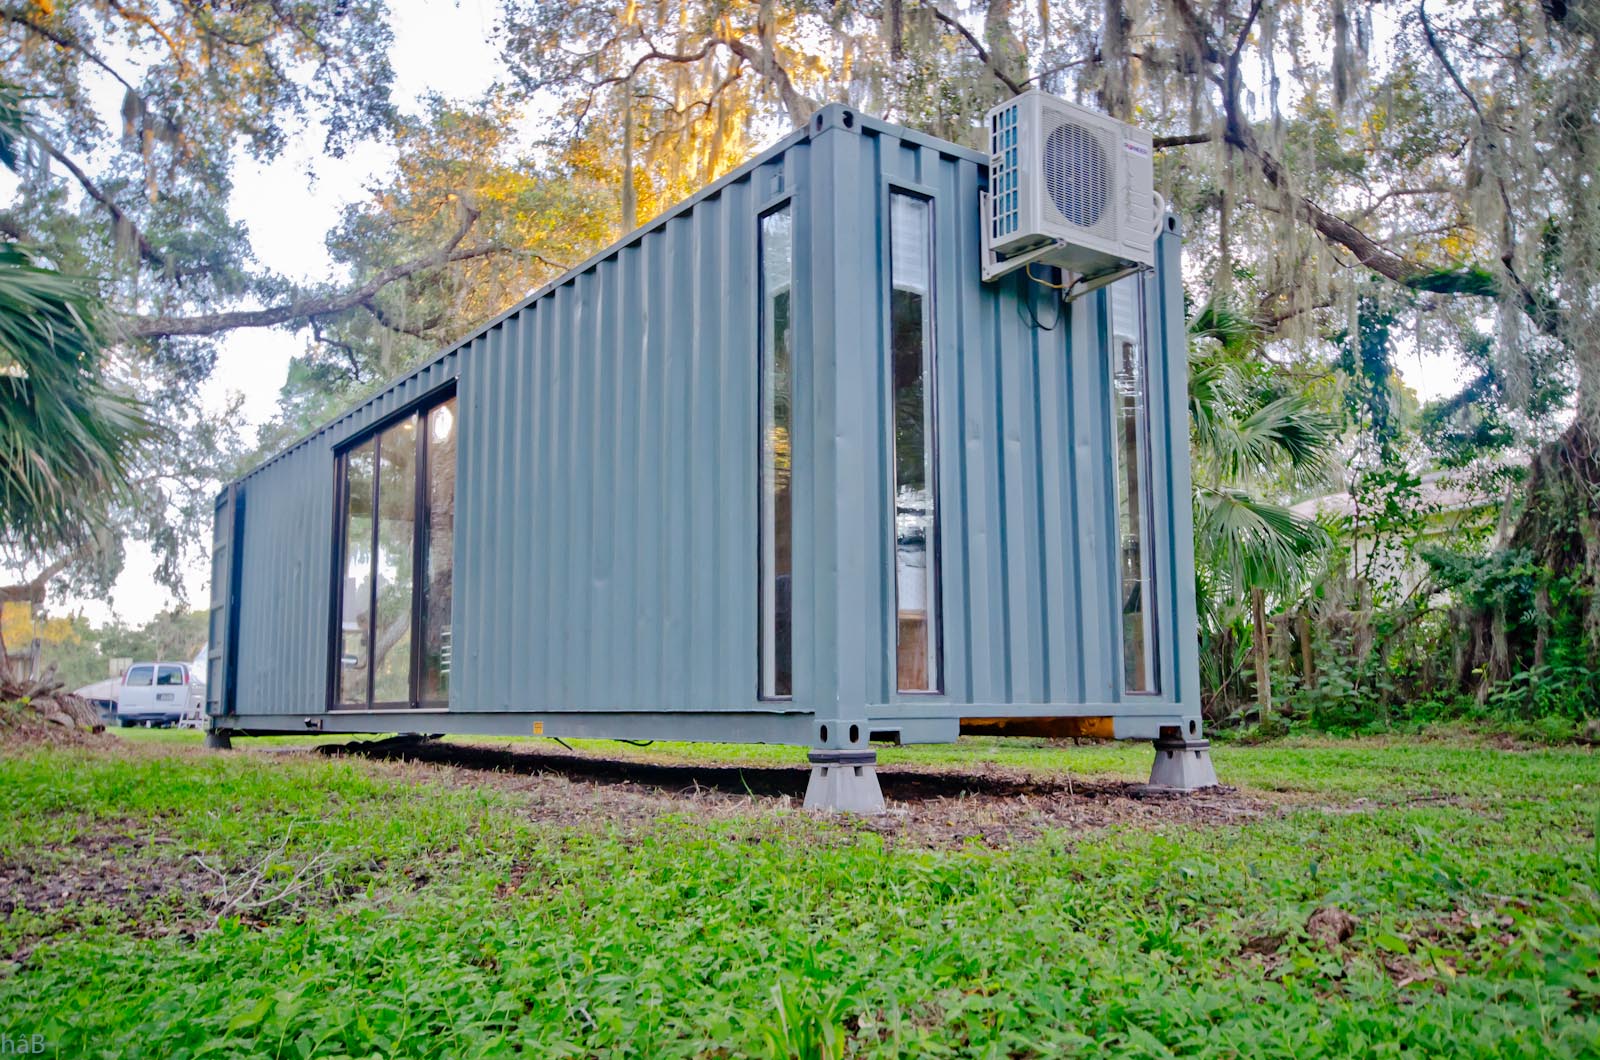
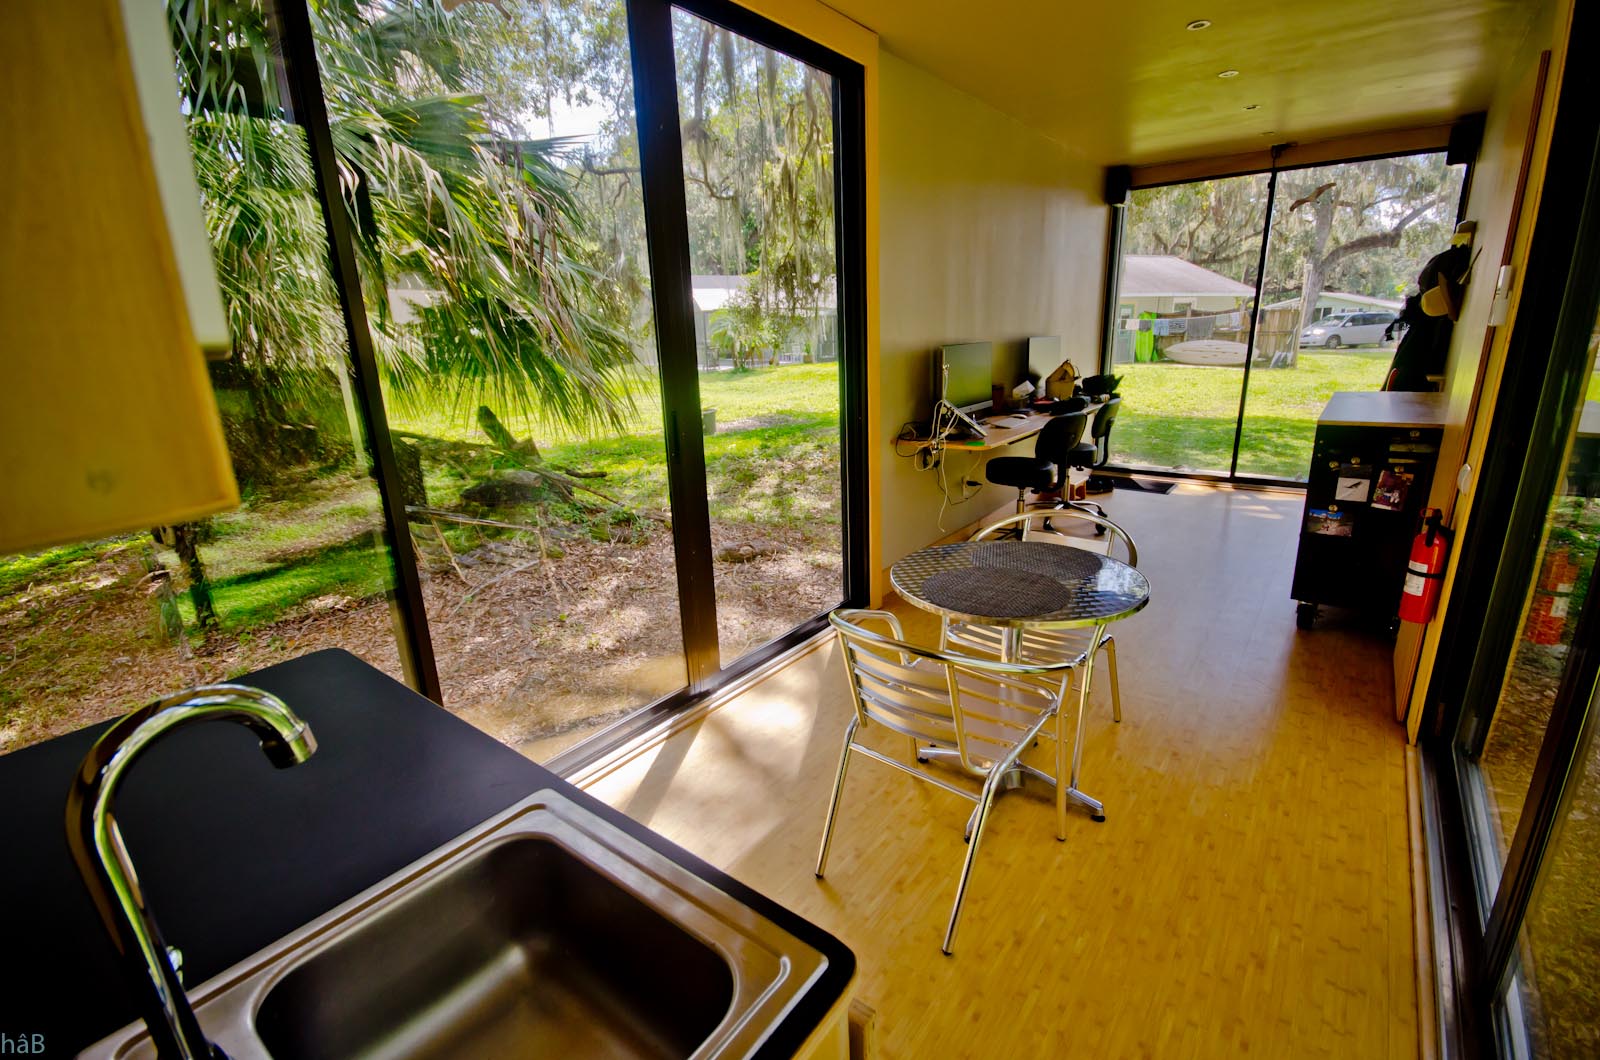
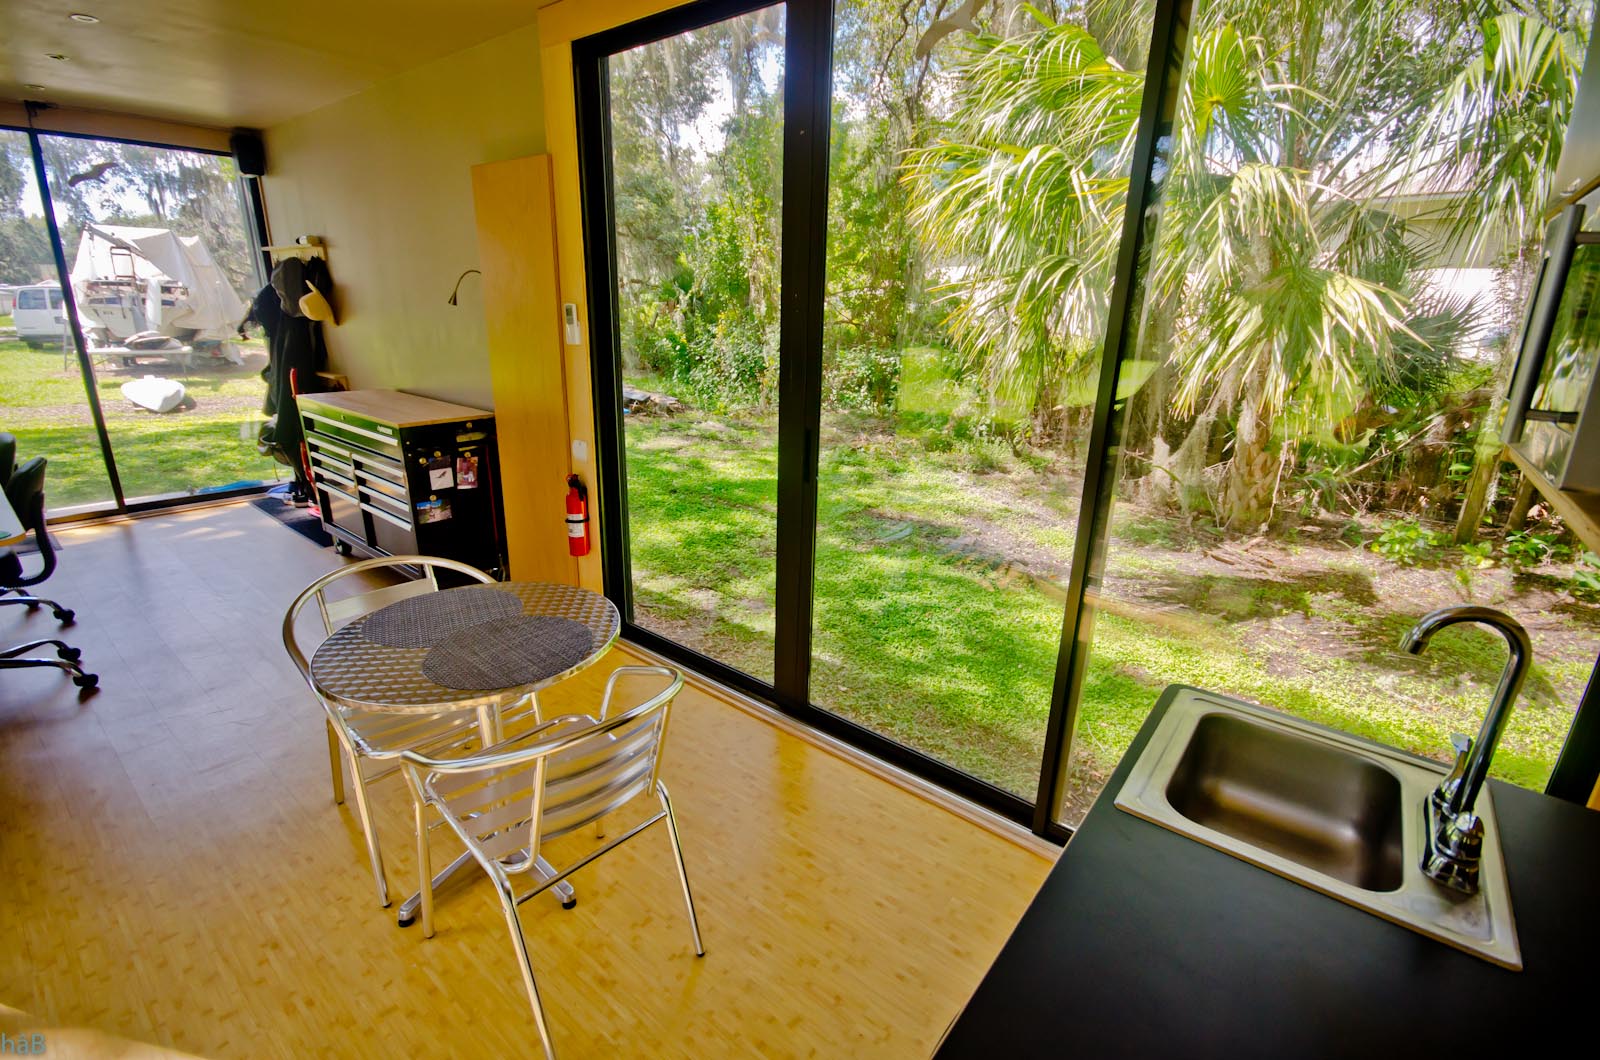
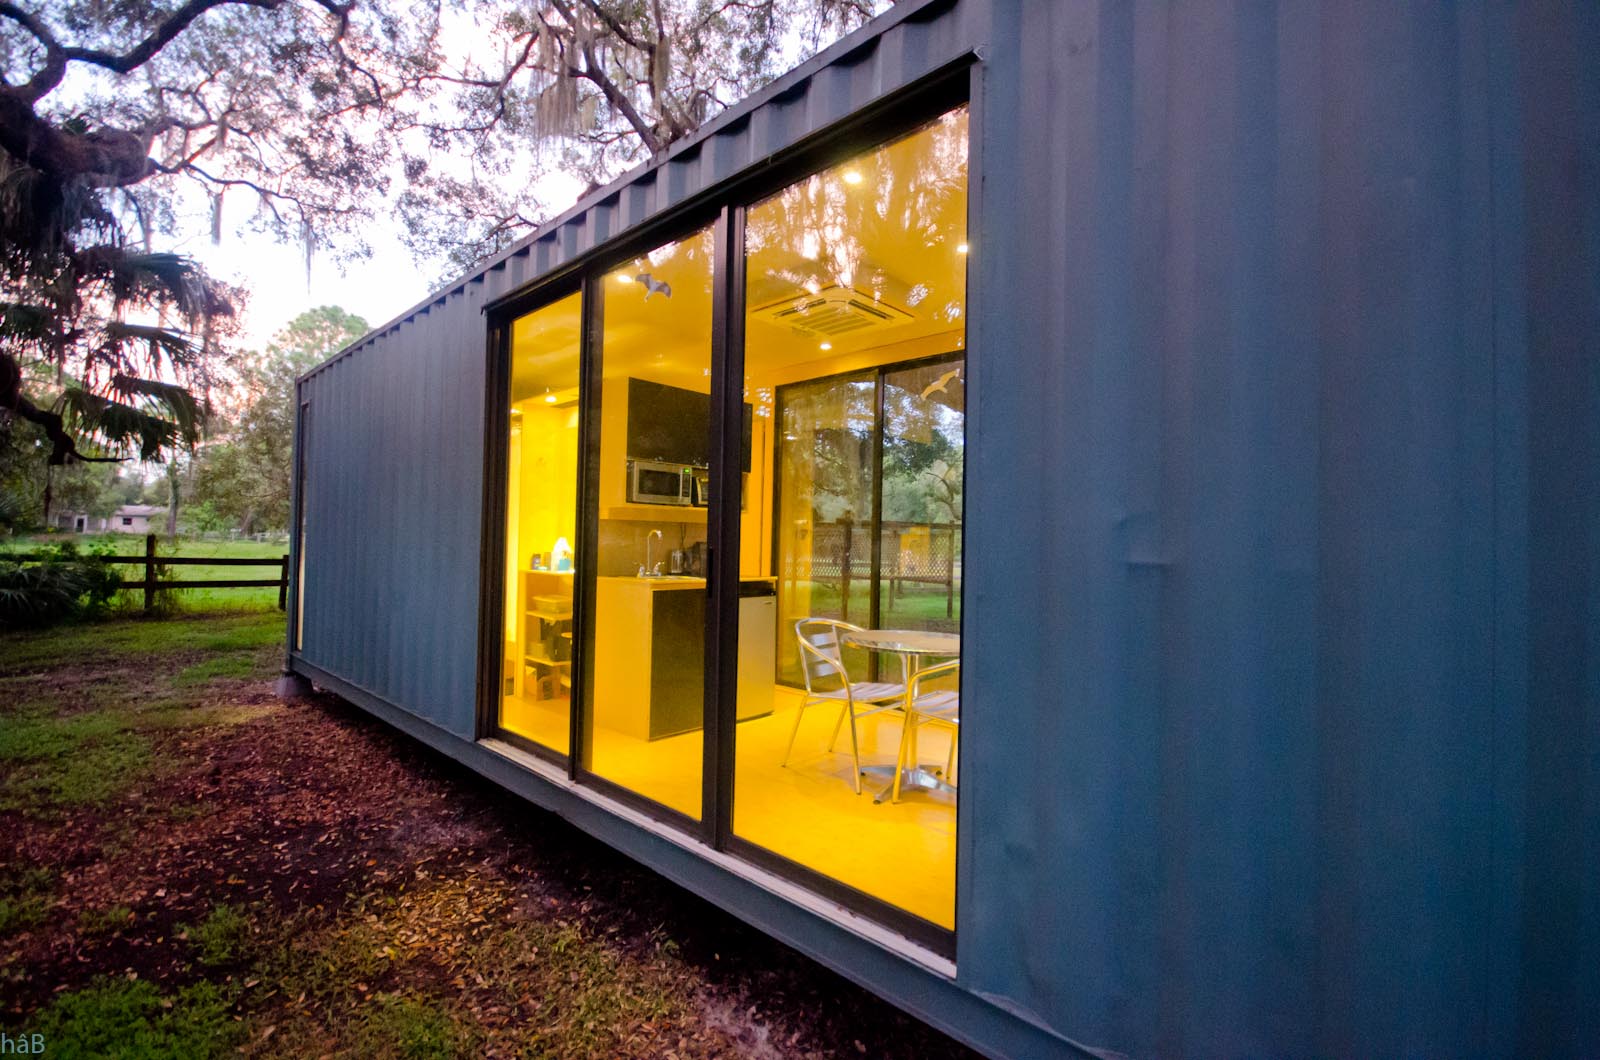
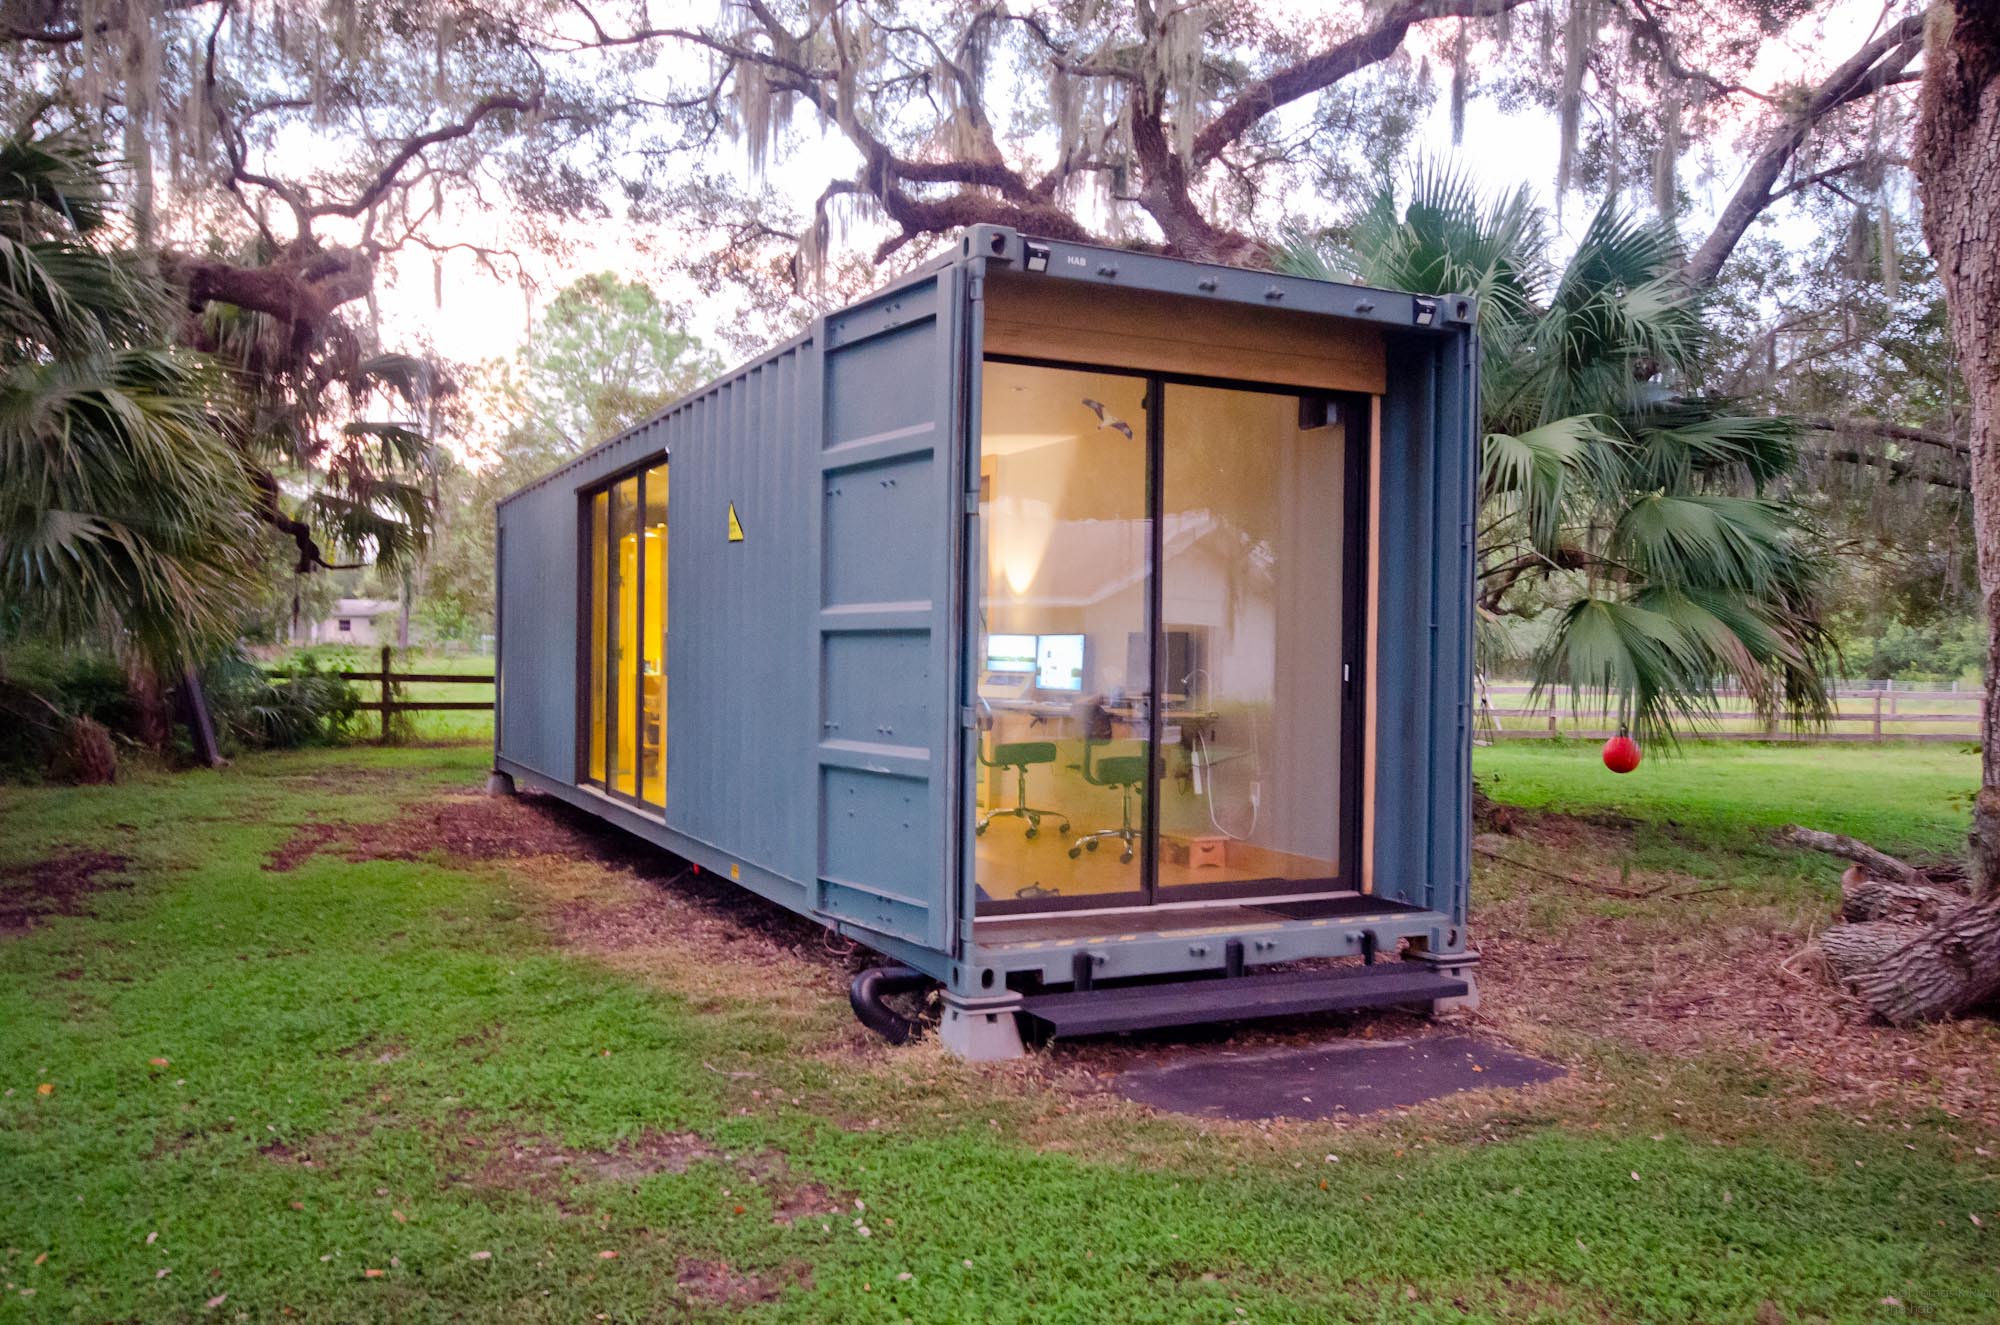
The same system was used for the two large sliding doors on each side of the container.
Each of those sliding doors is 10 feet wide by 8 feet high and are enclosed
in
an aluminum
frame. The large sliding doors are made of double pane tempered glass, without Low-E treatment (Low-E can form streaks after a few years: bad!). The sliding doors are also installed from the
inside and their aluminum frame is pushed and glued with silicone against the steel frame.
Above the two large sliding doors, we welded a gutter that is about one inch deep. If I would have to do
this again, I think 4 inches would have been more appropriate because the rain water often spills over and comes down on the glass
doors. Fortunately, this can easily be fixed and is something I plan on doing soon.
The windows are aluminum framed, double panes, and custom ordered from Home Depot and produced by PlyGem.com.
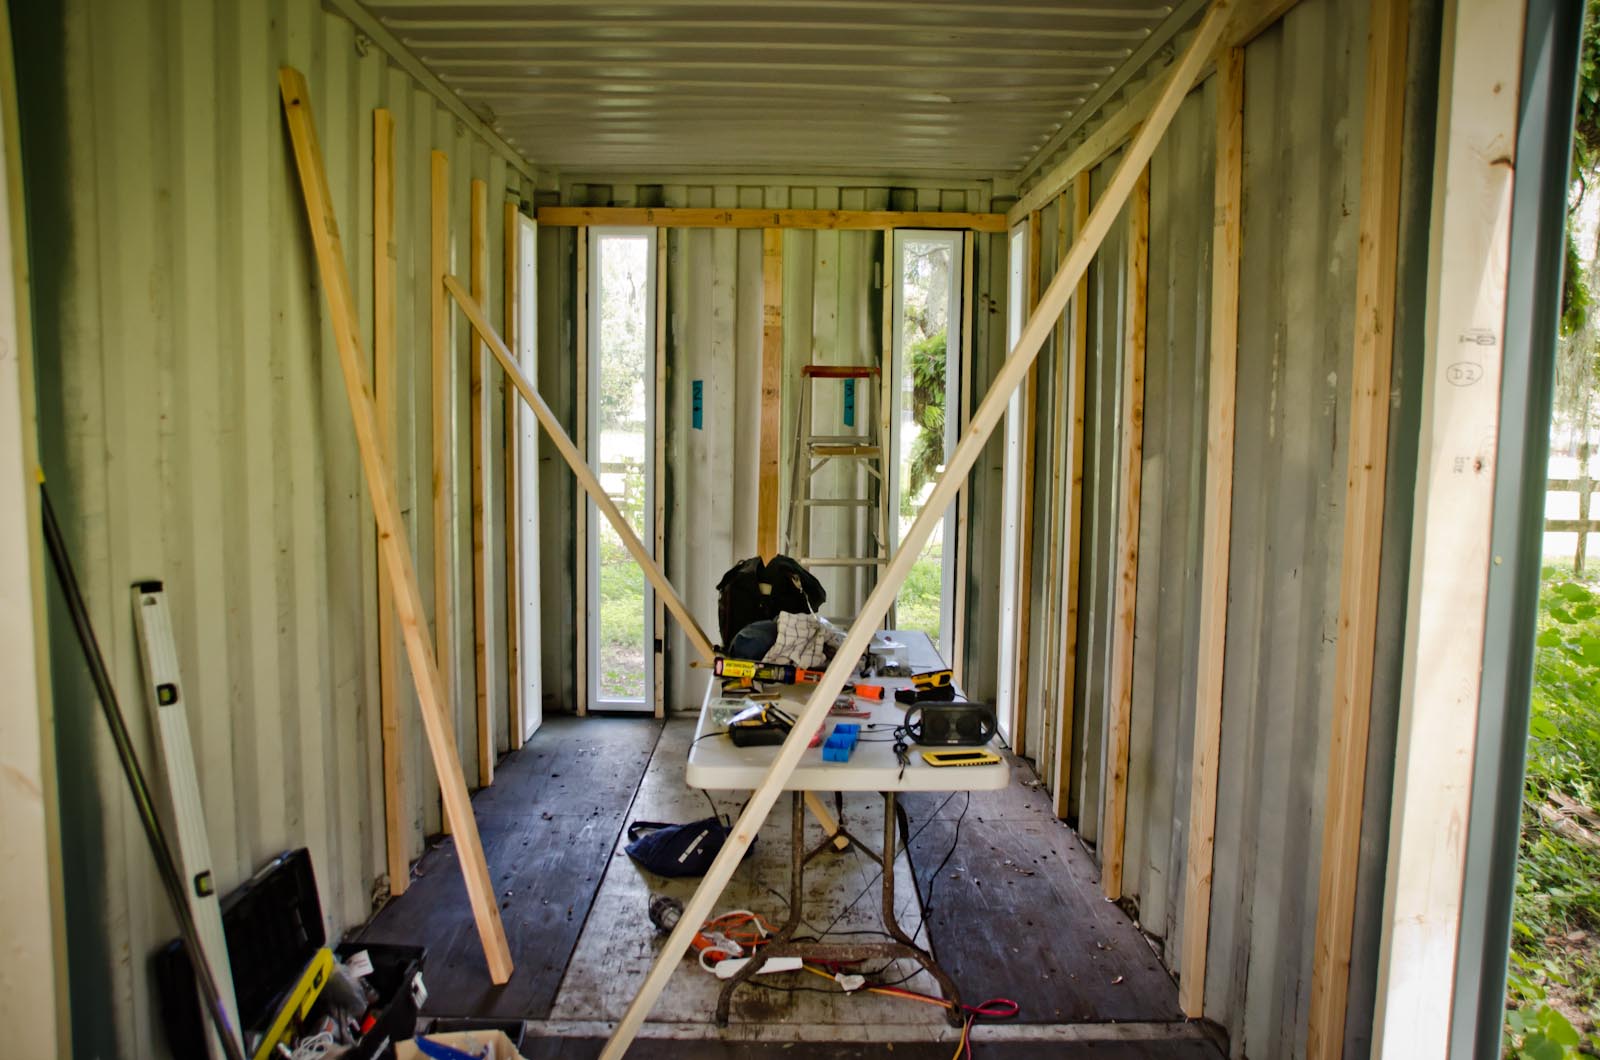
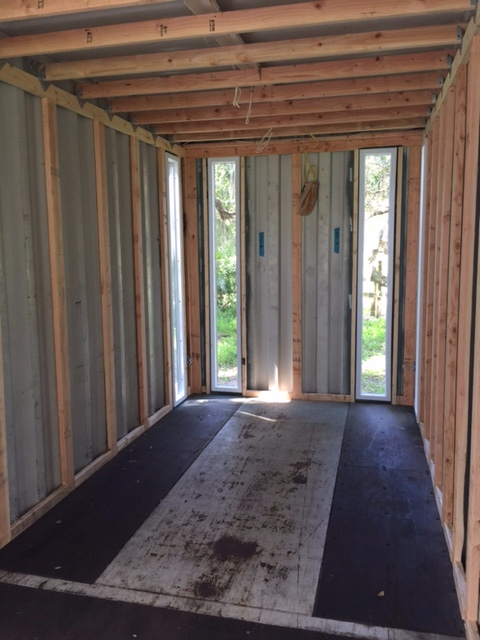
Framing
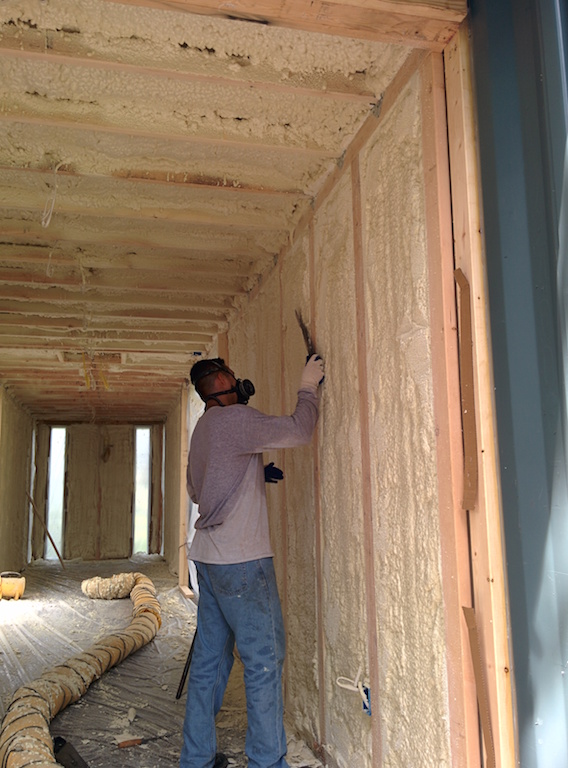
The next step was to frame the interior, put in insulation and finish with drywall. I did hire
professionals to spray foam the insulation.
When framing, I had to plan for the electric wiring, switches, outlets, etc. All the
plumbing would be located in what I call the service block (see
other
section below).
For framing, I used regular 2x4 glued sideways to the walls. This means they would provide no
less than 1.5 inches of space for the insulation. The ceiling frame is also made with 2x4 resting on the walls 2x4. That
gives over 6 inches of ceiling space to add insulation.
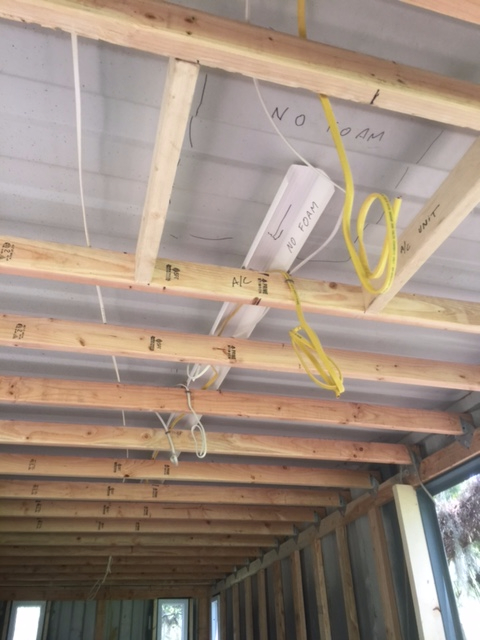
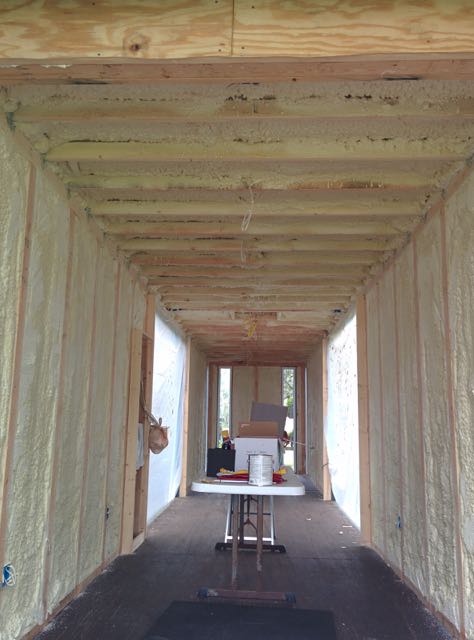
Insulation
The insulation was done with closed cell spray foam on all walls and ceiling. There is now
1.5 to 2.5 inches of insulation on the walls and 3 inches on the ceiling. I also had them spray one inch of foam under the
container. That was the right thing to do since the floor can get quite cold in the winter.
Once the foam insulation dries, it really keeps everything solid and tight. This foam material
basically turns into glue, so now all the framing feels firmly set into place.
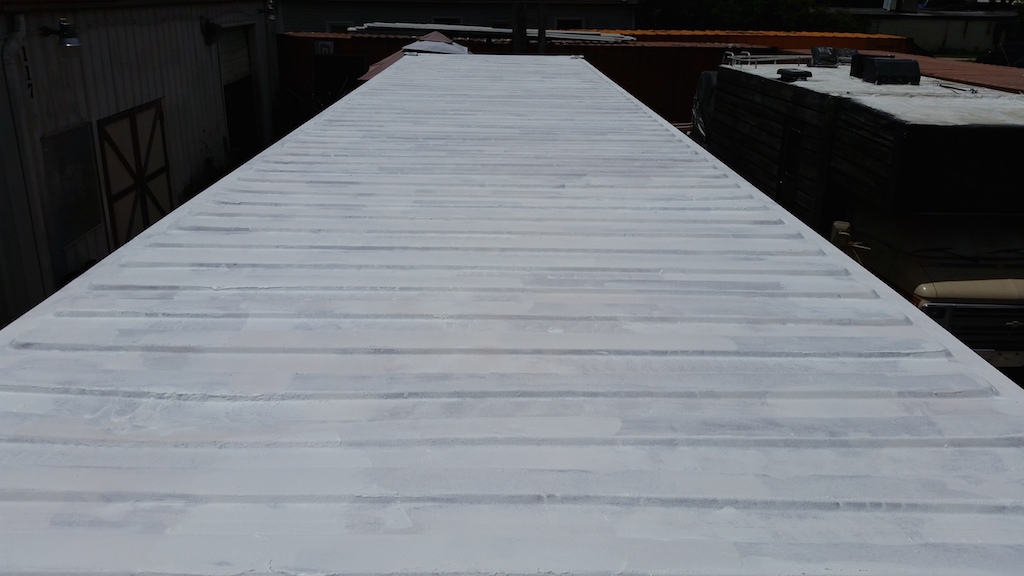
Roof
When I got the container, there were a few depressions on the roof and small pockets of
water would accumulate after the rain. Before the insulation was
sprayed
,
I used a 4”x4”x8’ beam and pushed it against the ceiling with my bottle jack resting on the floor and
pushing the beam upward against the ceiling. I did this under every depression I could see from inside, and it worked
really well. Using this technique, I was also able to create a slight upward shape to the roof which helps
drain
water away.
The roof of a shipping container is not that solid. By simply walking on it, you can feel the
metal buckle under your feet
, s
o you have to be careful not to create dents.
What I found out after applying spray foam insulation on the ceiling, is the roof feels very solid now. That foam material is
pretty awesome. The foam cost more than other types of insulation, but it is well worth it
since
it
becomes
much more than simply insulation.
The solidified foam also procures some structural element to the wall framing and roof.
Before delivery, Rick applied a thick layer (3 coats) of reflective paint. The paint used
is a type of protective marine coating. That stuff is thick and
is
be
perfect for the job.
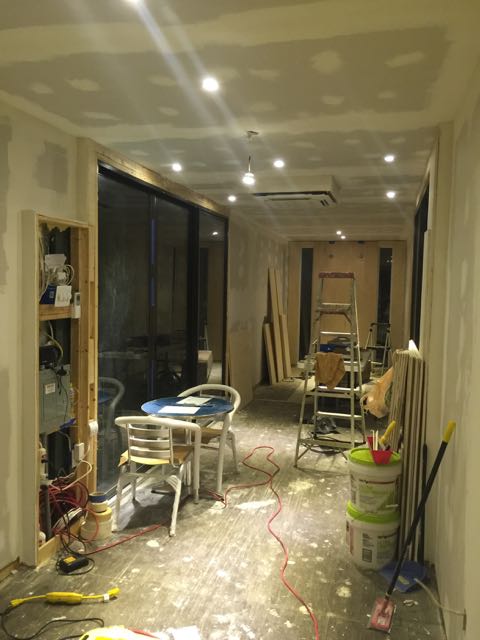
Drywall
Next came the drywall and the mud. Even after watching hours of youtube videos to learn how
to apply mud and make smooth walls, the result is far from perfect. I think no matter how many hours you watch, it still takes
a lot of practice to be decent at it,
there is no way around that.
T
he walls are not
perfect
, but I am
satisfied with the final appearance, it’s certainly good enough.
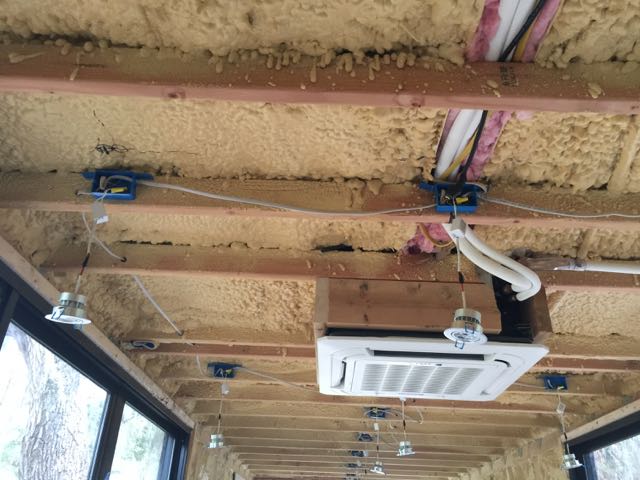
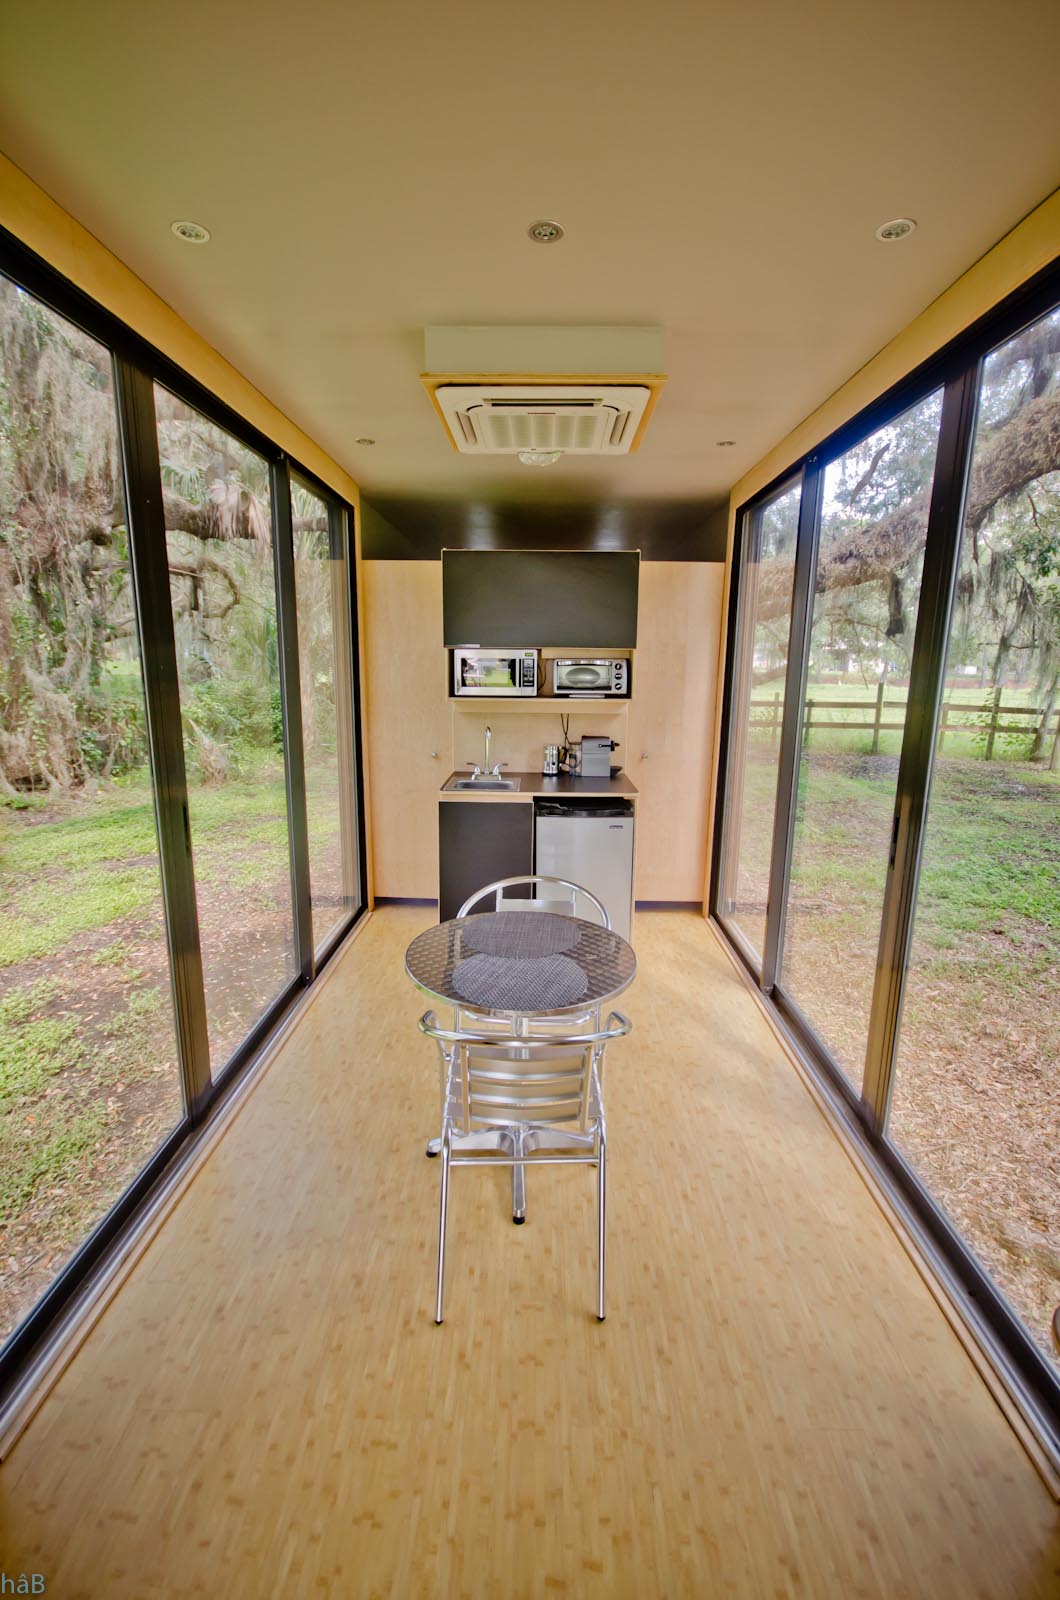
Climate control system
The climate system is an HVAC mini-split thermo pump made by Pioneer and capable of
producing 18,000 BTU of cooling. The indoor unit consists of an 8-way ceiling cassette. I wanted something located in the
middle of the container that could blow air in every direction. Having 18,000 BTU is barely adequate on a hot Florida
summer day. When the Sun is pounding on the container walls all day, the cooling unit works constantly.
I do not recommend a smaller unit, a couple more thousand BTUs would be better.
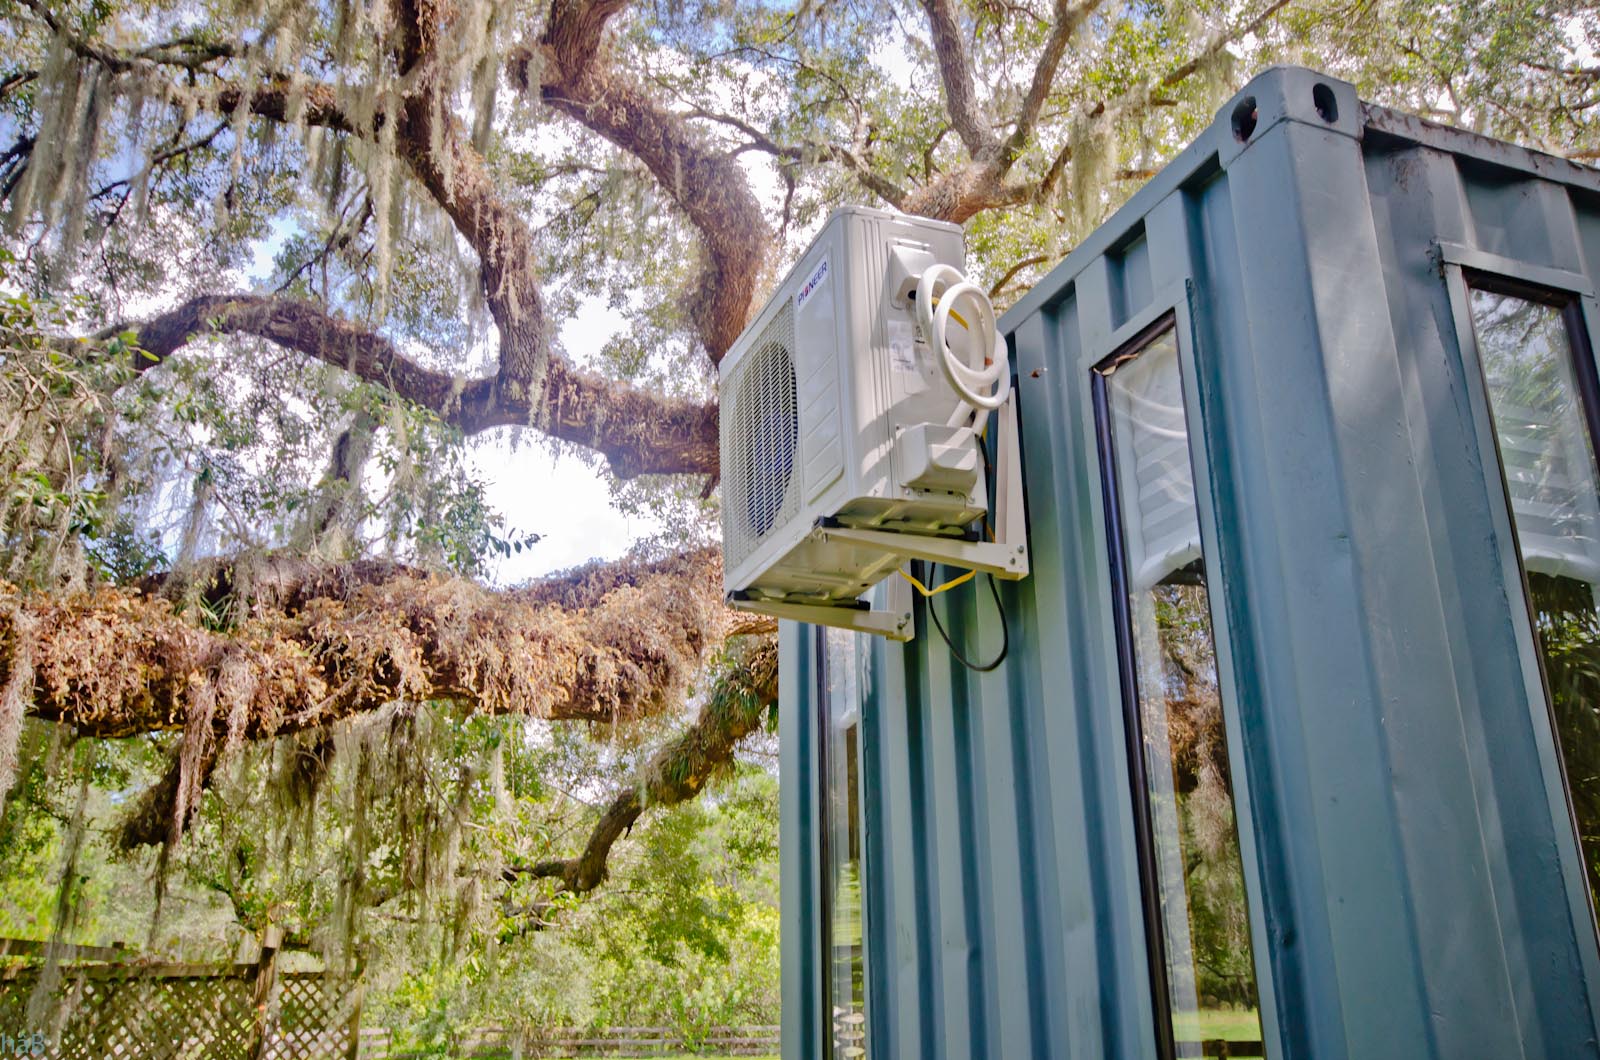
The indoor unit connects to the outdoor unit via a conduit running along the ceiling w
hich
exists
through
the back wall of the container. I was told to never d
rill
a hole in the roof of a shipping container, and I am glad I followed this advice.
The outdoor unit is bolted on the outside back wall. Four large bolts go all the way through the wall
and inside the bedroom. I added large rubber spacers on each end due to concerns with vibration and noise. When the unit is in cooling
mode, the vibration and noise is minimal. When in heating mode, it does make more noise but not too much. I am satisfied with this setup.
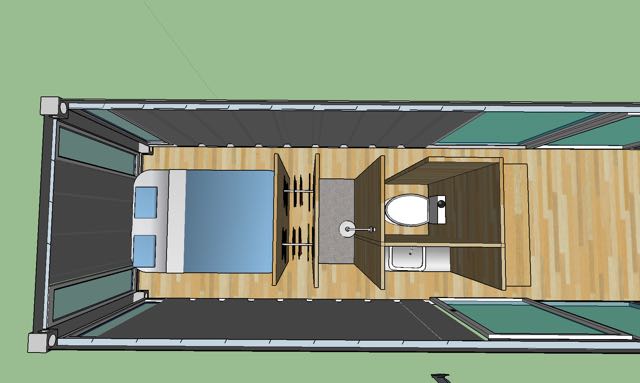
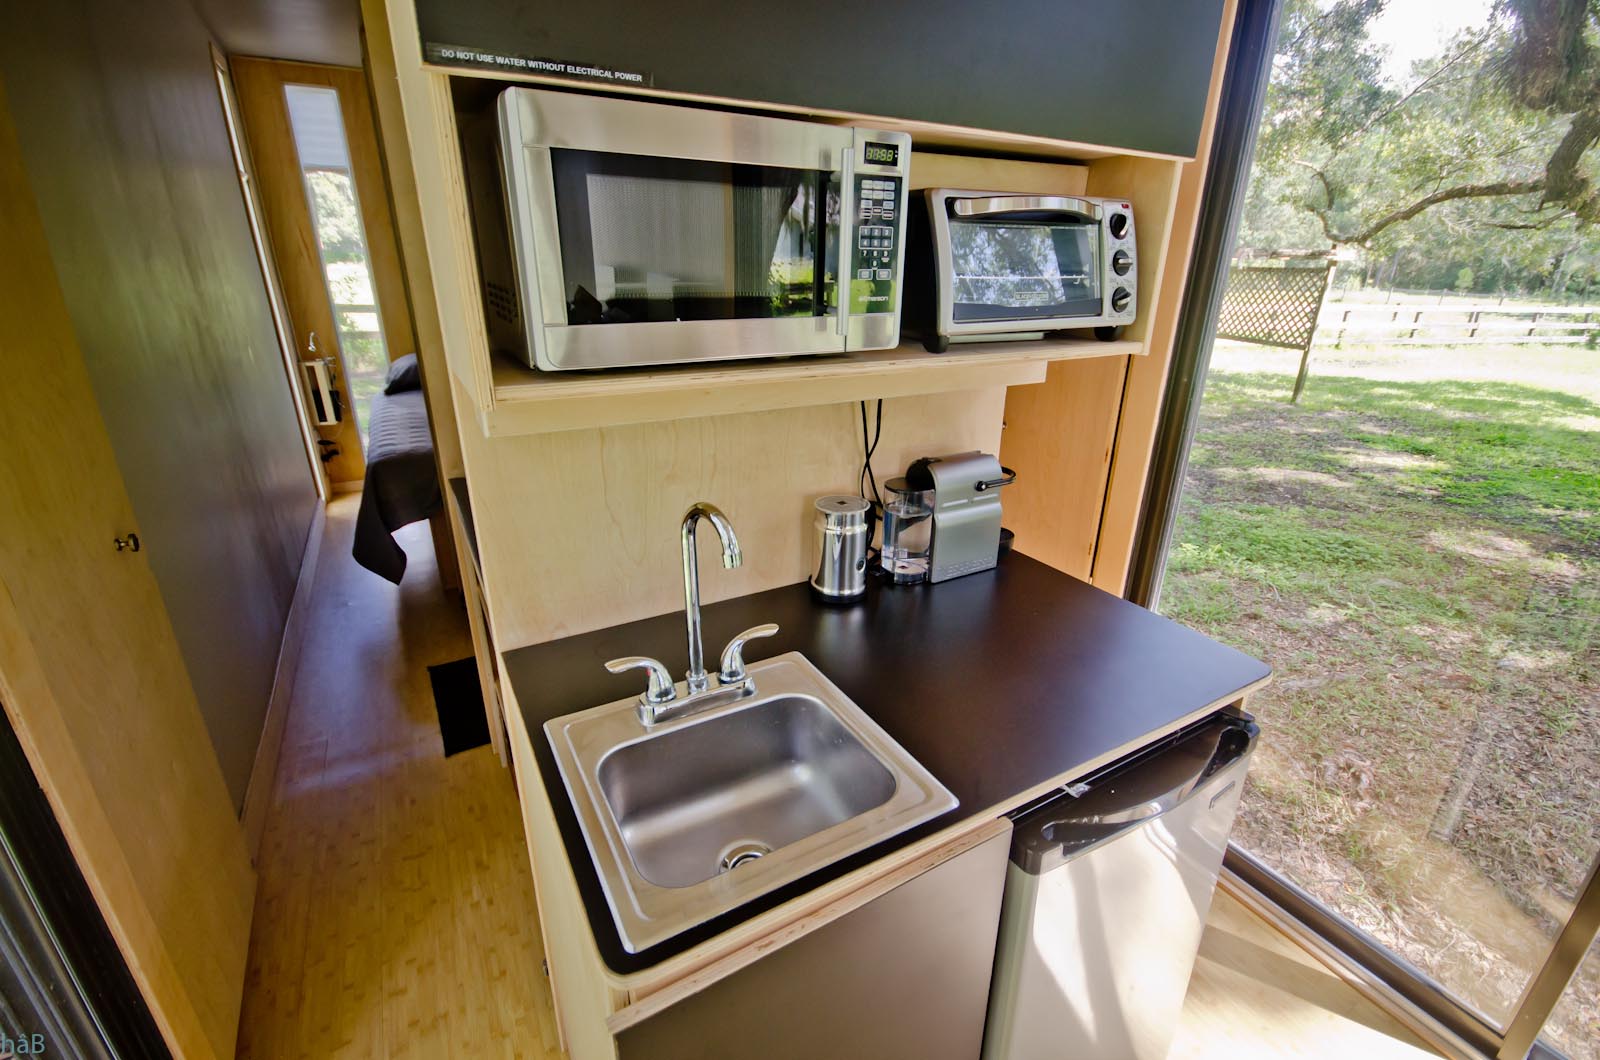
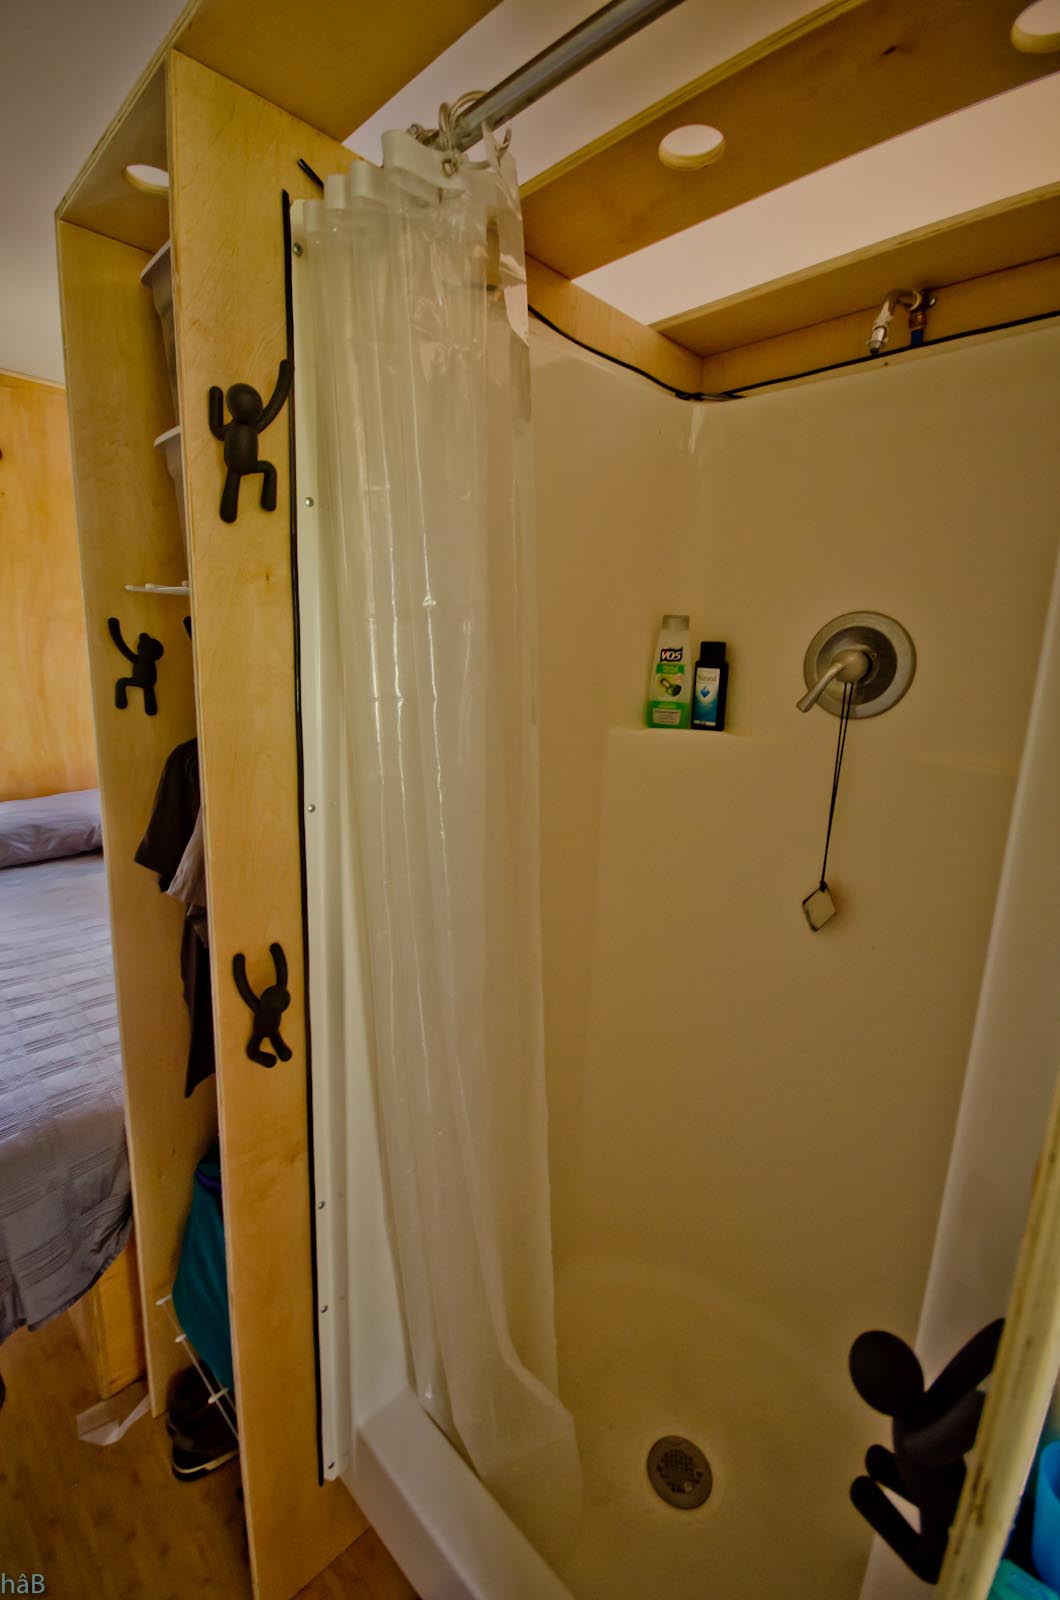
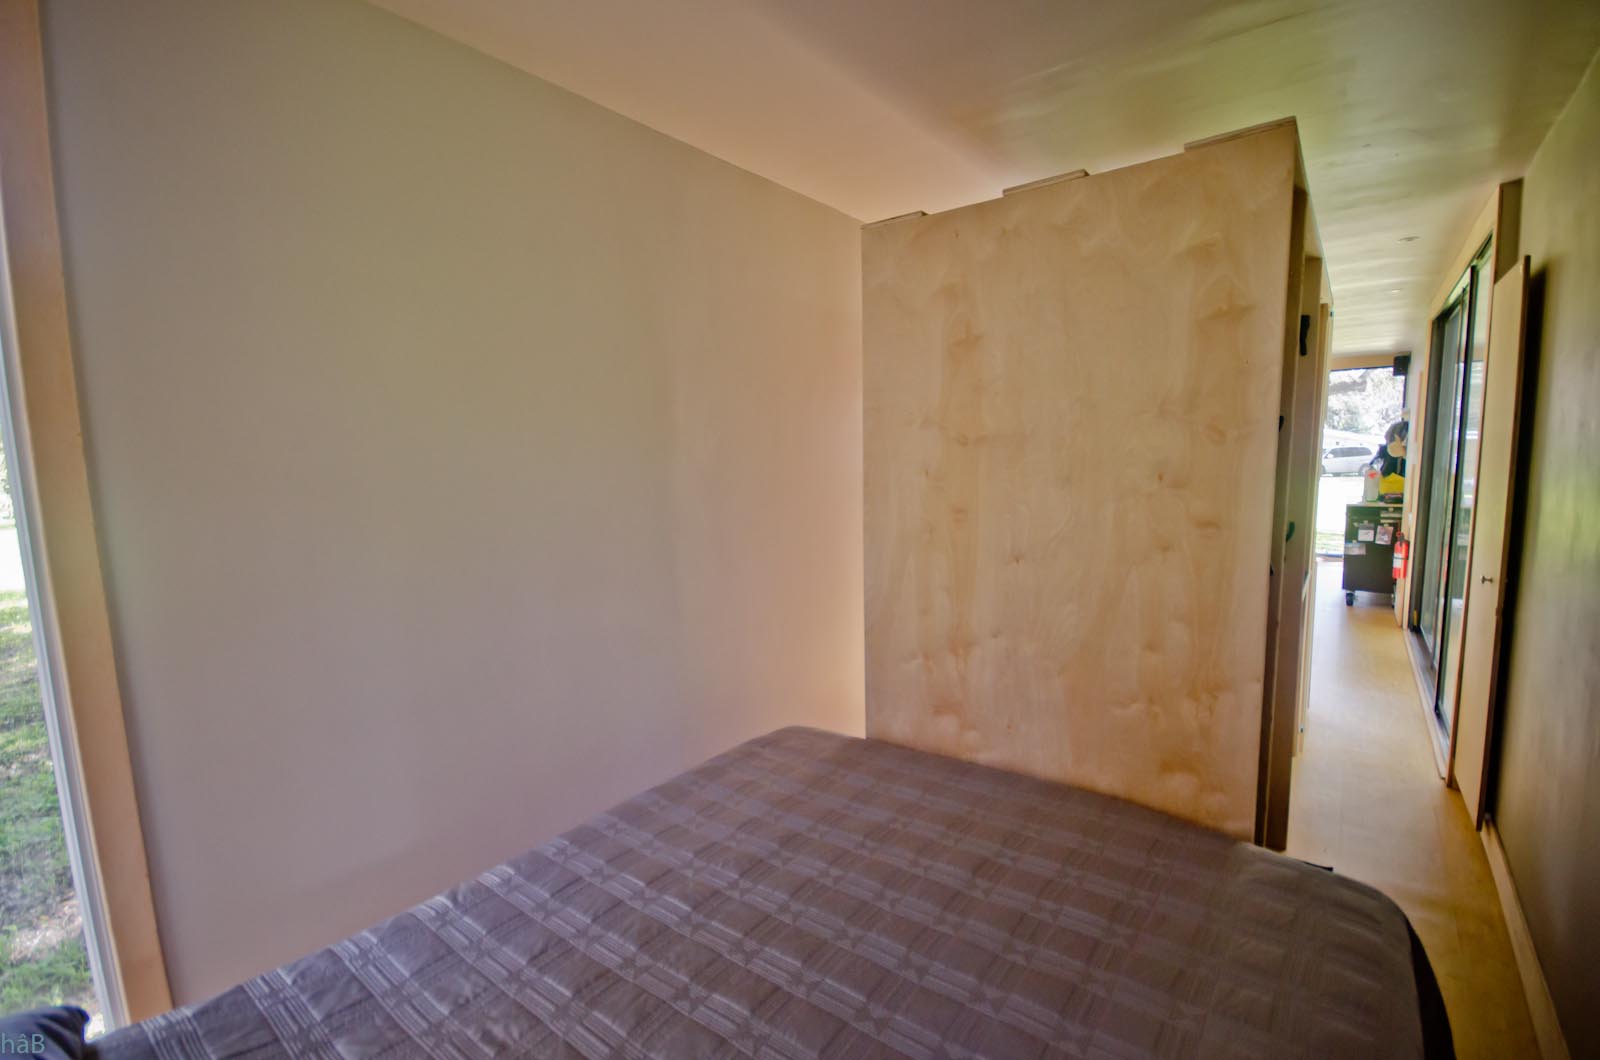
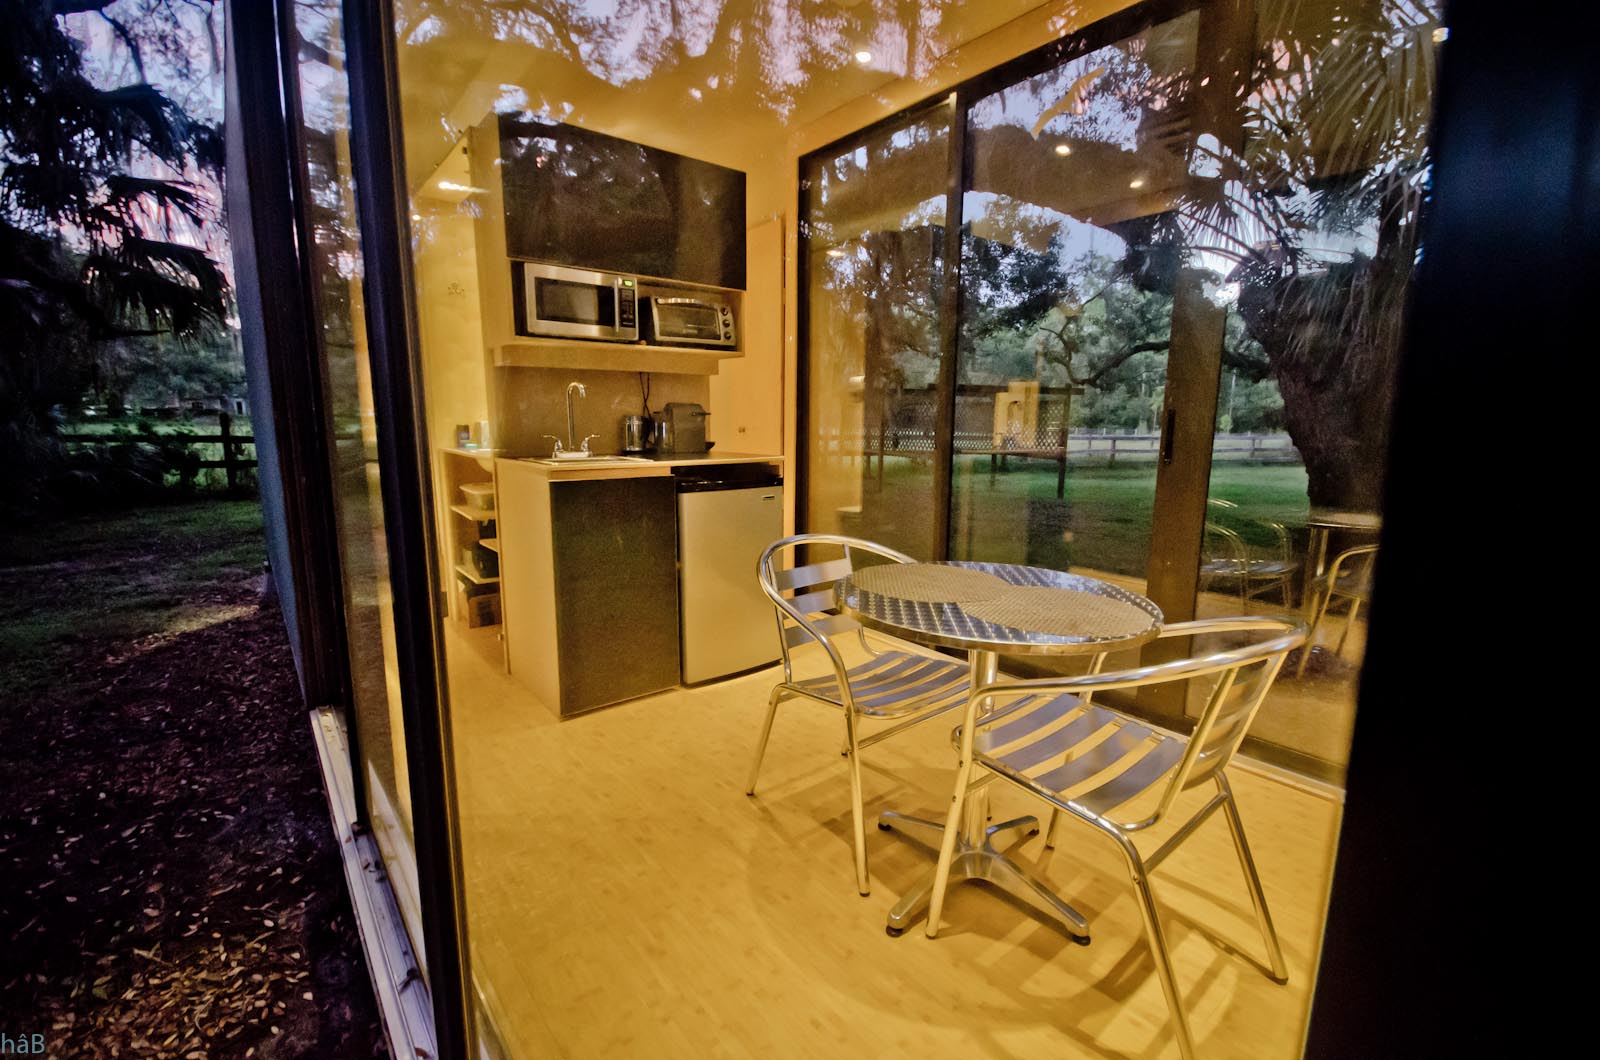
Service block
This is an 8 feet long by 7 feet high and 40 inches wide module which stands in the middle of
the container and therefore is not touching any walls or the ceiling. The service block receives power and water from the floor
of
the container, through a hole in the one-inch thick marine grade plywood floor.
The service block contains a mini kitchen, toilet, shower, hot water heater, small vanity with sink,
and two small closets. This makes a very compact and efficient unit accommodating pretty much everything one needs.
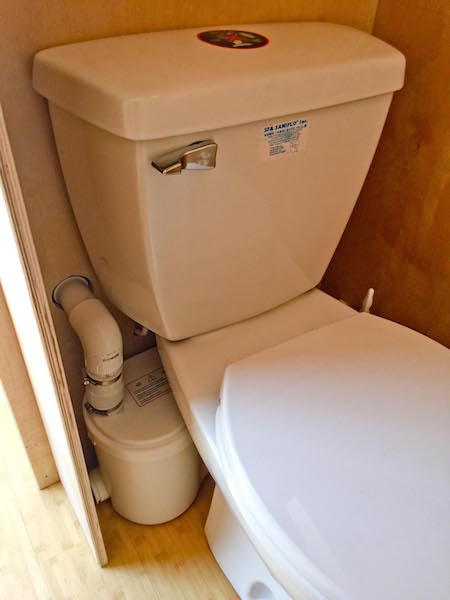
The Toilet Project
After long hours of intense discussion with my father-in-law, mostly about venting a toilet, we
opted for a Saniflo Sanibest Pro upflush macerating toilet. I think this is their high end commercial model and also their most
powerful. The manufacturer claims it can shoot up to 25 feet high and 150 feet away through a 3/4 inch pipe. I have no desire to
try this, mine is connected to a septic tank.
The grinder/pump
noise
is
loud, so much that I am sometimes a bit scared when it starts. It sounds like it could be used by
gangsters to get rid of evidence. It does have a very industrial noise to it, which goes in complete harmony with the subtle look
of the shipping container.
All grey water is connected to the small tank behind the toilet, that includes two sinks and
the shower. When this small tank fills up, the macerating pump automatically starts and pushes everything far away to the septic
tank. As for the vent, there is only one, and it goes up a few feet from the toilet tank and then back down through the floor.
This seems to work just fine,
and I never detected any odors from inside or outside.
Finally
Once I got the container shell delivered, it took me 288 hours to complete the project. I know, I
am no carpenter. I had to watch a lot of youtube videos to learn how to do all that stuff.
I did pretty much everything myself with occasional help from my brother, his friends, and the
entire family including
the
kids!
This project was an excellent excuse to get away from looking at a computer all day long. I also
made a total of 57 trips to Home Depot, that comes down to one trip per 5 hours of work… keep in mind I was learning
everything on the fly. After about twenty trips to HD, I granted to myself the right to park in the “pro parking”
spaces. I came to love going to HOOOOOOOME DEEEEPOOOOOOT!
Total cost: $25k + 288 hours of inexperienced labor including mistakes, redos, and various other
life distractions.
2020 Updates
Lessons learned after 4 years of use.
|
- The hâB -
DATA SHEET
|
The hâB - Tomás K Ryan - support@transitionalcontinuum.com
hâB - building a shipping container house